Mechanical Clock
Mechanical Clock


Print Profile(2)


Description
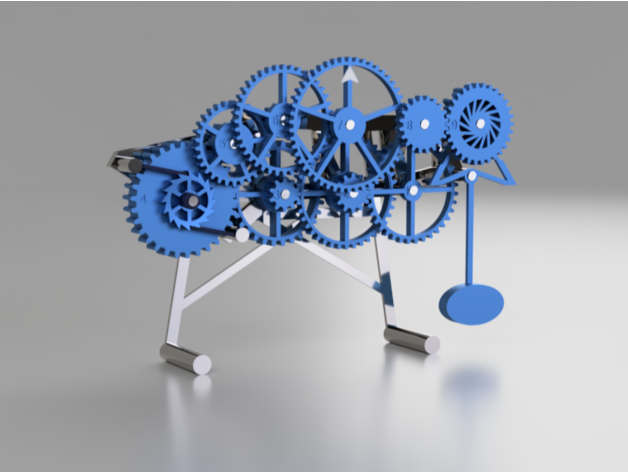
This is my completed project of a fully mechanical, 3D printed clock.
I decided to do an EPQ project, and my aim/title of my project was to make a mechanical clock, which in the course of about 5 months, I went from an idea, to planning and researching, and then designing and printing, as well as prototyping a clock out.
its definitely not the best, I unfortunately didn't do my gear ratios correctly when designing so some gears are out of time, and it only runs for about 5 mins before stopping because of friction (for me), but its a cool concept to show what can be built using a 3D printer, and to show different design techniques, as well as to incorporate unique ways that 3D prints can be used.
EDIT: I'm sooo happy to see loads of people like my design, and even downloading and printing my clock out, id love to see what people have made, its just exiting that people are actually printing my clock out despite it having flaws.
please have fun printing this out and assembling it, and also feel free to make any modifications to this, this is still a work in progress, and I would like to see what other people do to this.
Notes:
Definitely print the frame and palace out with either high infill or high wall count, id recommend 2 walls with 90% infill, so that extra material doesn't expand the print outwards by a bit.
print mainspring out with 3 walls and any percentage of infill (I did 20%), and ill also recommend flipping mainspring around and print with supports, so it has a better finish.
all other parts just print how you want it, I did 2 walls with 20% infill for rest of parts, just be careful that the parts are in the right orientation without any overhangs.
if you can, put some kind of silicone grease on the axels, as well as where the pendulum contacts with the escape wheel.