LED Lid Extension for X1 and P1 Series

LED Lid Extension for X1 and P1 Series

Boost
85
155
58

Print Profile(1)

All
P1S
P1P
X1
X1 Carbon
X1E
A1

0.2mm layer, 3 walls, 15% infill
Designer
10.5 h
1 plate
4.6(40)

Boost
85
155
58
2
608
401
Released

Description

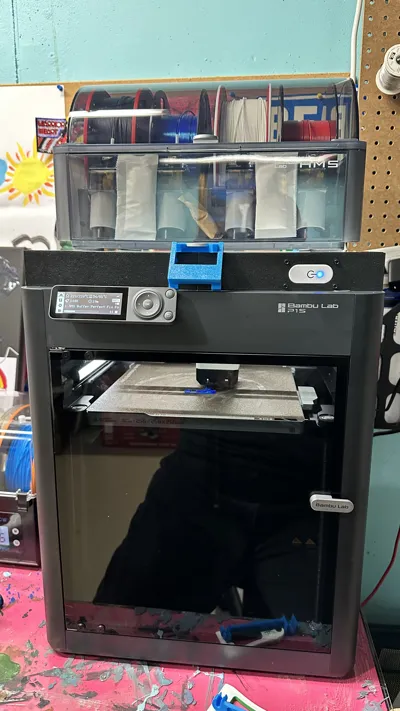
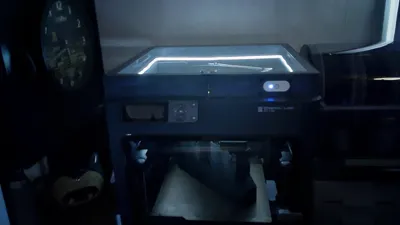
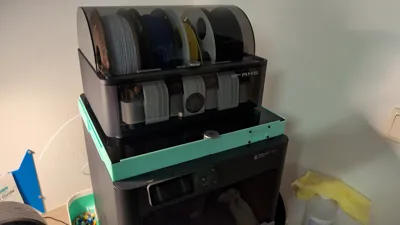
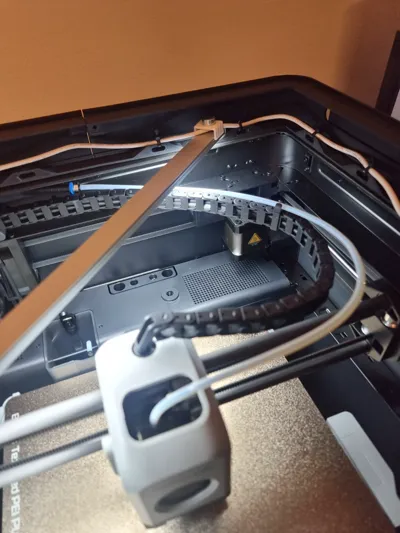
This Lid Extension addresses a few issues; the PTFE tube rubbing on the underside of the lid, the need for a little more light, need to vent heat out of the enclosure when printing with PLA.


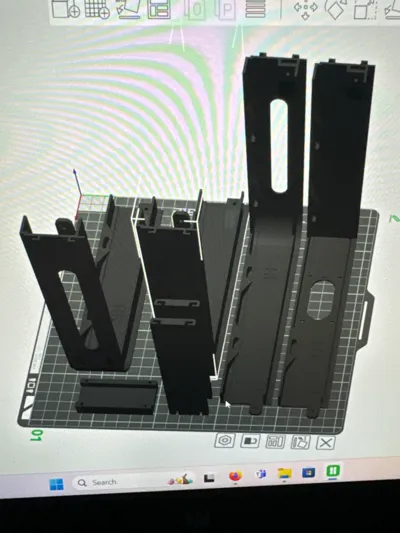
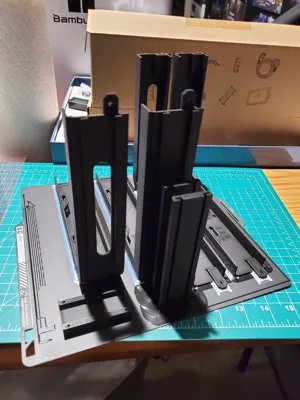
The assembly is simple, just four parts for the frame, a bracket for the LED controller, and two slides.

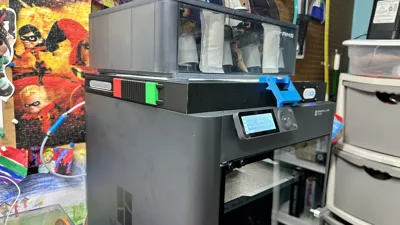
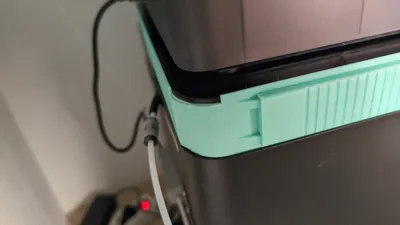
  • The slides are color coated (red and green) to be able to see if the vents are open or closed with a glance.
  • The four parts of the frame are embossed with identifiers (FR, FL, RR, RL).
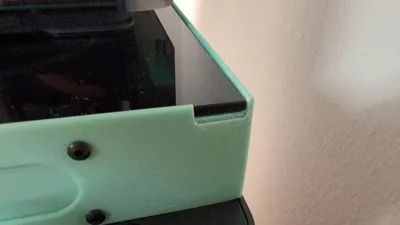
  • I used M3 - 0.5 socket head cap screws to fasten the tabs on the frame and for the LED controller.
  • Weather stripping (½" x 1/16") was used on the top lid cavity. (also used when converting P1P to P1S)
  • I printed the parts using PLA-CF and ASA. I am sure it would print well with PETG also.


All of the parts are listed in the BOM (included) and sources for the LED and weather stripping.


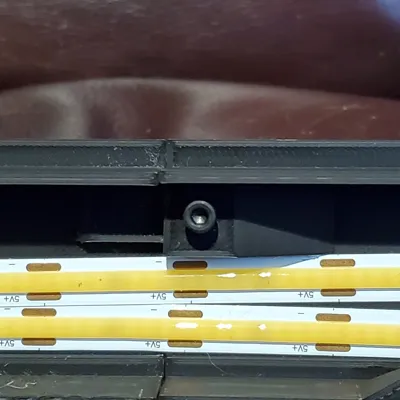
FYI: The LED strip might pull too much power, causing the LED lights to flash on and off. I was able to cut the LED strip down to cover 3 sides of the Lid Extension and have no power problems. I applied the LED lights to the Front, Right, and Rear of the enclosure to reduce any shadows.


Print Profile for the entire project on one plate and Profiles for the individual parts are provided.


COMING SOON

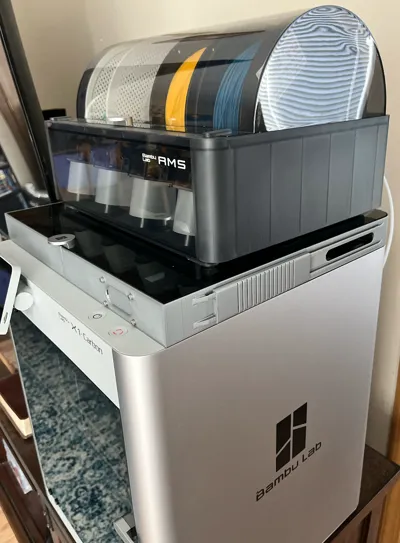
*Watch for another version of the Lid Extension designed more for the X1 series with power cable egress.


For more information, be sure to watch the Youtube video:


Documentation (1)

Bill of Materials (1)
Lid Extension BOM.pdf

Comment & Rating (58)

Please fill in your opinion
(0/5000)

Thanks for the detailed walkthrough. It’s looks great and functions as designed. just needs a bit of refinement on the print but nothing that you can work with with some sanding. Finally the light that was specked out pulls a little bit too much power to run at full brightness. had to dim it down to stop it from flashing.
The designer has replied
0
Reply
I shortened the LED strip. I forget how much I cut off, but I can run it full power.
1
Reply
Replying to @V3Precision :
I'll have to try trimming it down next time I'm in there.
0
Reply
Print Profile
0.2mm layer, 3 walls, 15% infill
I skipped the LED lighting part I really just wanted to raise the glass and have the vent system. I ended up reaming the holes a bit bigger because I had M3's laying around. I could of changed some setting and got a better print but I rushed it. Thanks good functional print.
The designer has replied
0
Reply
Awesome. Looks good!👍👍
0
Reply
Print Profile
0.2mm layer, 3 walls, 15% infill
turned out perfect. used silk pla
(Edited)
0
Reply
Print Profile
0.2mm layer, 3 walls, 15% infill
Excellent model. Only negative thing was connection strength, but a little glue goes a long way. I mistakenly printed with Bambu Labs Galaxy PLA (instead of the PETG I had intended). turned out attractive and functional.
0
Reply
I was wondering if we should change the orientation when printing? Right now Bambu slicer shows all 6 pieces on one sheet as so.
0
Reply
Nice model, fits the frame but not the glass. I did an ABS print and it warped. I think there should be an additional print profile for ABS with brim and supports enabled. I cut out some parts to fit the glass lid, it works now but don't look so nice.
0
Reply
Made it today. Only made it with pla so it's pretty flimsy but might do again in petg. I have rigged up a light bar I had laying around and cable tied the wire around the frame of the riser and also got the controle switch in place. Really like this design 👌
0
Reply
Very simple but functional design. Have couple of questions though. Will those 2 side vents be enough for long PLA prints? Also what is the bracket_back.stl good for? Can't seem to figure out where to put it.
The designer has replied
0
Reply
The vents combined with the fans should be enough for PLA. I used to take the lid off or open the door, but with the vents it has been working well. The bracket_bracket.stl holds the controller from the LED strip in place.
1
Reply
Replying to @V3Precision :
Thank you. Will go with your design then and see. That back bracket I won't need then because I will go with Wi-Fi enabled LED strip that will use external power source. That reminds me I need to make a hole on the back. Will post it here when I'm done with it.
0
Reply
Thanks for the model. It's very precise and has tight dimensions and tolerances. Since I'm new to printing on the X1C, I'm still learning what makes things more likely to succeed. I printed on the X1 Carbon with everything on 1 plate using 0.08mm Extra Fine @BBL X1C profile. Took about 20 hours to print. I used 4x M2-16mm Hex head screws with washer/nut to attach the part that holds the power button. (There are a bunch of assortment boxes on Amazon for ~$20.) The couple questions that I have. The RR and RL pieces have radiused corners. What did you do to make those corners look good? Initially I printed using the 0.20mm layer height and the radius is too drastic for the slice which made them look awful. At 0.08mm layer height they look decent, but the first 10 or so layers look kind of rough still. Did you add more supports to this area than what the defaults do? I just found the variable layer height, but the lowest it goes is 0.08mm. So, what I printed is the best the slicer will do, right? The X1 doesn't have a USB port behind the panel. So, I plan on using a USB extension cable to plug directly into a converter/outlet. It would be awesome if there was a modified version that had a hole big enough for a USB cable to fit through so it can get out the backside of the printer. I plan to drill a hole in the print probably where RR and RL join each other. The only other modification I would want is to have all 4 corners as their own parts that can be printed in the orientation they'd sit on the printer. That way, the curved corners would print better. And an option without the vents that would allow all 4 straight sides to be printed flat on the bed with snap off pieces so the tabs can be bridged by the printer rather than needing supports. All of the pieces fit very nicely together. I did have to file down the 2 attachment tabs because of supports not being configured right. I'll have to mess with those settings some more to figure out what works best. The PLA Support material is really nice and detaches easy enough from the print, but I need to use a different pattern so things print smoother. Thanks again for the model. It's really awesome as is and I hope you don't mind my thoughts, experience, and suggestions.
The designer has replied
0
Reply
Thanks for the feedback and stay tuned. I am making another model specifically for the X1C. I am going to separate the corners for better printability and have a port or other access for power. I am looking into tapping into the power going to the AMS. It is probably 12V or 24V so I will find the appropriate LED strip. Just working out a couple of design issues, but it shouldn't be long!
0
Reply
Replying to @V3Precision :
I'm looking forward to the next versions! And, really, the 0.08mm height isn't bad. Here are some pics of my print. All I wanted was better light inside and this definitely checked that box. :)
0
Reply
Hello, Thank you for the information and plans for the build. It worked out just perfect. I have a question around the LED lighting? I bought the one from the link and installed the system and it works great; but after a few seconds the LED starts to blink off and on, and was hoping you might have seen this before? Thank you, Wess
0
Reply
It is probably because you are using too much power. Try Trimming off a bunch of leds that you can do without to lower the amount of current it uses.
0
Reply