Vibration Damping For Any 3D Printer and speakers
Vibration Damping For Any 3D Printer and speakers


Print Profile(2)
Description
A very long Introduction …
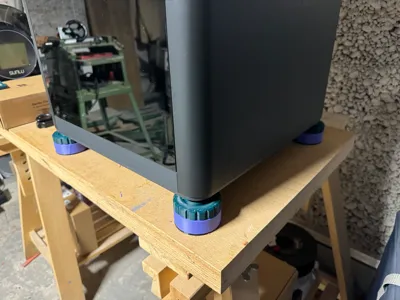
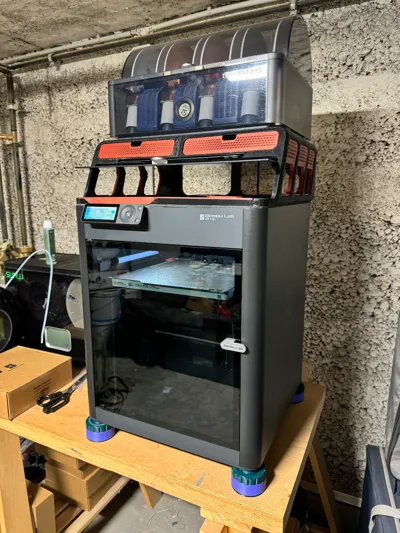
I present to you my suggestion for vibration damping for any 3D printer.
There are many systems that try, and indeed reduce vibrations, but not all systems are efficient, or even applicable to all contexts.
Many of the structures available are fine for light printers (approximately 5kg), but in the case of larger printers, something more robust is needed, more capable of withstanding all the inertial and static loads generated when the printer is operating. The simple springs, with more or less intricate geometries, cease to be efficient at a certain limit. Take the case of the X1C of the bambulab, with the loaded AMS can weight around 20kg, which gives 5 kg for each foot considering the machine at rest, although it is not considered heavy, the simple spring-type systems may not be the most efficient.
The movement is not absorbed by magical arts, it will be dissipated in some way (heat transfer, and other types of vibration as is the case of sound waves), if it is not dissipated on a certain moment, it will be propagated along the structure that supports the machine until can find a way to dissipate.
Polymers, as an example, TPU and TPE can be 60 and 90 on the scale of hardness Shore A. Ninety A is too hard, below 85A will be better, as is the case of the Ninjaflex filament, but for this type of situation, it also does not seem enough.
My sugestion
There are materials with a much lower Shore A index, for example Silicone and others, (silicone starts at 10). But, available silicone is readily available. The one that is applied on glass and kitchens has it shore A scale is between 45 and 50, far below any TPU-TPE.
Besides being something easily available is cheap. I thought it was a viable alternative to other damping systems.
Expected effects
The system was designed to support the vertical load, relative to the weight of the set, but also and above all, to absorb the lateral loads.
Proof of concept.
Interesting questions for 3d Printers:
- Is the lateral resistance to week, for printer loads?
- Is the resistance in general to week, with the printer oscillates to much?
- This is not ok, the swing effect can be dangerous, although the limit is approx. +/-3mm
- Silicon degradation and subsequent breakage.
If any of this happens the silicone may not be a good solution, the problem is that there is a LOT of this Polydimethylsiloxane (silicone) elastomers types out there…
Warnings and considerations
So, I present my solution, it is simple and ready for you to try. Before you take any tests, I want it to be clear that I am not responsible for any kind of damage that this experience may cause.
So that there are no doubts, this does not try to reduce the noise, but the vibrations and therefore some of the noise should disappear.
I remember that the Silicone although it seems dry after a few minutes, is not cured, this process can take days, depending on the ambient conditions, large volumes of silicone take longer to cure.
Assembling
First and foremost, do not focus on the printer being given as an example, this is applicable to any printer, you just have to change the part of the contact zone.

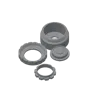
- Print the Parts;
- The dark part “Stoper” should be TPU and printed with a 100% infill. Other parts, PLA or PETG (infill of 40% or more).
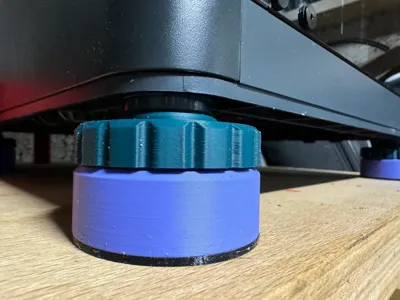
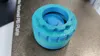
- Mount according to the orientation of the image;
- The red part is only a centralizer, being later discarded, so it is only necessary to print one unit.
- Assemble the parts except for the "stoper" in TPU;
- Get an old cloth to put the parts down, and place it on a flat area.
- It is better to put gloves, silicone is very sticky and hard to remove. Watch your clothes…
- Fill with silicone through the filling gate, let stand 1 or 2 minutes and if necessary, add more silicone.
- Put the “Stoper”;
- Leave to stand about 24 hours (or more) in that position.
- Rotate the foot upwards, to the position in which it will be applied to the feet of the machine after (after about 24 hours or more, it really depends on ambiental factors).
- Remove the “centering ring”.
- make another one.
- last and worst part, expecting silicone to cure (in can go to several days). Cure is not the same has dry…
A word to the community
In theory this has all it takes to work out well, but it would be interesting if someone could do a comparative study of this system with others solutions.
Thanks
I would like to thank: Retless, drevilporkchops and Reckit for their contribution on this project, and all the other that one way or the other helped on with this.
Change log
(29-08-2023) - enlarged the filling gate hole. drevilporkchops reported that can be easier to tape the the filling gate hole and fill with silicon from the top-down.
Support the designer:
This design is free for the benefit of the community, but If you like my designs and want to contribute, you can make a donation to buymeacoffee or paypal, or even better, join “My Club” here in printables.com, that will be greatly appreciated.
Comment & Rating (22)