A320 RMP and ACP panels

A320 RMP and ACP panels 3D print model

Description

+++ SPECIAL OFFER +++

TWO PANELS AT A REDUCED PRICE!

A320 RMP & ACP panels.

NO PCB NEEDED!

Now you can have both models at an even more affordable price. The state of the art RMP and its ACP.

Both panels do not need any PCB as they have the unique Button Base panel for easily insert and attach buttons, switches, rotary, potentiometers and encoders.

It can be connected to my MCDU https://www.cgtrader.com/3d-print-models/games-toys/game-accessories/a320-mcdu-736b7fc7-79b0-4dd7-806f-baf829f81730

It is possible to print only the boards and screw them to a pedestal board. Includes nuts for screws compatible with AIRBUS models.

Dimensions of RMP panel:

  • 148/88 mm
  • Height: 40 mm (or 6 mm for pedestal installation option)

Part list:

  • 2 x 0.36 inch 6-digit LED Display Tube (decimal) 7 Segments (TM1637 preferred)
  • 13 x Mini Push Button Switch DIP Tact Switch 6X6X4.3mm
  • 2 x Rotary Potentiometers
  • 1 x Mini Toggle ON OFF (or ON ON) Switch
  • 4 x M3X20 Round screws
  • 4 x M4X16 Round screws

Can be purchased separately here: https://www.cgtrader.com/3d-print-models/games-toys/game-accessories/a320-rmp-control-panel

Dimensions of ACP panel:

  • 148/88 mm
  • Height: 40 mm (or 6 mm for pedestal installation option)

Part list:

Option 1:

  • 15 x Guitar Push Pull Potentiometers A250K (or similar) 18mm
  • 10 x Mini Push Button Switch DIP Tact Switch 6X6X4.3mm
  • 1 x Mini Toggle ON OFF (or ON ON) Switch (Flat Handle preferred)
  • 4 x M3X20 Round screws
  • 4 x M4X16 Round screws

Option 2:

  • 15 x Mini Push Button Switch 6 pin push with self lock 8.5x8.5x14.6mm
  • 15 x Rotary Potentiometers 15mm
  • 10 x Mini Push Button Switch DIP Tact Switch 6X6X4.3mm
  • 1 x Mini Toggle ON OFF (or ON ON) Switch (Flat Handle preferred)
  • 4 x M3X20 Round screws
  • 4 x M4X16 Round screws

Can be purchased separately here: https://www.cgtrader.com/3d-print-models/games-toys/game-accessories/a320-acp-control-panel

3D PRINTING SETTINGS

Better be done with dual extruder 3D printer.

H
hiwatari19951111 2024-05-16 07:56:36 UTC
Thanks for your generosity! So, there are some issues that I have encountered. 
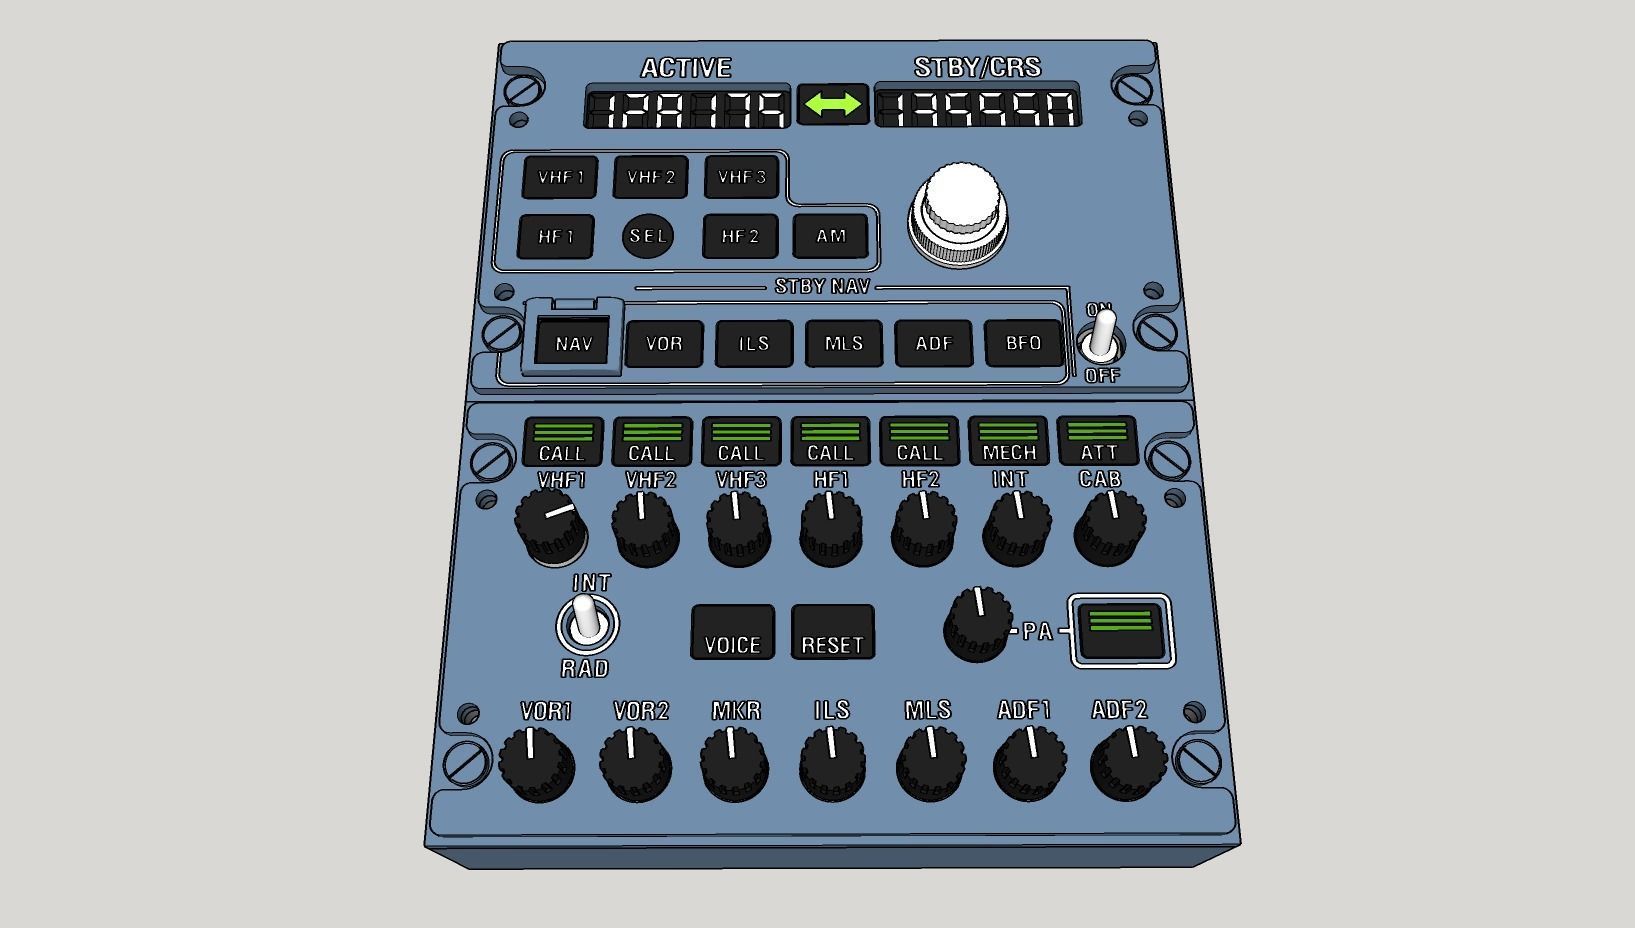
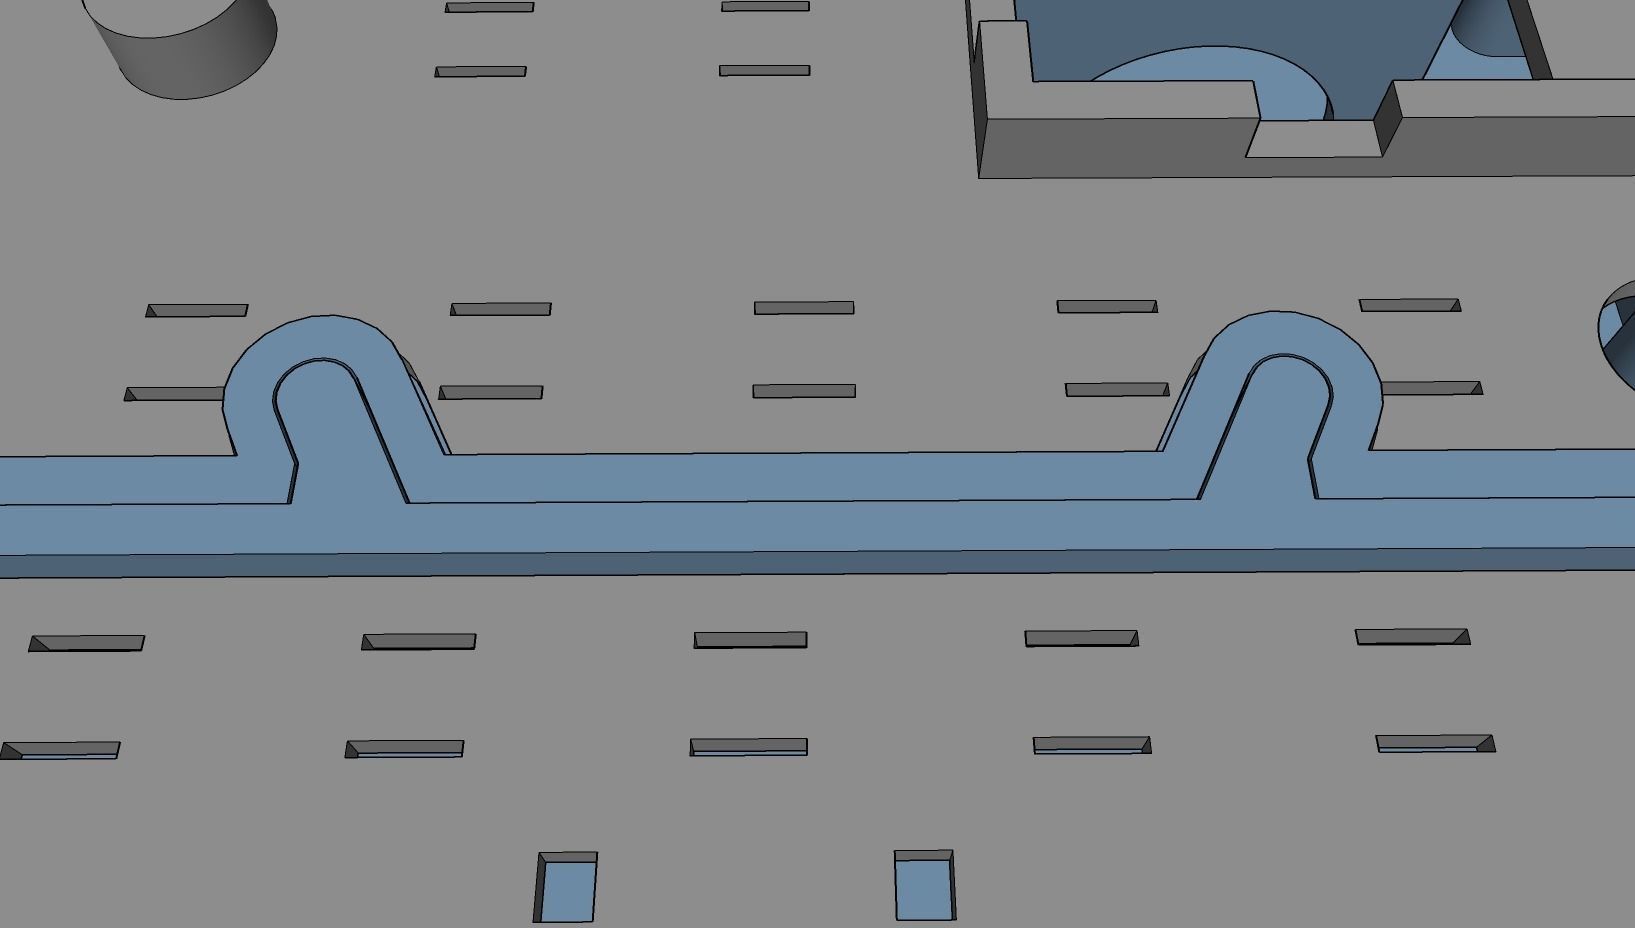
Firstly, the manual mentioned that the panel of TM1637 may have to be desoldered from the PCB if the PCB can not fit in the slot. The thing is if I desolder the panel and put it into the dedicated space, I will have to solder the panel and the PCB to make a connection by the wire or something again, is that correct? Secondly, is there any advice on how I can connect the tack switch and on/off switch to Mega2560? The only way I can think of is also soldering the wire to connect them. Thirdly, I am thinking of using the rotary encoder rather than the rotary potentiometer as I want to feel the “click” feeling when I rotate the frequency knob. But I am not sure how long the half-moon-shaped handle on the encoder should be. Do you recommend 15mm or 20mm? I am sorry that I have so many dumb questions to ask. I am totally a nooby for such a high-quality DIY. Thank you in advance for the reply!
R
RanPetel 2024-05-16 09:01:07 UTC
Hi hiwatari19951111. Your questions are really excellent and can definitely help other people. 1) As for your first question, YES. You have to solder the 7 segment to its PCB again by wires. 2) As for your second question, YES. You have to solder wires to the Tactile Switches in order to have them attached to the "Button_Base" panel and by that be able to connect to the Arduino. 3) As for the third question, the only way to use the frquency knobs is by Rotary Encoders. Use the EC11 7 Pins 15mm shaft height rotary encoders (by that shaft hight the "half-moon shaped handle on the encoder" will be 10mm high). Hope I helped :)
H
hiwatari19951111 2024-05-14 11:15:37 UTC
Hi! I am interested in it. But may I ask how do I connect to the PC without any PCB such as mega2560? I would like to know before I buy this data.
R
RanPetel 2024-05-15 06:19:20 UTC
Hi there. You will need an Arduino to comunicate with the simulator. The no need for PCB is only for the connetion of the electronic devices to the panel as it has its uniqe "Button_Base" panel for easily insert and attach buttons, switches, rotary, potentiometers and encoders. For comunication with the simulator you should better use MobiFlight https://www.mobiflight.com or SimVim https://simvim.com services.
H
hiwatari19951111 2024-05-15 16:58:59 UTC
Thanks for the reply! I've bought the 3D model, and I have some questions regarding the technical issue. Do you mind if I ask here? Or may I have your email address to contact you as it may be a confidential question?
R
RanPetel 2024-05-15 17:09:53 UTC
Feel free to ask any question as it might be beneficial for others as well.
Item rating
0 0
A320 RMP and ACP panels
$20.00
 
Royalty Free License 
A320 RMP and ACP panels
$20.00
 
Royalty Free License 
Response 100% in 21.1h

3D Model formats

Format limitations
  • Stereolithography (.stl) (3 files)10.5 MB
  • PDF (.pdf) (2 files)10.1 MB
  • DXF (.dxf) (2 files)10.1 MB

3D Model details

  • Publish date2023-03-14
  • Model ID#4362298
  • Ready for 3D Printing
Help
Chat