QuickFix - The Phone Mount


QuickFix - The Phone Mount
Published 2021-02-22T10:35:44+00:00
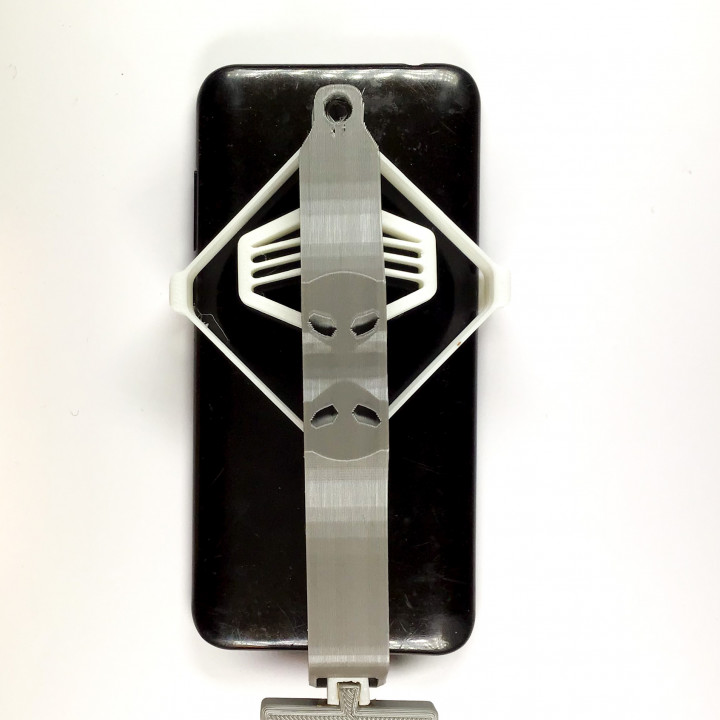
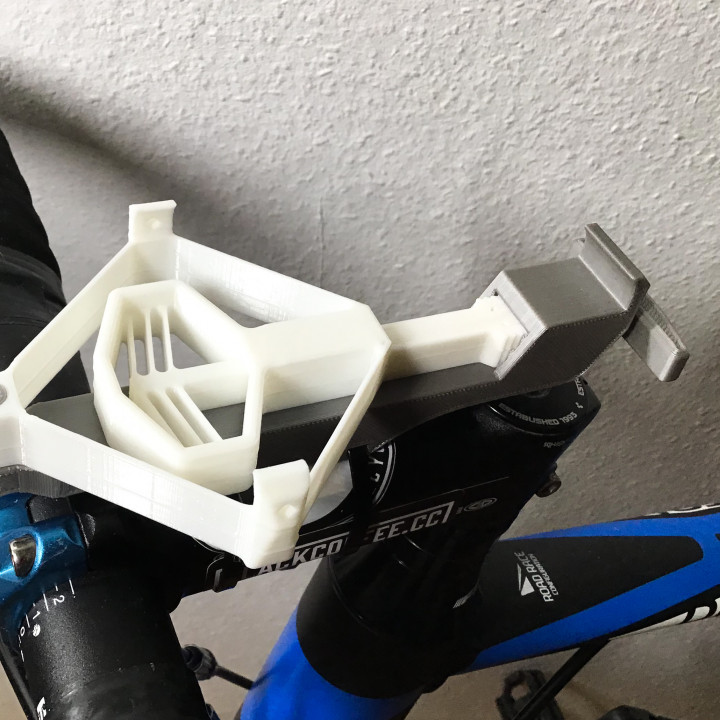
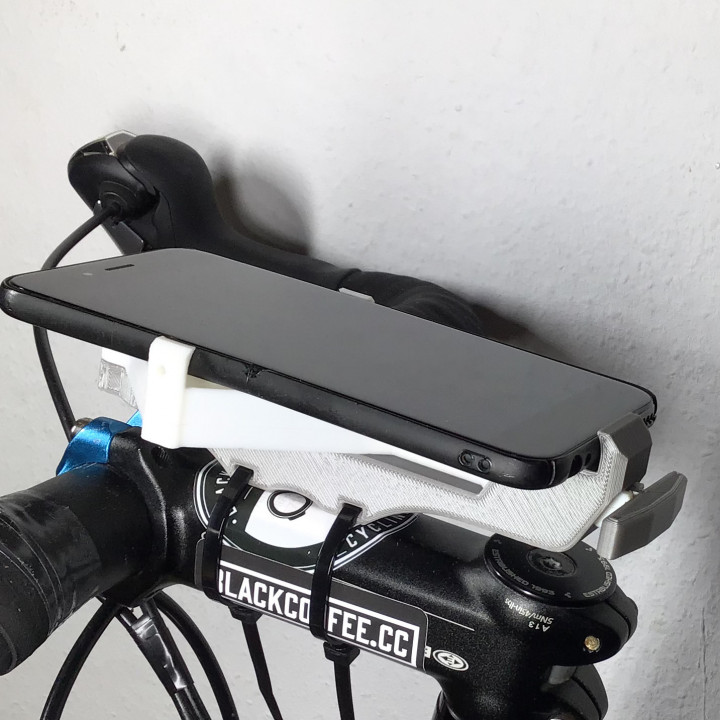
Are you looking for a universal phone mount for your bike?
You then are in the right place here!
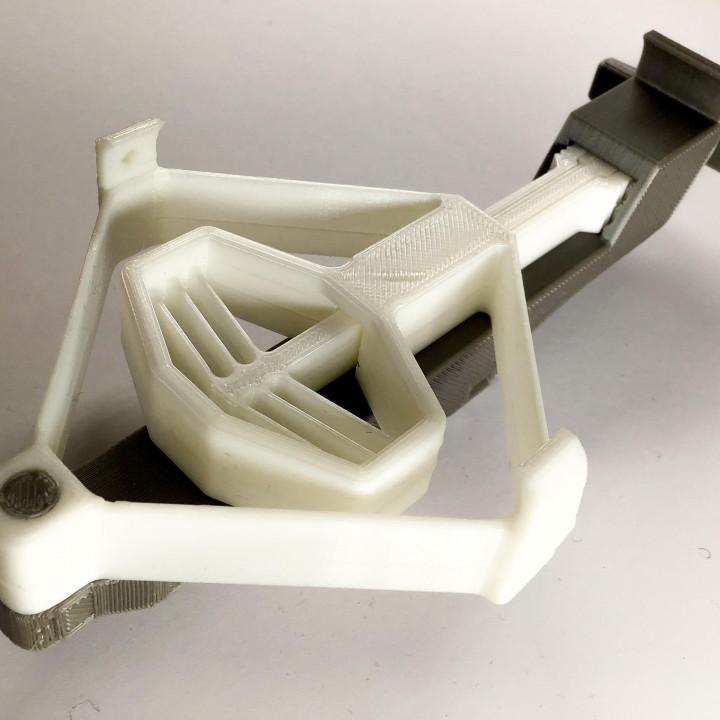
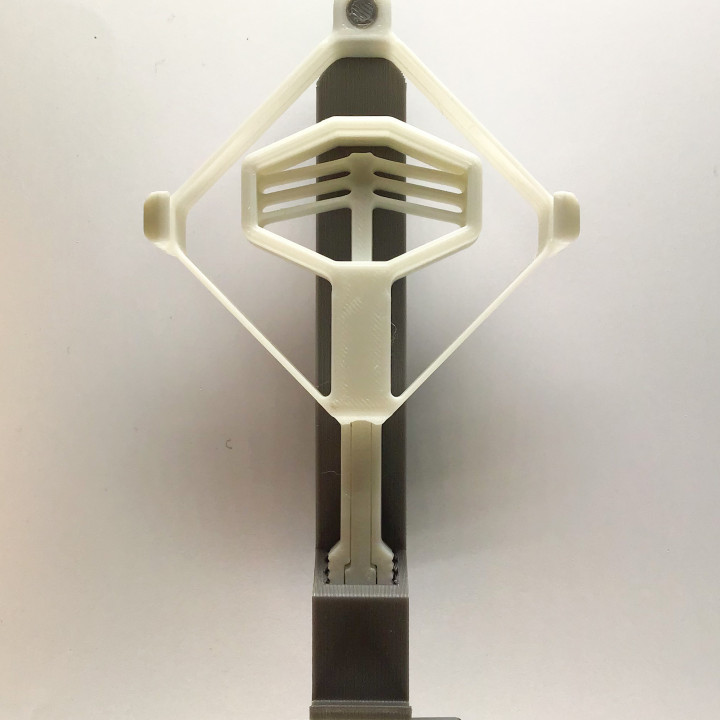
This phone mount can clamp any size of phone (within the range of 60 to 80 mm width) with just one simple pull at the bottom knob. This is achieved by using a bistable mechanism as the 'brain' of the mount. It activates the latching mechanism at the perfect clamping force. The parallelogram in the meantime is elastic enough to cling to any phone size.
Make sure to check our printing adice down below!
WE TAKE NO RESPONSIBILITIES FOR ANY DAMAGES TO YOU SMARTPHONE!
----------------------------------------------------------------------
This model has been developed by Ahmed Abdalla, Marcin Ciesielski, Dominik Herczynski, Joshua Carl Korhammer, Tom Fritz Thurley and Maximilian Georg Schmahl. It was part of the course ‘3D-Druck in der Mechanik’ at ‚Stabilität und Versagen funktionsoptimierter Strukturen‘, TU Berlin. Many thanks go to Andre Sebastian Klunker for his guidance and patience with this project.


The kit consists out of four parts. The parts should be printed with two different settings shown below. We printed everything in PLA. If you try some other material, please let us know how well it works.
Print setting 1
Parts: main.stl, dowel.stl
Infill: 100%
Support structures: NO (not needed)
The main structure should be printed with 100% infill. Otherwise the loss of rigidity might cause the mechanism to not work properly. You can as well raise the wall count for even better performance.
The dowel pin tightly connects the first two parts. A high infill-density therefore is indispensable for stability. If the tolerance doesn’t work for your printer, consider scaling it up or down in your slicer. If your slicer allows it disable ‘uniform scaling’ and adjust just the X- and Y-scale. The height then remains the same.
Print setting 2
Parts: base.stl, knob.stl
Infill: 20-40%
Support structures: YES
(overhang angle >45° depending on your part cooling)
There are two wedges aligned inside the tunnel of the base that help to remove the support structures. Just grab them with a plier and pull them out of there. Then clean and remove the remaining support carefully without damaging the teeth.
| Date published | 22/02/2021 |