E-Vise V2


E-Vise V2
Published 2020-05-19T11:27:57+00:00
Listen here ye lil shits! Ya got slippery ass butter fingers? Can't keep ahold of the Holy Grail to save your life? Did you commit the ultimate father-son sin, by dropping the flashlight whist your father works on the engine, destroying that special bond and trust for eternity???
Well we can't fix the fuck up you've become, but we CAN help ya hold your johnson in place while you take a piss... or just make make it easier to work on PCBs at your desk... whichever comes first.
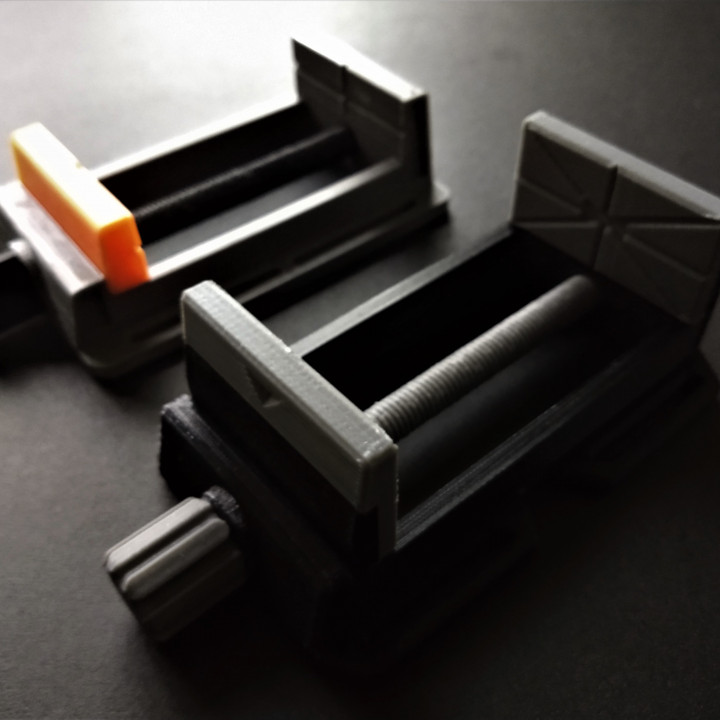
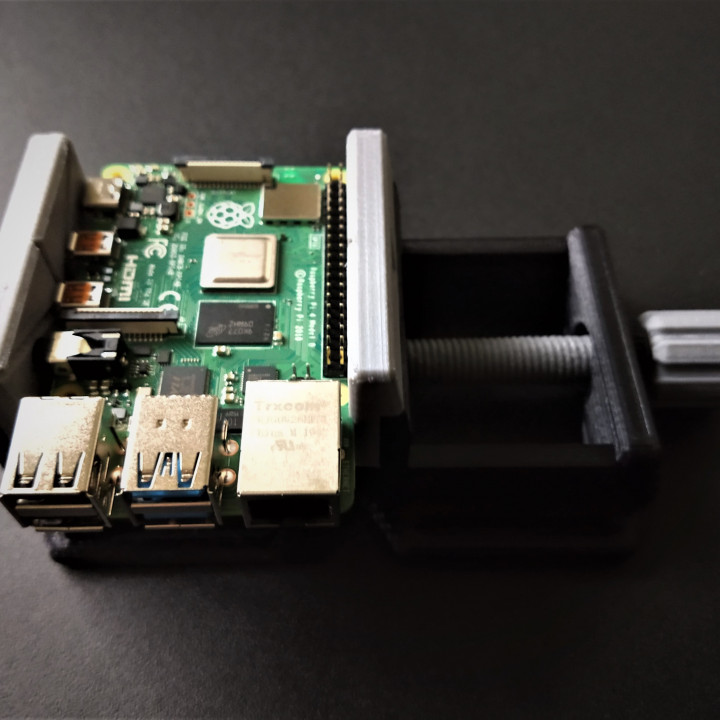
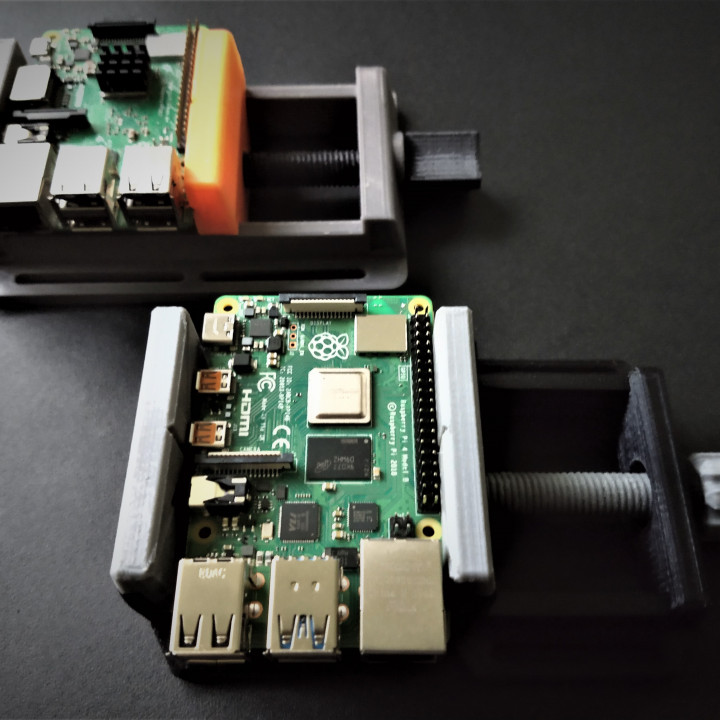
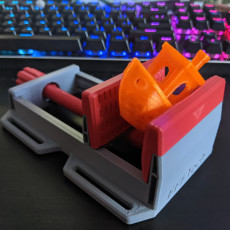
You loved the original E-Vise; now get ready for a banger of a sequel! Introducing the E-Vise V2! Blessed by the angels of mechanization, this absolute god tier device can hold PCBs with ease! Simply index a PCB into one of the slots in the jaw inserts, crank that bitch down, and go to town with your soldering iron like that prom date who ditched you for the football jock. (#FeelsBadMan)
We at FFFTech just pull new features out of our asses, and we pass those dirty, unwashed, underw- cough cough - I mean features onto you! There has been many changes made, along with a few additions made in the development of the E-Vise V2, including:
A redesigned jaw sliding screw. (V1 screw is compatible with the V2 vise)
A redesigned vise frame, more aesthetically pleasing (To me... piss off I like it.)
Guide channels added to the vise frame, with channel indexes added to the sliding jaw, for a more tight jaw lockdown, along with better parallel jaw alignment.
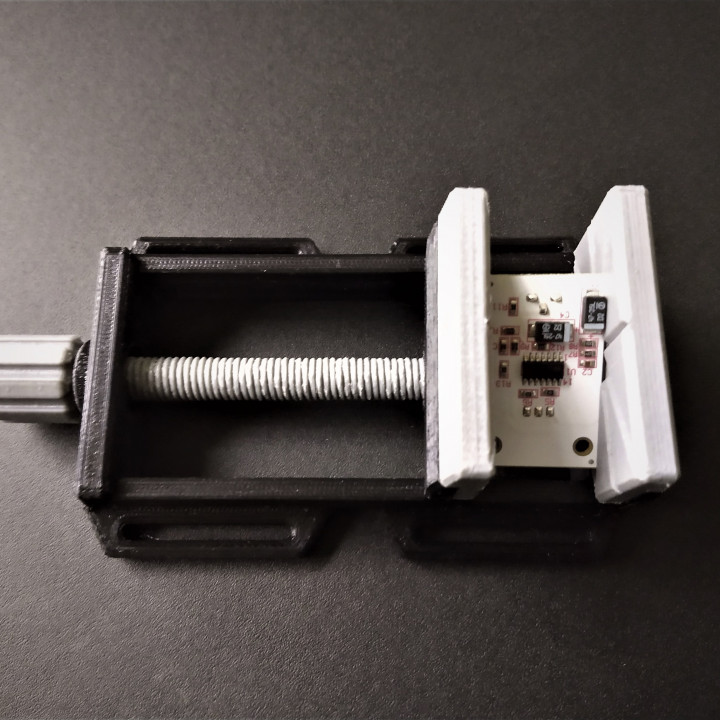
Both jaws have slots modeled in for modular jaw inserts.
The jaws (and their inserts) hold PCBs a bit higher, along with have a larger surface area, compared to E-Vise V1
(My favorite part) Modular jaw inserts for different working conditions.
Three different Jaw Inserts have been designed:
Standard PCB Jaw Insert, For working on a single PCB at different angles.
Multi-PCB Jaw Insert, For working on multiple PCBs in a stacked orientation.
General Grip/Hold Jaw Insert, For holding objects that need a bit of grip.
(More inserts might be developed in the future)
And just like the original E-Vise V1, this model requires no extra hardware, it's 100% 3D printed.
We printed this in "Going through a goth phase" Black, and "I'm ready; depression..." Gray. But you can print this in any color, from "Basic Bitch" Beige, all the way to "Special Snowflake Safe Space" Powder Blue.
So start holding shit like like your life depends on it; start printing the E-Vise V2, Today!
Original E-Vise V1: https://www.myminifactory.com/object/edit/98495
Build Instructions:
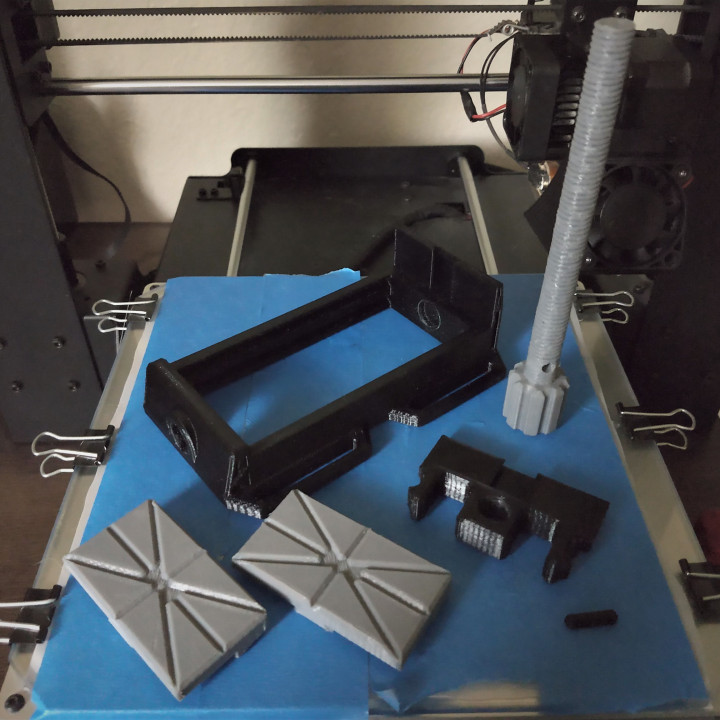
1) Insert the Sliding Jaw sideways into the Vice Frame. Once centered, twist the Sliding Jaw into the indexing guides, stopping once the Sliding Jaw and Frame Jaws are parallel.
2) Insert the Jaw Screw through the Vise Frame, and twist through the Sliding Jaw until it reaches the recess at the end of the Vise Body.
3) Once the Jaw Screw and Sliding Jaw are in their proper place, insert the Screw Retaining Pin through the slot at the bottom of the Vise Frame, and through the Vice Screw. Both ends of the pin should protrude slightly from both openings in the screw body.
4) Sand the Jaw Insert's dovetail rails (Both the inserts) should they fit tight. DO NOT skip this step if you haven't checked the fitment. If they're too tight when you place the Jaw Inserts into the jaws, they might get stuck, keeping you from utilizing the Jaw Insert modular function of the vise. Once done, insert into the jaws.
5) Drive the Sliding Jaw back and forth on the guide rails to allow for break-in. The screw should turn with minimal effort, and the jaw should slide easily on the screw mechanism and indexing guides.
6) (Optional) Add a small amount of synthetic grease to the index guides and the screw threads, to reduce friction.


Standard Print Settings:
Extruder: 212C
Bed: 60C
First Layer Print Height: .30mm
Wall Thickness: .40
Wall Perimeters: 2 (The Jaw Sliding Screw needs up to 7... yes 7 walls if you want it not to snap)
Supports Percentage: 15%
Print the Sliding Jaw on its back, with no supports for the screw threads specifically
Print the Jaw Sliding Screw with the "Vise Screw with Sacrificial Support.stl". The custom designed support will keep the screw in place, and is easy to remove once done printing. Almost looks like a rocket payload fairing. No extra supports are necessary for this part.
| Date published | 19/05/2020 |

Everything printed well. I was leery about the screw thread not screwing on right, so I moved the vise screw model down below the build plate in my slicer so that only about an inch of screw thread was sticking up. That way I only printed the top inch or so, and I tested threading it into the sliding jaw. That worked out perfectly, so I printed the full vice screw. It's pretty slow to screw it all the way in to close it, but it works really well to keep things in place. I haven't tried the PCB jaw grips yet, but I probably will soon, since I have some projects coming up.