Octo-Iris Box


Octo-Iris Box
Published 2019-05-07T16:37:43+00:00
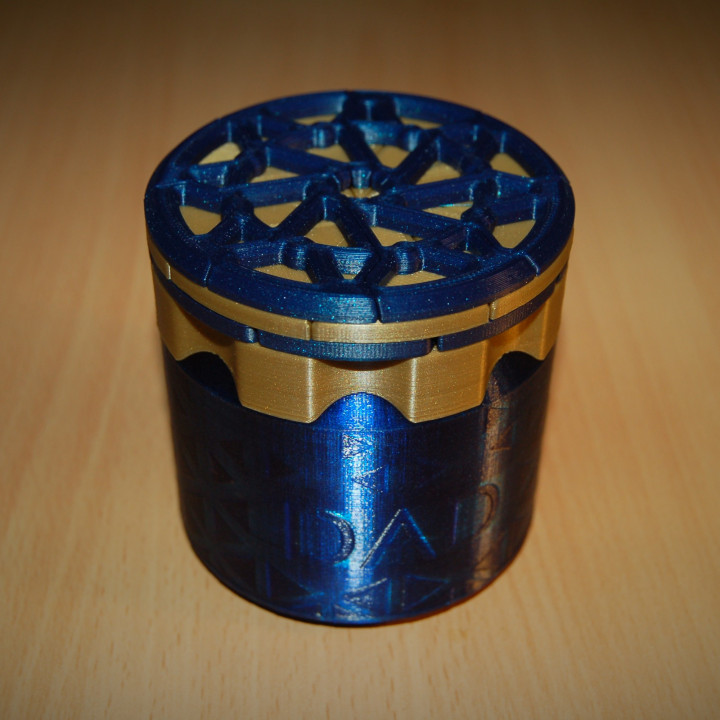
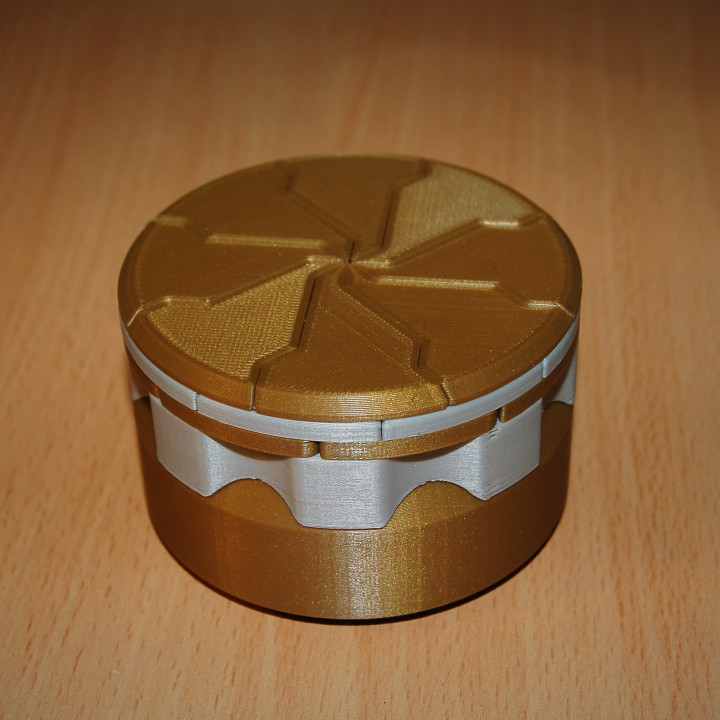
This is an improved version of my 'Octobox V2' iris box which features a new easy opening twist collar. No support material is required for this design.
There are many other iris boxes which you can find on my profile page. I have also produced a general Instructable guide on how to print my iris boxes to a high quality.
Other than the printed parts, this requires M2x6 countersunk/flathead screws to assemble such as these (the same screws my other designs use); 48 screws in total are required for one box. Larger or smaller screws may be used if you scale the model appropriately e.g. M3x8 screws at 150% part scale.
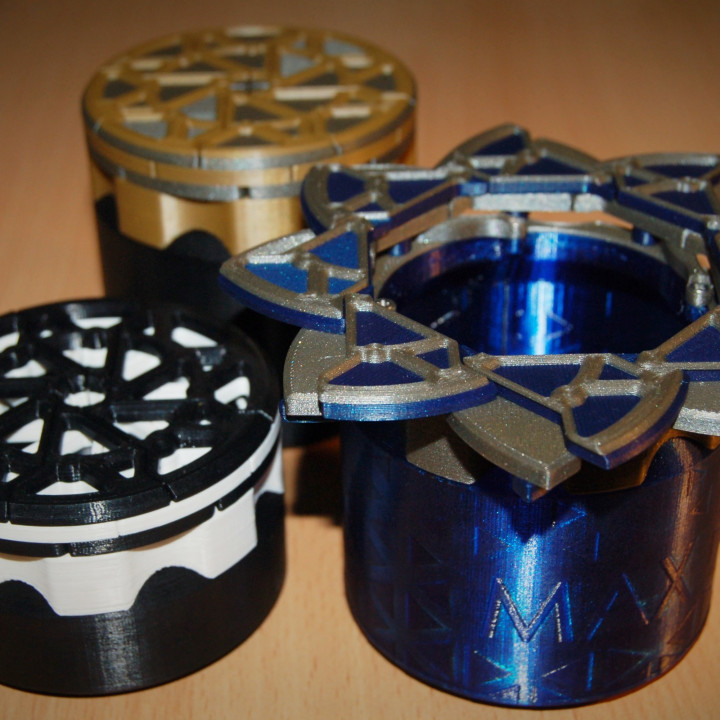
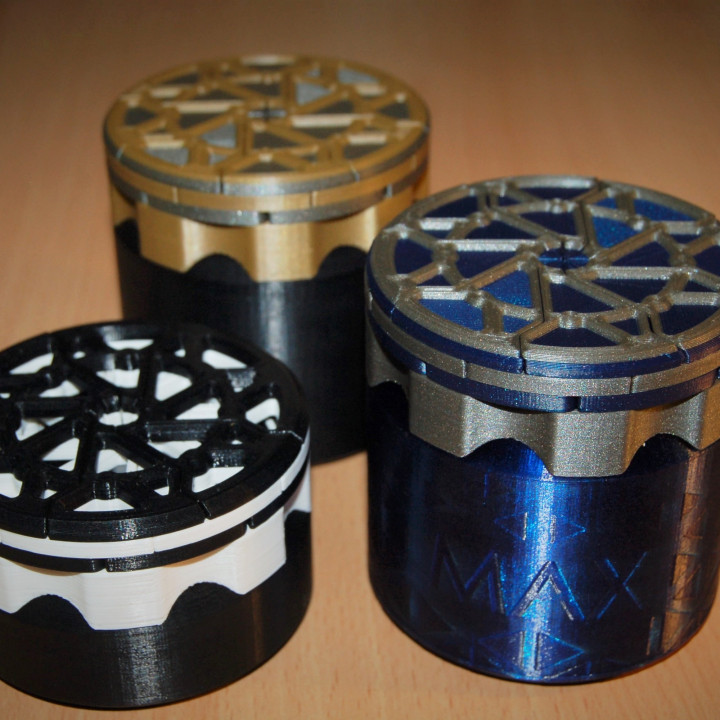
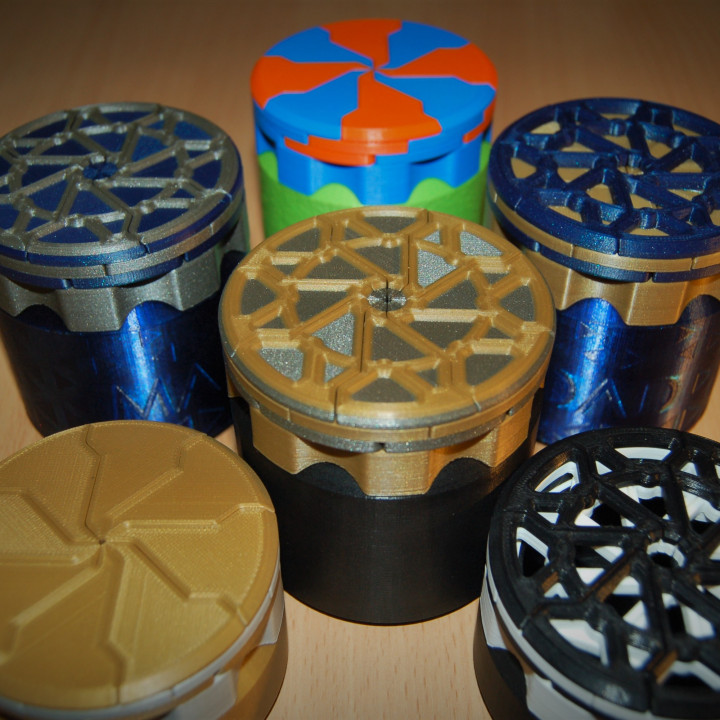
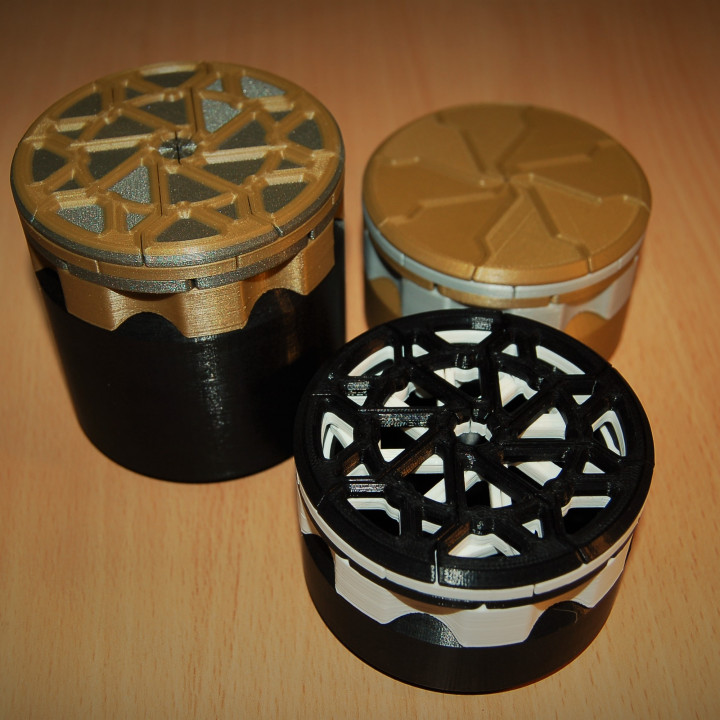
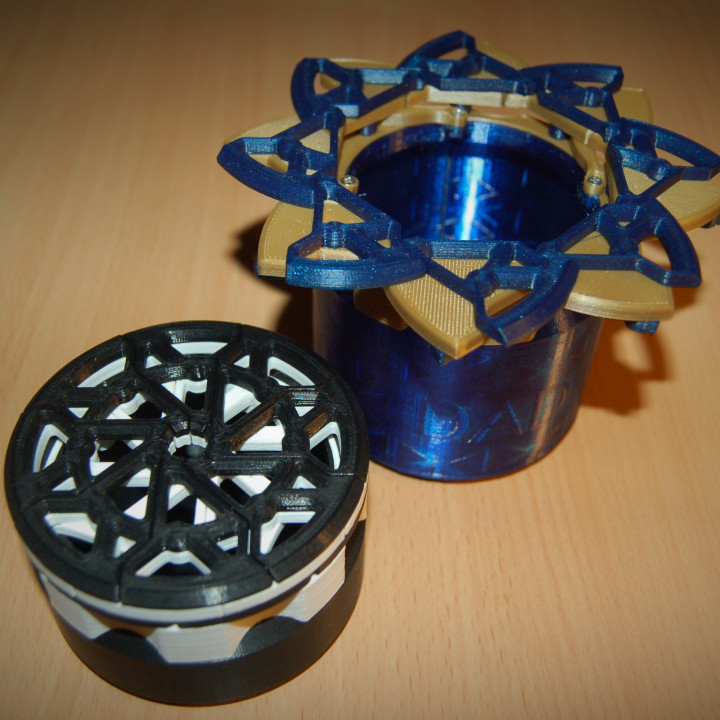
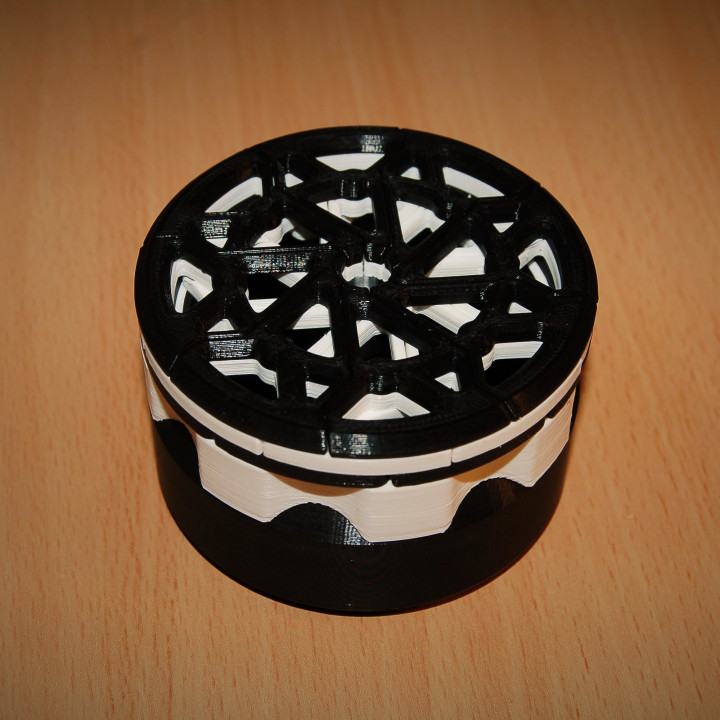
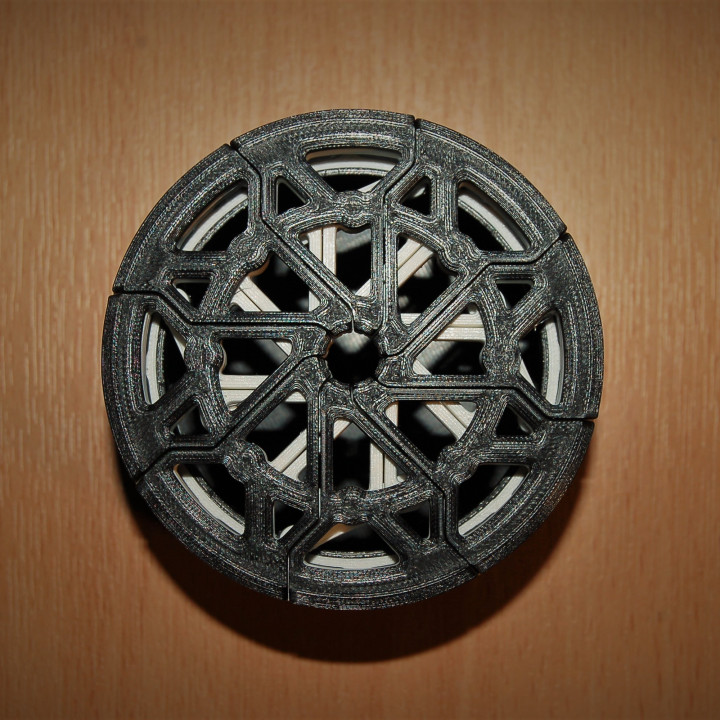
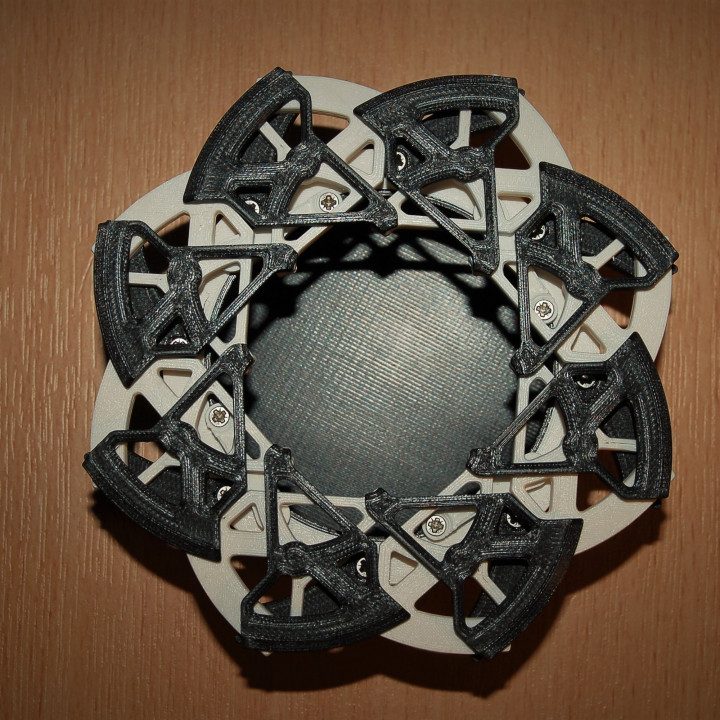
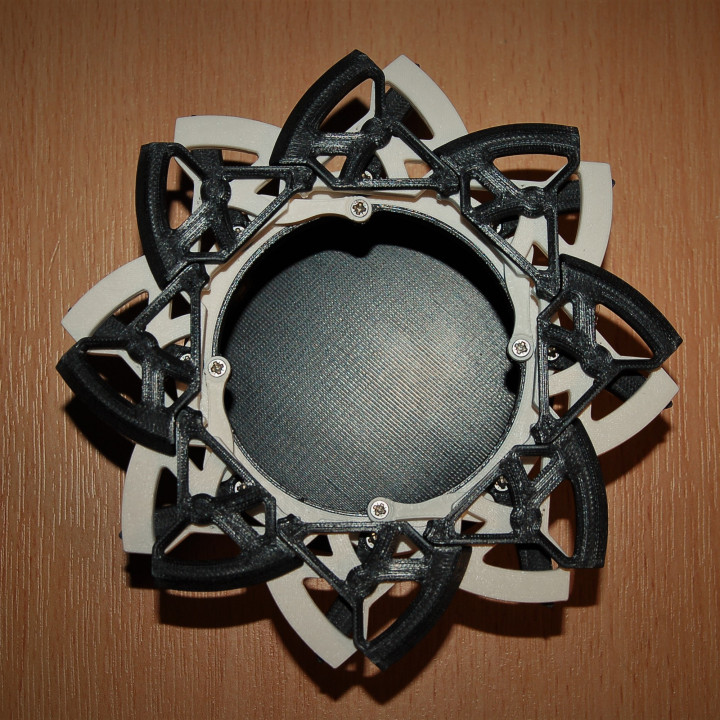
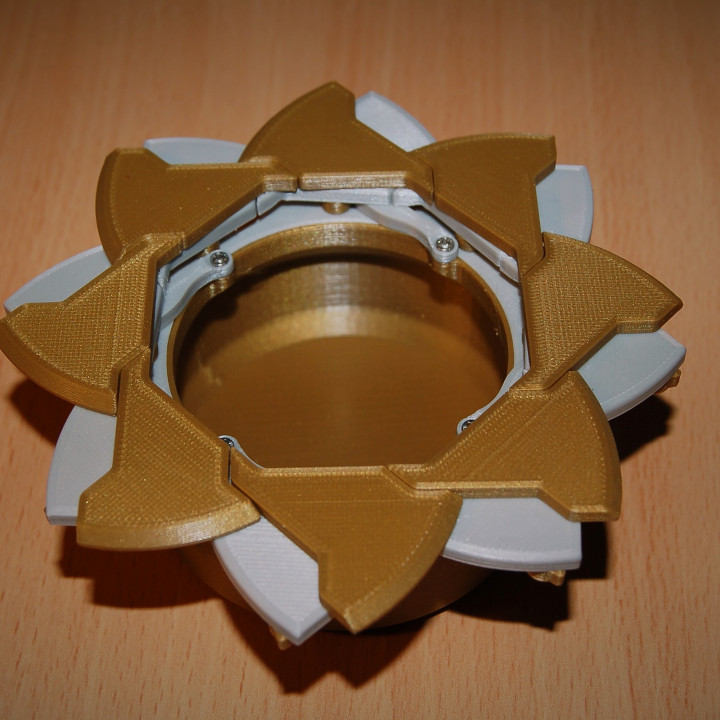
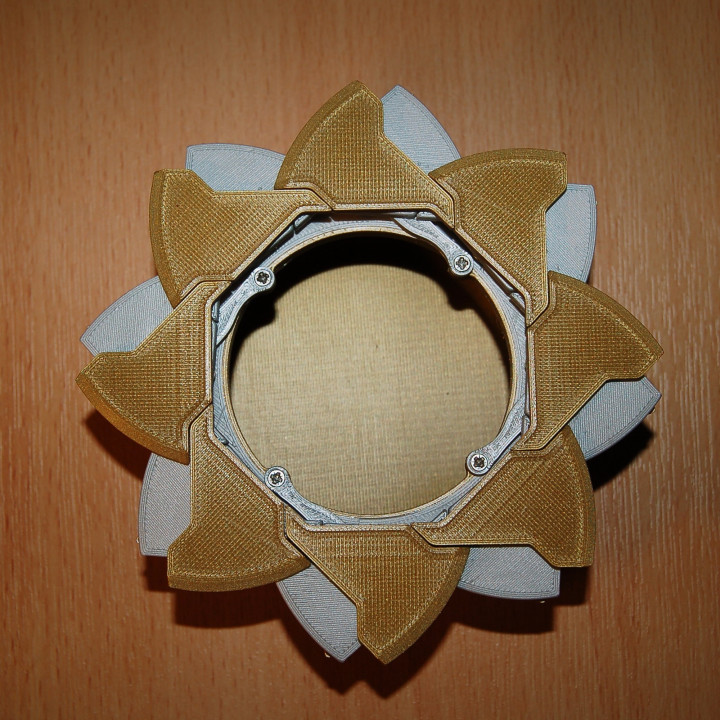
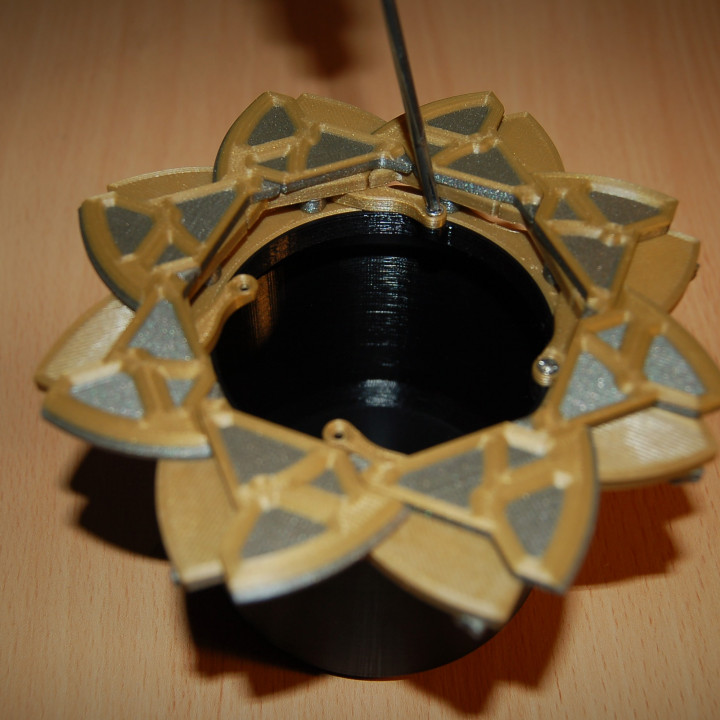
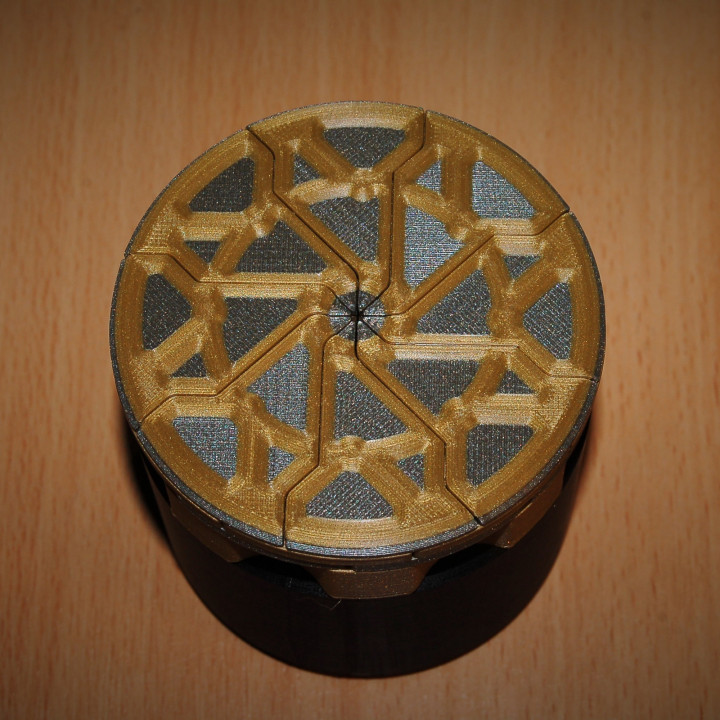
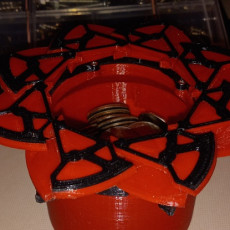
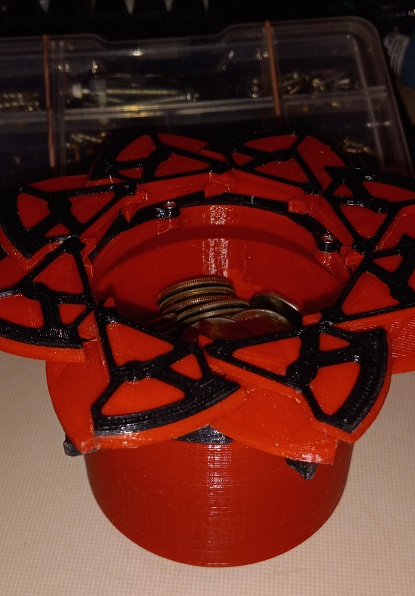
There are three door designs included for the box: the plain 'door' is completely flat, 'top door mech' has an embossed mechanical style embellishment, and lastly the 'hole' parts which have the same pattern as the 'mech' parts, but the panels are cut all the way through the doors creating the framework type appearance.
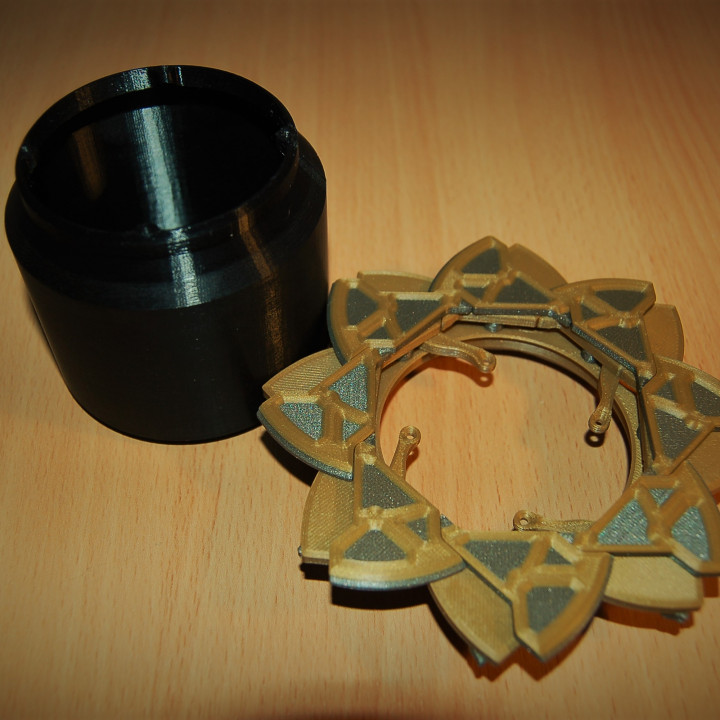
The box is 80mm in diameter, approximately 80mm tall with the standard container and 51mm with the short container.
Part testing
Before printing off all the parts you should make sure the screw joints work correctly with your print settings. Print one 'door top' and one 'door base' parts. Check that your screws fit tightly in the holes in 'door top' but are free to rotate in the 'door base' holes and the head is flush with the bottom surface. You may need to use hole XY compensation (Ideamaker is a free slicer which does this) to get a good fit.
Multicolour Printing
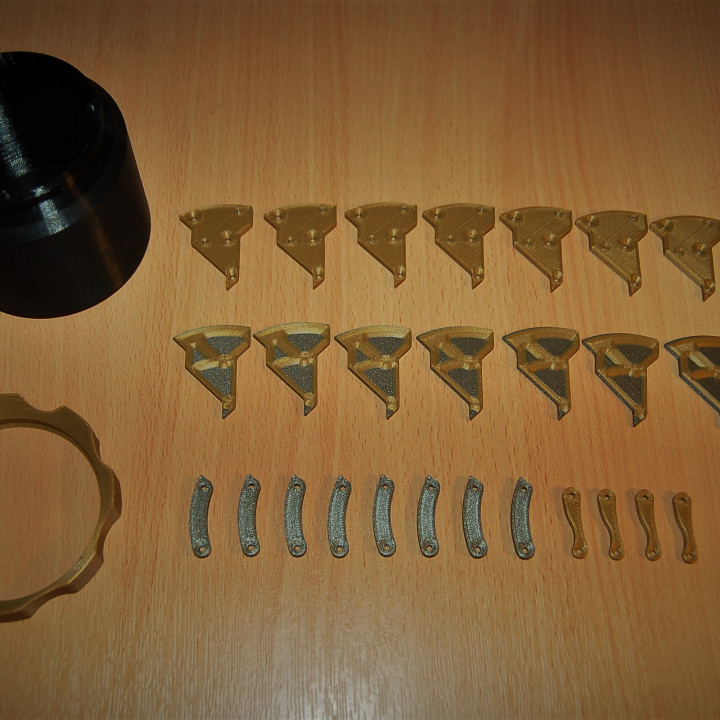
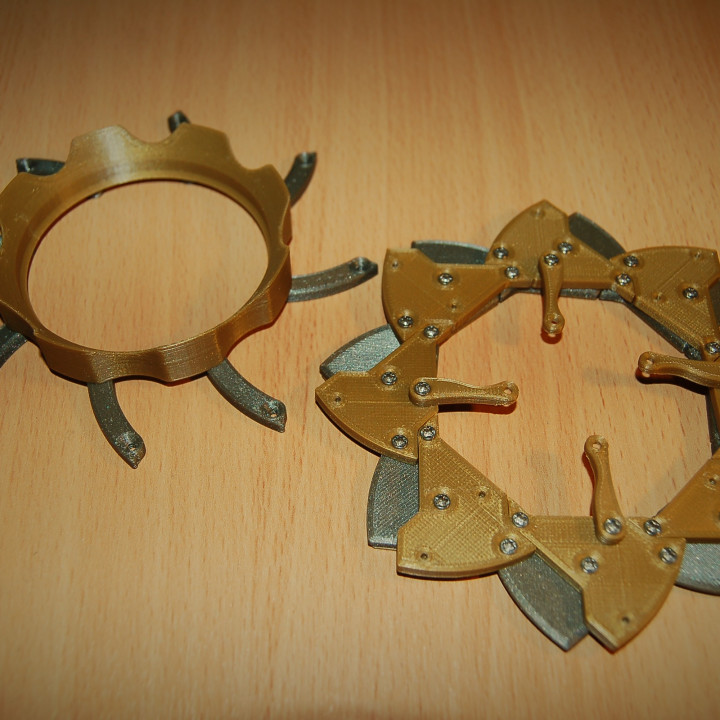
To make one box you will need to print: 1x 'container' or 'short container', 1x 'collar', 8x 'link 1', 4x 'link 2', 8x 'door base' of any type, 8x 'door top' of any type. No support material is required for these parts. You will also need 48-M2x6 countersunk/flathead screws.
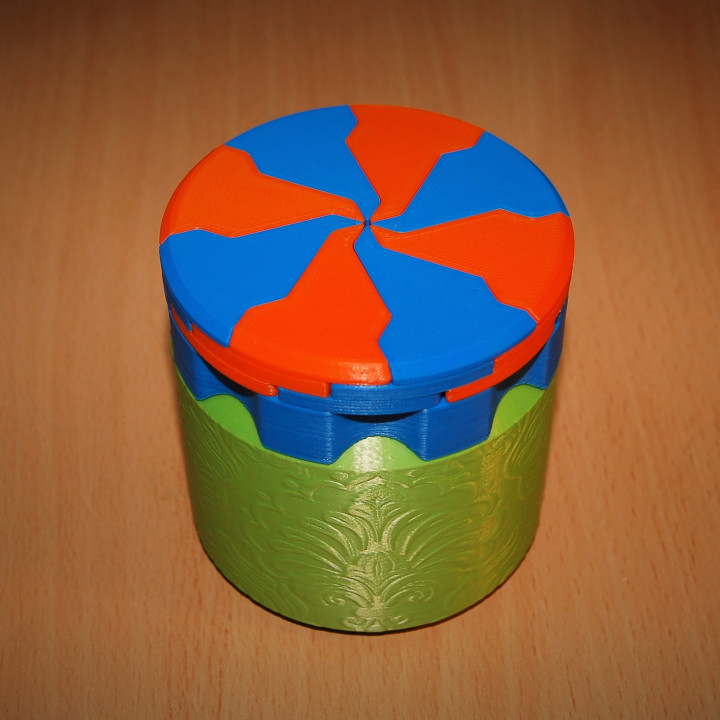
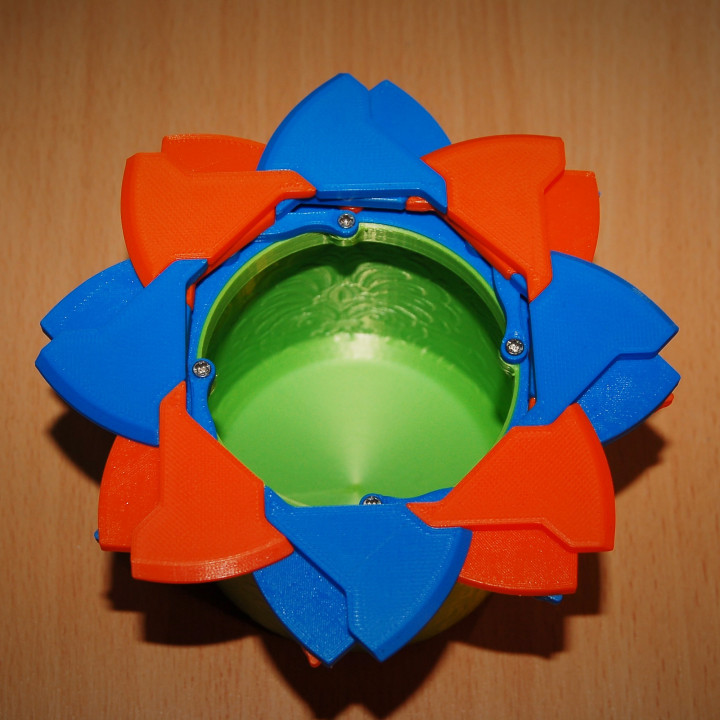
The multicoloured lids can easily be achieved by doing a material swap at the appropriate height.
The pattern on the green and blue containers was formed using the velocity painting technique (more info in my Instructable). The floral patterns were remixed from designs by GarryKillian / Freepik. The triangular pattern was remixed from a design by rawpixel.com / Freepik.
Assembly Instructions (also see pictures)
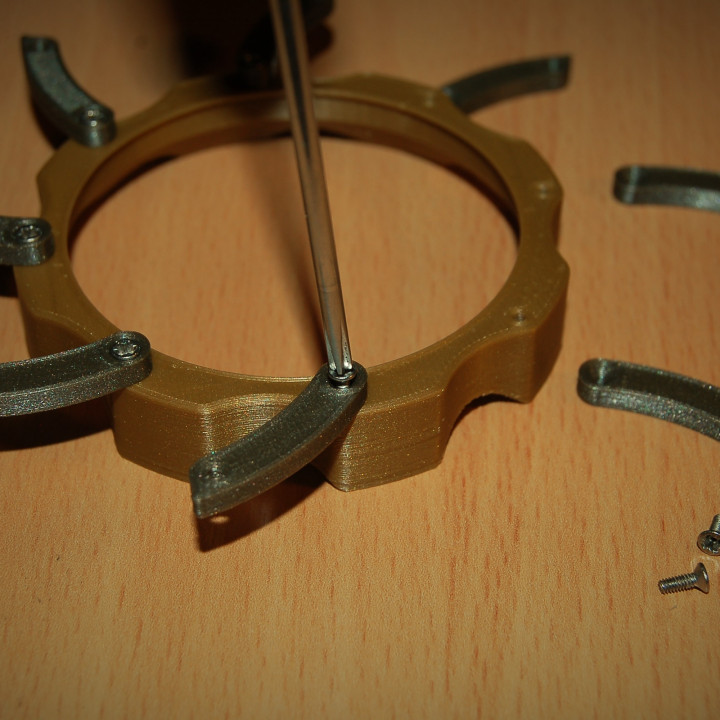
Firstly screw the non-pointed end of the longer links (link 1) to the collar. It is important to get these the right way around otherwise the mechanism will not work.
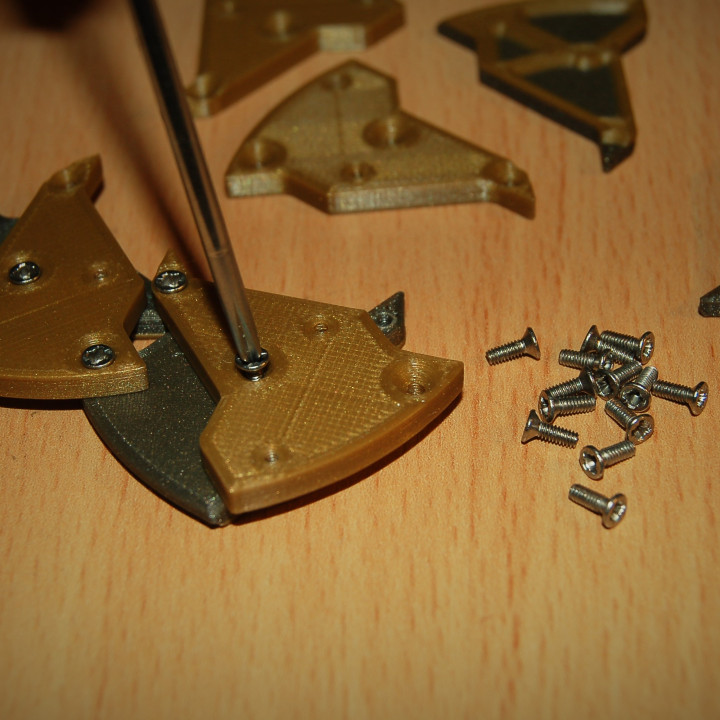
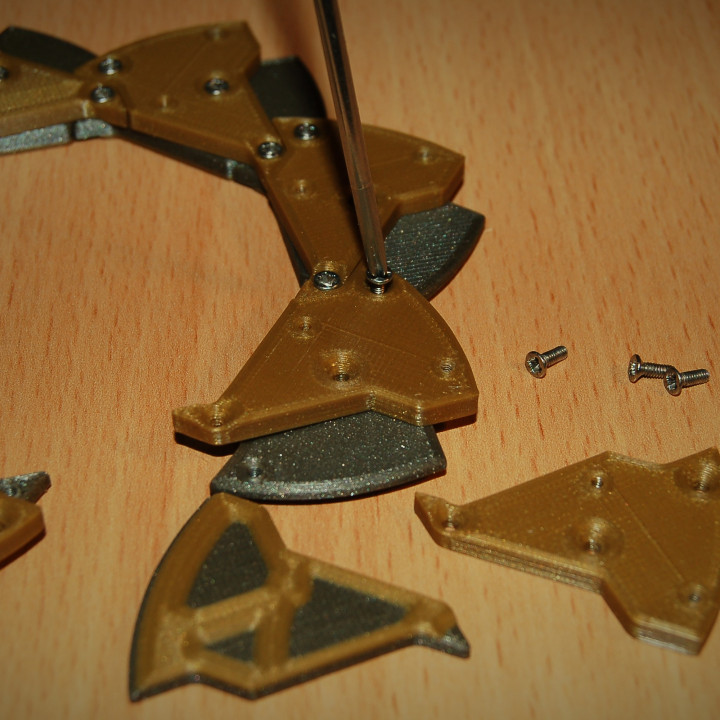
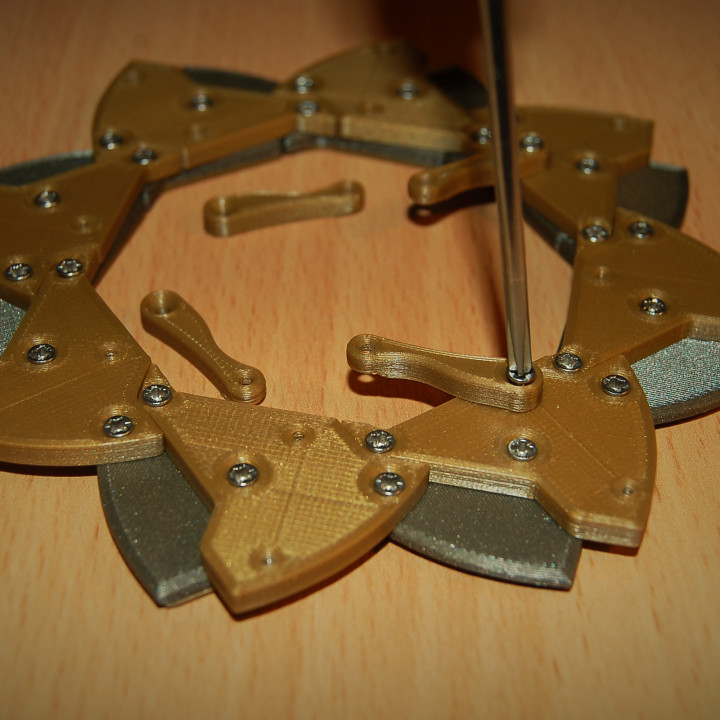
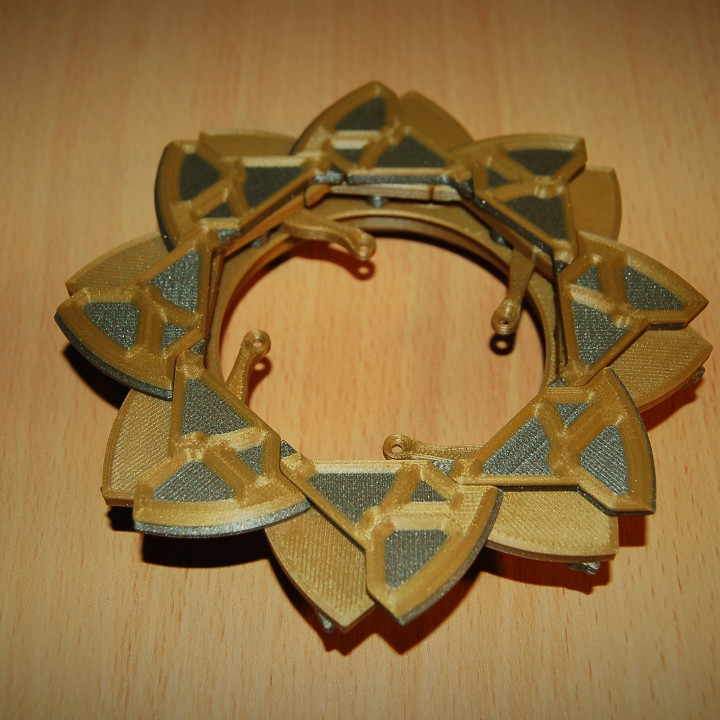
Next take all the 'door' parts and begin assembling them into the iris with the screws. It is actually easier to assemble them neatly in the closed position rather than open shown in the pictures. Also try to keep the screws straight to make the assembled top neat. Don't overtighten the screws otherwise it will be difficult to open the box. I generally tighten them all the way and then untighten them half a turn. This iris mechanism should now open and close fully in your hands.
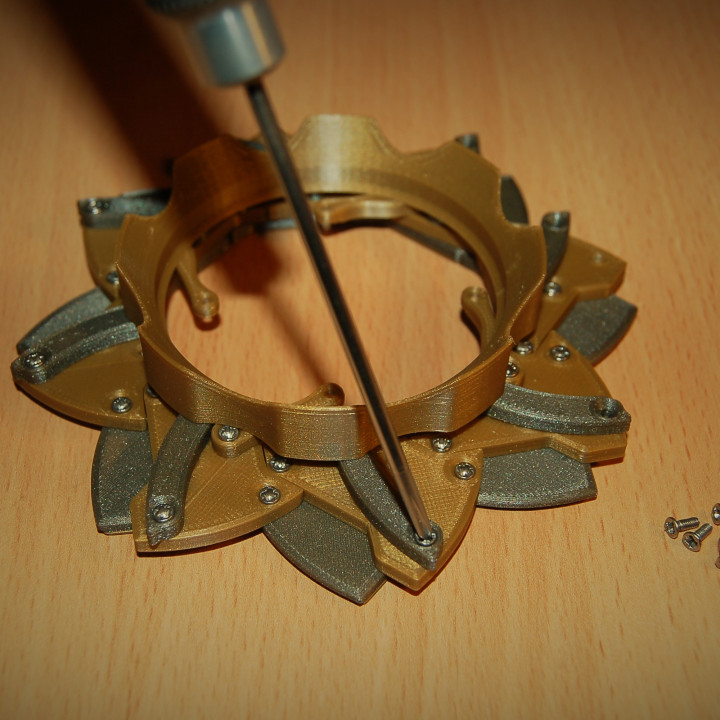
Screw the larger end of the small links (link 2) to the inner holes on the 'base' doors. Make sure the four links are distibuted evenly around the mechanism, one every other base door.
Then take the collar assembly and place it on top of the iris door assembly. Take the other end of the longer links and screw them to the outer holes on the door base parts.
Finally take this entire iris assembly and place it onto the container. With the iris fully opened screw the other end of the small links to the holes in the container. The box is now fully assembled! The box should close by twisting the collar anti-clockwise (it may be a bit stiff at first).
If you have any problems with this design, let me know and I'll try to help out ASAP.


I recommend at least 3 perimeters with an 0.4mm nozzle on the parts for strength, particularly on the container walls as this makes them solid.
All the parts were printed with 0.2mm layer heights as this gives a good balance of quality and printing speed. For multicolour door designs, I recommend using 0.1mm layer heights for the patterns as this gives a nice quality finish.
Try to avoid 'elephants foot' on the base of the parts, particularly the doors, as this can cause excess friction and poor fit in the mechanism.
| Date published | 07/05/2019 |
| Material Quantity | Approx 80g (PLA) |
| Dimensions | 80mmx80mmx80mm |
| Support Free | YES |
Thanks for this great print! Thanks for the step by step photos. May I add that "when assembling, DON'T OVER TIGHTEN THE SCREWS!" I learned that the hard way. Tighten to just snug, and back the screw about a third to half a thread.