Honeycomb Buzzle


Honeycomb Buzzle
Published 2018-06-19T10:18:00+00:00
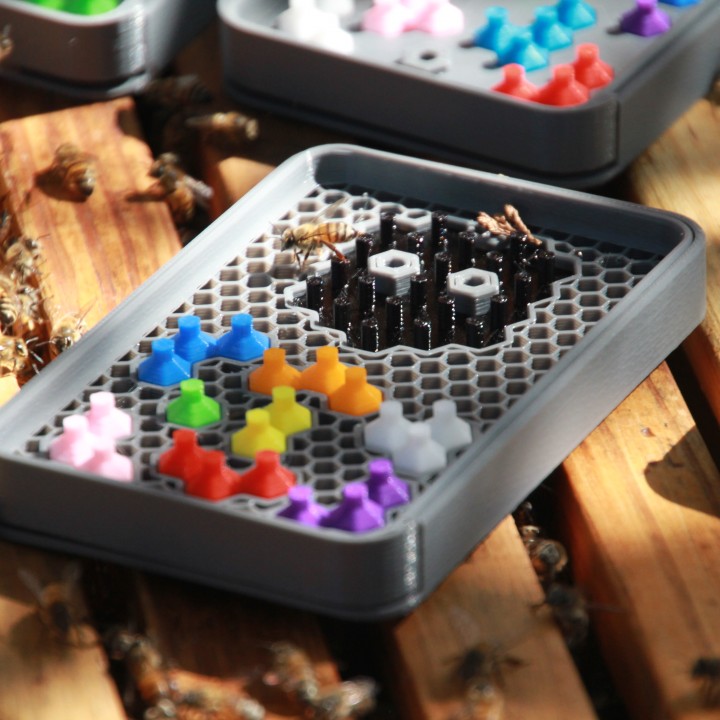
The #Buzzle is a #3DPuzzzle based on a game, Montezuma Puzzle, my kids play on their phones. It is a relaxing and logical tiling puzzle game. Or maybe you will be a busy bee BUZZing around the honeycomb to move all the pieces to the pattern. All the pieces in this version of the game are hexagon shapes in different configurations. Arrange the puzzle pieces in the correct position to complete the puzzle pattern. There can be multiple solutions to completing each puzzle pattern. To make the puzzle more challenging, the difficulty insert can be used to restrict the number of possible solutions to the puzzle by forcing all the pieces to a set orientation.
Description
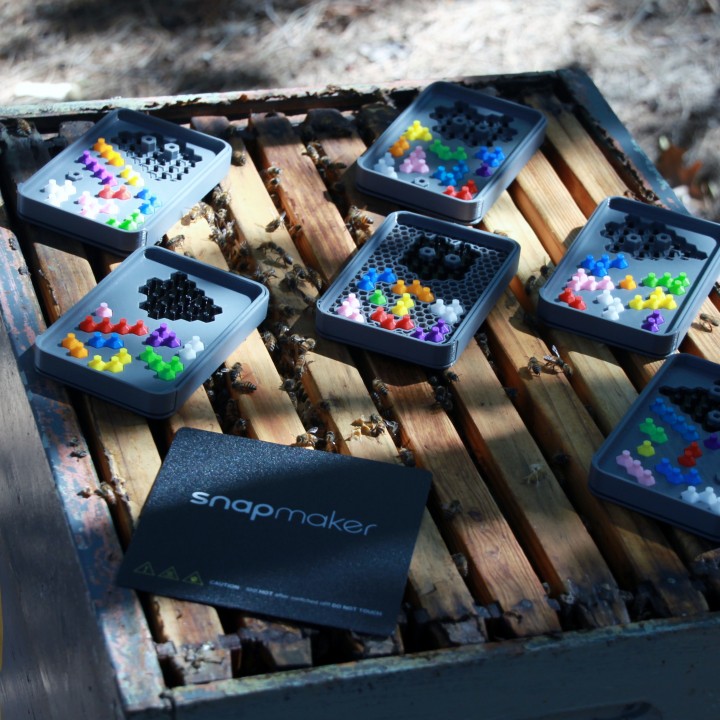
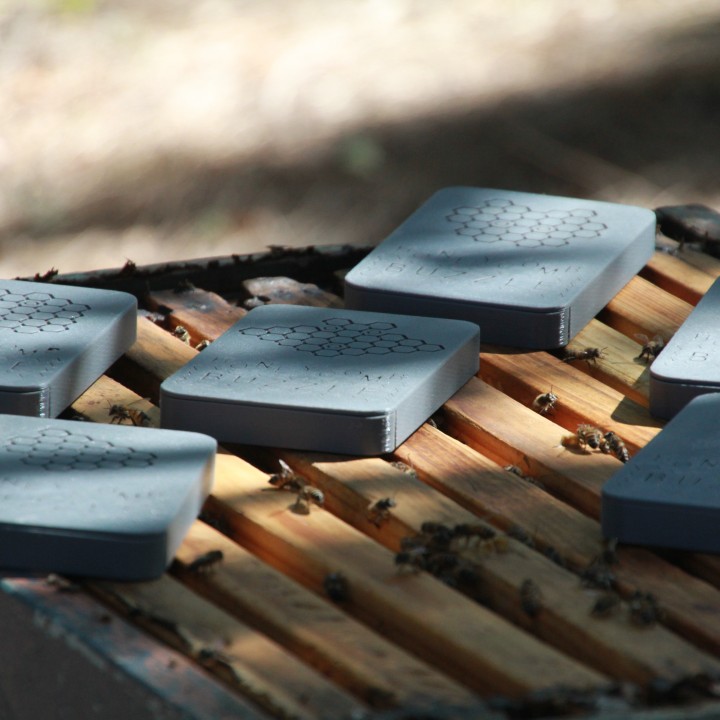
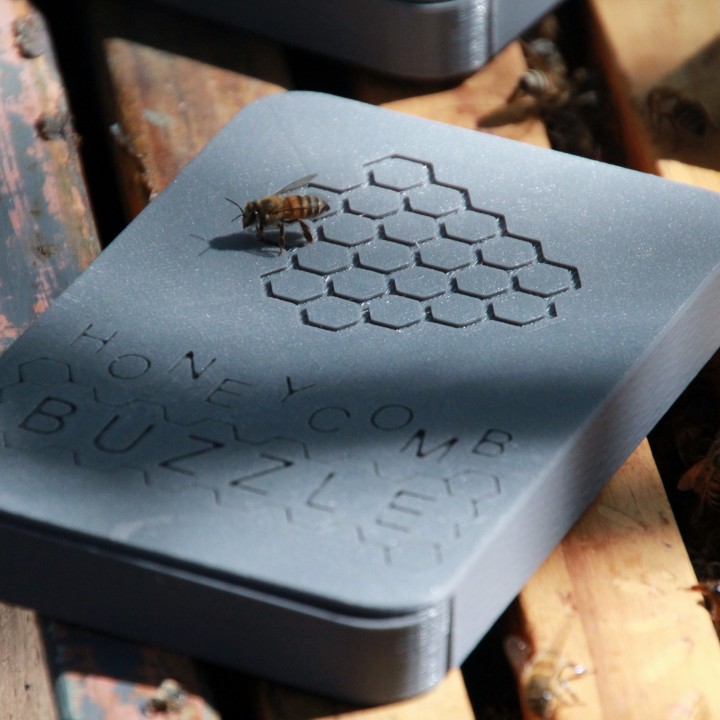
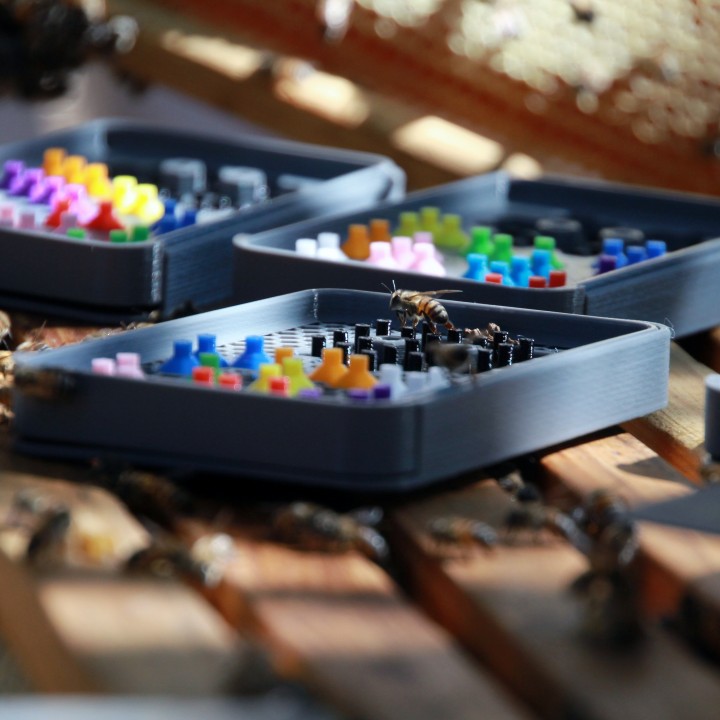
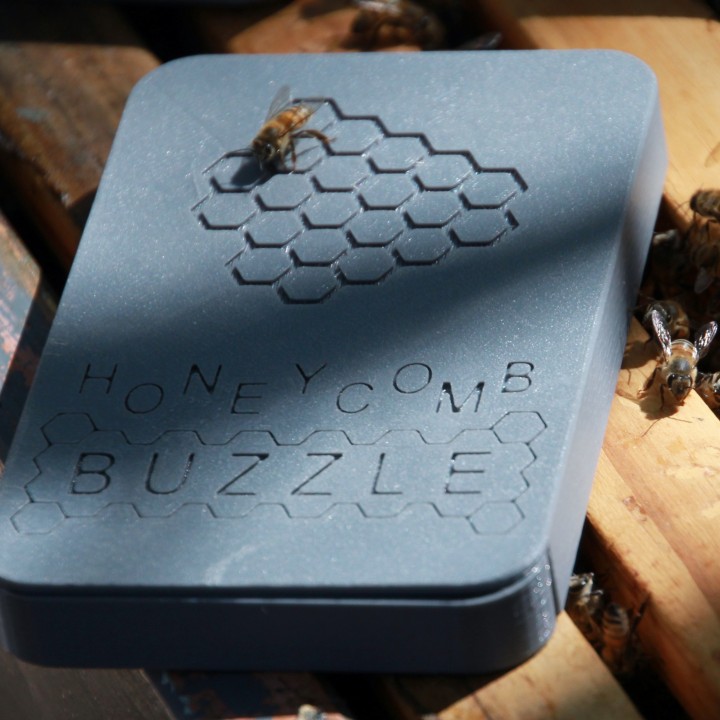
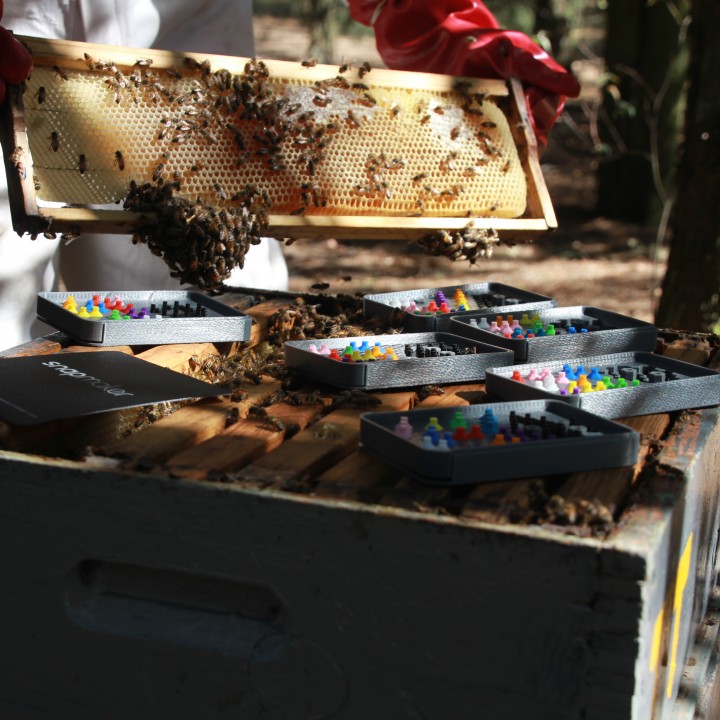
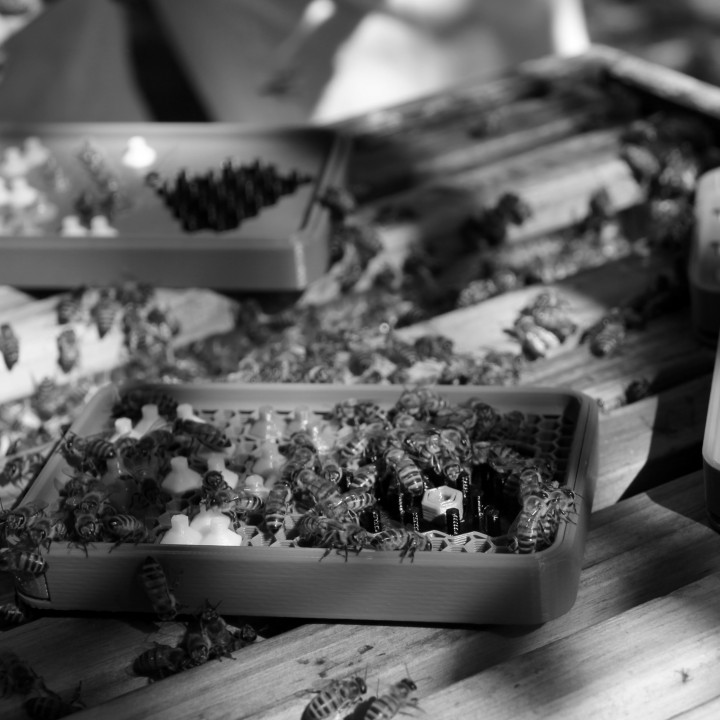
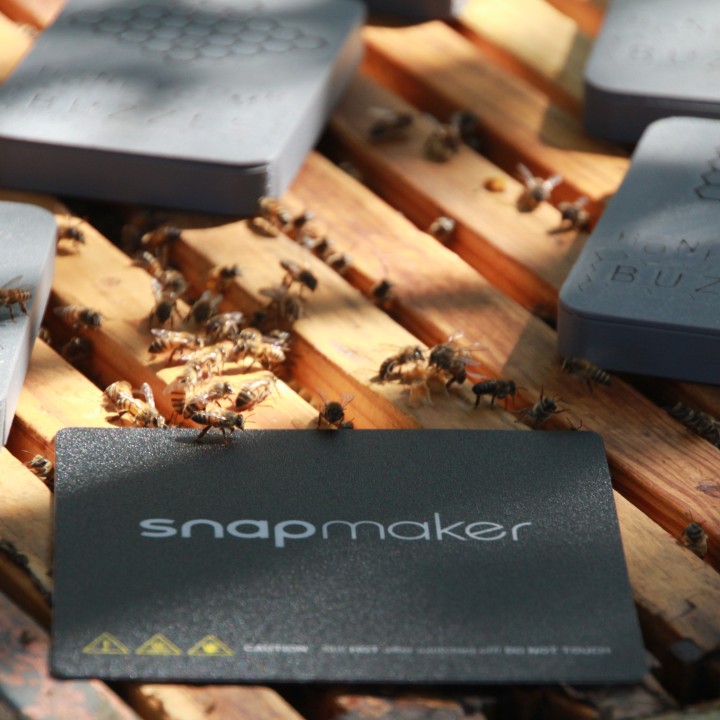
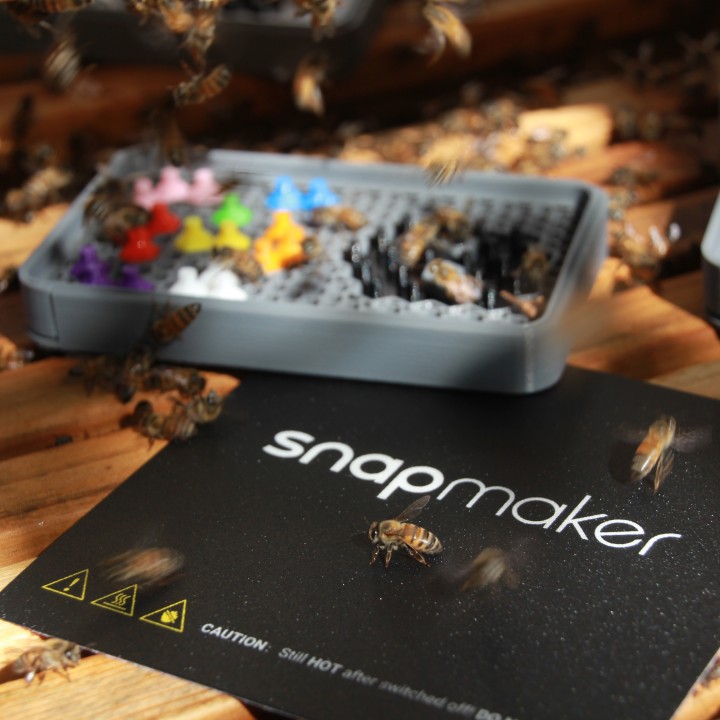
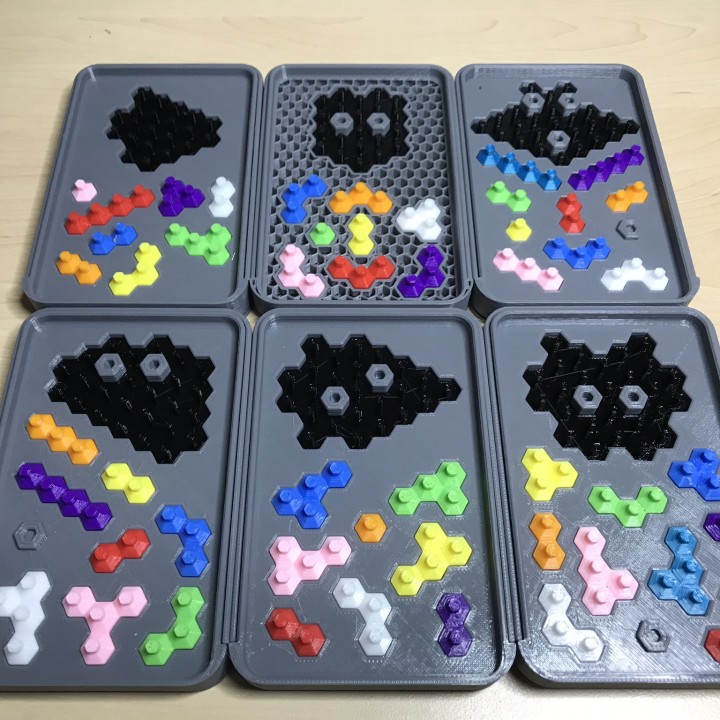
In this design submission, there are 6 #Buzzle sets that can be printed separately. Each of the sets comes with a travel box that holds the pieces. This includes a base (playing area), cover, difficulty insert and the related pieces for the set. Each set is embossed with a logo as well as the #Buzzle pattern on the cover for easy identification. Dimensions of each set fit nicely in the palm of your hand and can print on small printers, total dimensions 122mm x 79mm x 15mm.
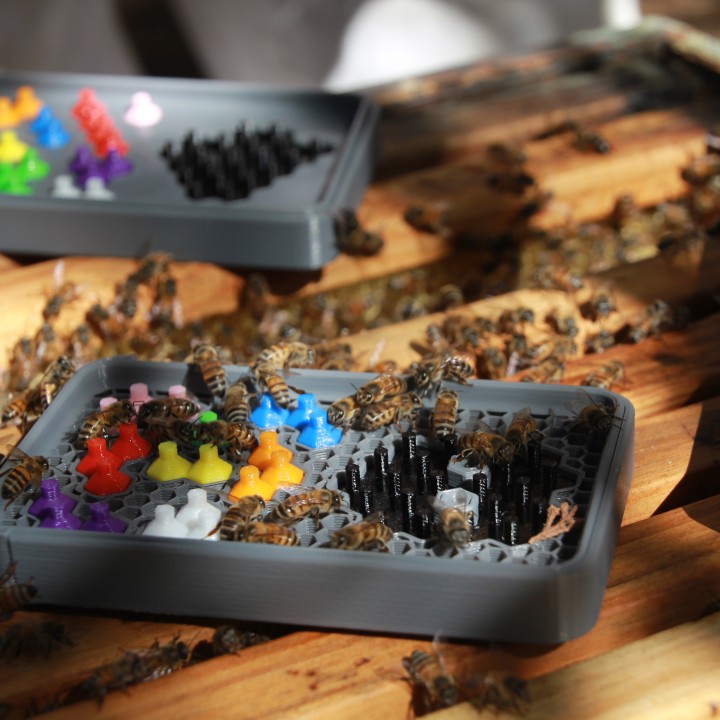
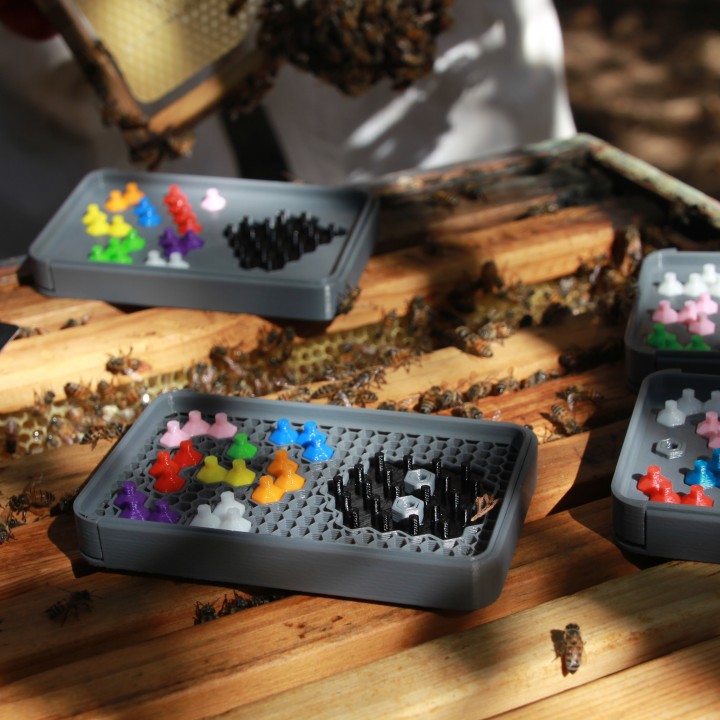
The base of the set contains the puzzle pattern as well as storage pockets for the pieces. On the bottom of the base is a logo embossed and prints wonderful if your printer can handle 1.15mm bridging. The base also features a 0.5mm slide groove on both sides for the cover to slide over. Inside the groove is a “lock/grip/stopper” to ensure that the cover is secured when travelling. Storage pockets for the pieces are designed to have 0.2mm spacing on all sides to ensure pieces are not stuck. Inside each storage pocket is an orientation guide to assist the player with organising the pieces when storing. This also gives an intuitive guide to what is required when using the difficulty insert.
The cover of the set slides over the base to enclose the pieces for travelling or can slide below the base while playing (with a 2mm gap for the difficulty insert). The spacing between the cover and base is 0.4mm (0.2mm on each side) to ensure easy sliding. The sliders on both sides of the cover contain the locking grip (stopper) of 0.5mm that will keep the cover in position when playing or travelling.
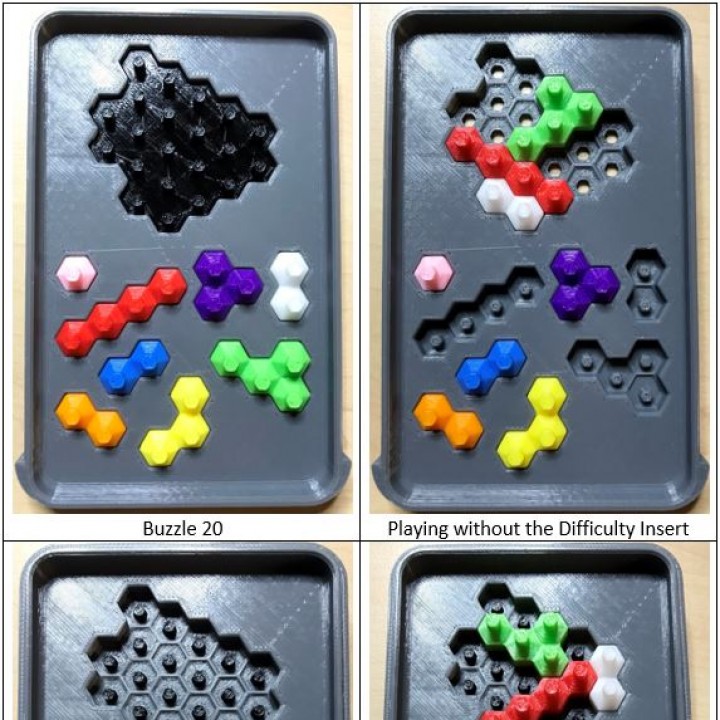
Without the difficulty insert, the pieces can be arranged in any orientation to fill the puzzle pattern. With the difficulty, their orientation is limited to the same orientation as their respective storage pockets. The difficulty insert is designed to be stored inside the puzzle pattern and can be inserted from the bottom of the base to force the orientation of the pieces and make the puzzle more challenging.
All the puzzle pieces are hexagonal shaped (4.9mm radius) and 10mm high (5mm piece with 5mm grip). The base of the pieces is chamfered with 0.5mm 45⁰, this allows pieces to stay in their placed positions and not slide around. The handles on top of each piece is 2mm and chamfered onto the base. Inside the base of each piece is a 2mm radius hexagon 4mm deep, this pocket is offset with 1mm to one direction. This 1mm offset ensures the piece can only be in one specific orientation when using the difficulty insert as well as when storing them in their pockets.
As part of the challenge, I did some research on puzzles and stumbled across a TED talk by Scott Kim, “The art of puzzles” Following are some tips for puzzles;
- A puzzle is a problem that is
fun to solve (as opposed to everyday “problems”)
and has a right answer (as opposed to a toy or a game) - Puzzles are an ancient art form.
- Like a joke, poem, trick or song.
- The best ones are memorable.
Design Challenges
During this last month, I learned a lot about various pieces of software. I learned and used FreeCAD for my design. At first, it was a simple task, draw some Hexagons, configure them to make different puzzle patterns and then union them. Draw a block, chamfer the edges arrange the pieces into the pattern and do a cut. Easy. I printed this, and my kids were impressed. Then the came the pieces and I suddenly realised that there needs to be a certain tolerance. What is the acceptable spacing….? This video by Devin from Make Anything on “How to make Puzzles” helped a lot.
I settled for a 0.2mm spacing (Devin had 0.25 clearance) between the pieces in the playing pattern area. Drawing the first pattern soon pointed out that I need to document my steps and find a method to reproduce all my steps. Drawing and fiddling around with values resulted is a cool puzzle but whenever I wanted to make a change, I had to reproduce my steps. This resulted in me quickly learning Python as used in FreeCAD. To be honest, I merely copied and pasted the commands as FreeCAD generated the python scripts as I drew.
With my Python scripts, I soon had a base box that will hold the pieces and a cover that can slide over to enclose the puzzle. Eventually, I settled for a size of 122mm x 79mm x 15mm. This might have been better to have it 85mm wide since the one #buzzle (nr 63) is a bit cramped horizontally. In order to be able to produce different versions of this puzzle, I designed the following components/modules that can be reused for each puzzle in a different configuration.
- A Logo; This only came in later, but I realised that it would be better to have a logo on both the Base and Cover. I spend several hours to design a logo that can print as part of the bottom layers without bridging and elephant foot issues. This logo design was then embedded in the Base as well as Cover modules.
- Base Box to hold the puzzle pattern and storage pockets. Below the Base, the Logo has been added at a fixed position on the Base. This Base Box Module was then reused in each version of the puzzles.
- A Cover that can slide over the base to enclose the puzzle when traveling. This cover is designed to slide below the Base when playing with a 2mm space gap for the Difficulty insert. The Logo is embossed in the Cover Module. For each puzzle, this module with logo is used and the pattern of the specific puzzle is embossed to easily identify the puzzle you wish to play.
- Puzzle Pocket Piece; For each Puzzle Pattern, there are; 1) the Puzzle Pockets inside the Base, 2) the Engraving on the Cover to identify the Puzzle, 3) the Difficulty insert to be used. All three of these are configured in the same configuration pattern for each puzzle. To reduce repeating the same pattern configuration steps for each of the three areas (Base Pockets, Engraving and Difficulty insert), I combined them into a single modular component. This modular component that has all three elements, could then be used to configure the desired puzzle pattern. After the pattern is configured, by cloning this modular component and positioning them into the pattern, it resulted in the puzzle pattern on three levels that can be used for the base, engraving and difficulty. Using the FreeCAD functionality to Cut and Union the Base, Cover and Difficulty insert for each puzzle can be designed.
- Puzzle Patterns – Base Pockets; To design the Puzzle Patterns for each puzzle, I used the Puzzle Pocket Pieces and arranged them according to the configuration required. With the desired configuration in place, the combination of the Puzzle Pocket Pieces had three layers, the Base Pockets, Engraving layer and the Difficulty insert. Using a solid Cube just larger than the Base configuration, I used the intersection function to intersect the cube with the Base Pocket section of the pattern. Thus, resulted in only the Base Pockets that can be used on the Base for another Cut Out.
- Puzzle Engraving; As with the Base Pockets, the same configuration of Puzzle Pocket Pieces was used. This time, the middle section with the Engraving Layer was intersected with a solid cube. This Engraving Pattern was then overlaid on the Cover with a 1m intersection. A Cut Out of this Engraving Pattern from the Cover resulted in the Puzzle Pattern being embossed into the Cover. However, the outer perimeter of the Pattern only had a single thickness compared to the inner section where two pieces shared the same edge. To overcome this and ensure a nice embossment, I used a Sweep function to create an additional 0.87mm boundary around the outside of the Engraving Pattern before it was Cut Out from the Cover.
- Difficulty Insert; As with the Puzzle Engraving, the Difficulty Insert came from the same configuration of the Puzzle Pockets into the Pattern for the specific puzzle. However, with the engraving, I had to add to ensure the correct thickness. For the Difficulty Insert, I did another Sweep around the outer perimeter, this time to Cut Out / Shave off 0.2mm on the outside to ensure an easy fit inside the Pocket Pattern for storage of the Difficulty Pattern.
- Playing Pieces; The basic single piece was created based on the 5mm radius hexagon with a 2mm radius handle on top. Inside the base, a 2mm radius hexagon with a 1mm offset from the centre. This 1mm offset forces the orientation of the piece when using the Difficulty insert. The orientation is also embedded in the Storage Pockets; thus the player will intuitively be guided into keeping that orientation. To ensure an easy fit in both the Puzzle Pattern as well as the Storage Pockets, the size of the piece is reduced to 4.9mm radius. The configuration of all the pieces were based on this base single piece. To ensure overall size of the pieces are still aligned to the 5mm radius hexagonal shape, a 0.2mm spacer were placed between all pieces. A multitude of puzzle piece configurations were created to cater for all the different options and configurations. Naming these pieces resulted in a naming convention to describe the pieces. The first digit indicates the size (number of hexagonal shapes) that the piece occupies. Then a description for ease of identification; straight, dogleg, triangle. Lastly, the orientation always starting from the highest (furthest North) pieces. Following is a list of pieces currently created to cater for the 6 #Buzzle versions in this submission;
- 1 Hexagonal Pieces
Buzzle 1 Piece - 2 Hexagonal Pieces
Buzzle 2 Piece NE
Buzzle 2 Piece NS
Buzzle 2 Piece NW - 3 Hexagonal Pieces
Buzzle 3 Piece Dogleg NES
Buzzle 3 Piece Dogleg NSE
Buzzle 3 Piece Dogleg NSW
Buzzle 3 Piece Dogleg NWS
Buzzle 3 Piece Frown
Buzzle 3 Piece Smile
Buzzle 3 Piece Straight NE
Buzzle 3 Piece Triangle NSE
Buzzle 3 Piece Triangle NSW - 4 Hexagonal Pieces
Buzzle 4 Piece 3NE 1NE
Buzzle 4 Piece 3NS 1NW
Buzzle 4 Piece 3NS 1SE
Buzzle 4 Piece 3NS 1SW
Buzzle 4 Piece 3NW 1N
Buzzle 4 Piece 3NW 1NW
Buzzle 4 Piece 3NW 1S
Buzzle 4 Piece 3NW 1SE
Buzzle 4 Piece Straight NE
Buzzle 4 Piece Straight NW
Buzzle 4 Piece Y
- Storage Pockets; The Storage Pockets were designed on the same principle than the Puzzle Pieces but with the additional spacing gap in mind. This spacing was used in both the sides of the pocket as well as the difficulty cut out below the piece. For each of the Puzzle Patterns, the Storage Pockets were arranged in the open space below the Puzzle Pattern. After the arrangement was complete, all the Storage Pockets were Unioned/Joined into 1 object before this was cut out from the base. For each of the Puzzle Pieces listed above, there is a corresponding Storage Pocket. However, the STL files for these were not included since they are all embedded into the Base Boxes. Should anyone require these, please feel free to contact me.
Thank you
Designing this was an amazing experience and I would like to thank @MakeAnything3D for hosting this Design Challenge on @MyMiniFactory. The prize that was sponsored by Dremel is a Digilab 3D45. All of these lured me down the path to submit a design for the competition.
I’m new to 3D Printing, I received my Snapmaker 3-in-1 printer at the end of April. At first, I merely copied and printed objects found on various sites. In the middle of May, I stumbled across www.MyMiniFactory.com when I followed a link to the SUPERCUBE 10x10 Puzzle Cube designed by Devin Montes of @MakeAnything3D. From there it was a never-ending downhill marathon (with some hills like the Comrades Marathon) learning everything, designing, printing, software (a social media). Even my kids got involved, they are now 5 and 3 years old and observing them playing the puzzle inspired me and guided me in making small changes.
Thank you for opening this world to me.
To quote Devin; “Don’t forget, stay inspired ↑”


As mentioned, this submission contains six different #Buzzle sets. They can be printed all separately and played on their own. Following are the pieces required for the various sets. The #Buzzle number corresponds to the Montezuma Puzzle number on the phone game.
- Buzzle 20
Buzzle 20 Base.stl
Buzzle 20 Cover.stl
Buzzle 20 Difficulty
Buzzle 1 Piece.stl
Buzzle 2 Piece NE.stl
Buzzle 2 Piece NS.stl
Buzzle 2 Piece NW.stl
Buzzle 3 Piece Dogleg NSW.stl
Buzzle 3 Piece Triangle NSE.stl
Buzzle 4 Piece 3NE 1NE.stl
Buzzle 4 Piece Straight NW.stl - Buzzle 44
Buzzle 44 Base.stl
Buzzle 44 Cover.stl
Buzzle 44 Difficulty.stl
Buzzle 1 Piece.stl
Buzzle 2 Piece NS.stl
Buzzle 3 Piece Dogleg NSE.stl
Buzzle 3 Piece Dogleg NSW.stl
Buzzle 3 Piece Dogleg NWS.stl
Buzzle 3 Piece Frown.stl
Buzzle 3 Piece Smile.stl
Buzzle 3 Piece Triangle NSW.stl - Buzzle 63
Buzzle 63 Base.stl
Buzzle 63 Cover.stl
Buzzle 63 Difficulty.stl
Buzzle 1 Piece.stl
Buzzle 2 Piece NE.stl
Buzzle 2 Piece NS.stl
Buzzle 2 Piece NW.stl
Buzzle 3 Piece Frown.stl
Buzzle 3 Piece Smile.stl
Buzzle 3 Piece Straight NE.stl
Buzzle 4 Piece Straight NE.stl
Buzzle 4 Piece Straight NW.stl - Buzzle 99
Buzzle 99 Base.stl
Buzzle 99 Cover.stl
Buzzle 99 Difficulty.stl
Buzzle 2 Piece NE.stl
Buzzle 2 Piece NW.stl
Buzzle 3 Piece Dogleg NES.stl
Buzzle 3 Piece Dogleg NSW.stl
Buzzle 3 Piece Straight NE.stl
Buzzle 4 Piece 3NS 1NW.stl
Buzzle 4 Piece Straight NE.stl
Buzzle 4 Piece Y.stl - Buzzle 122
Buzzle 122 Base.stl
Buzzle 122 Cover.stl
Buzzle 122 Difficulty.stl
Buzzle 1 Piece.stl
Buzzle 2 Piece NS.stl
Buzzle 3 Piece Dogleg NSE.stl
Buzzle 3 Piece Dogleg NSW.stl
Buzzle 3 Piece Smile.stl
Buzzle 3 Piece Triangle NSE.stl
Buzzle 3 Piece Triangle NSW.stl
Buzzle 4 Piece 3NS 1SE.stl
Buzzle 4 Piece 3NS 1SW.stl - Buzzle 133
Buzzle 133 Base.stl
Buzzle 133 Cover.stl
Buzzle 133 Difficulty.stl
Buzzle 1 Piece.stl
Buzzle 2 Piece NE.stl
Buzzle 2 Piece NS.stl
Buzzle 3 Piece Dogleg NES.stl
Buzzle 4 Piece 3NW 1N.stl
Buzzle 4 Piece 3NW 1NW.stl
Buzzle 4 Piece 3NW 1S.stl
Buzzle 4 Piece 3NW 1SE.stl
Colours
Should you wish to print all six sets and have the pieces in different colours, following is a quick guide to use. You can swap colours but this configuration will result in all pieces per puzzle being different;
- Blue
Buzzle 2 Piece NW
Buzzle 3 Piece Dogleg NES
Buzzle 3 Piece Dogleg NSW
Buzzle 3 Piece Smile
Buzzle 3 Piece Triangle NSW
Buzzle 4 Piece 3NW 1S - Green
Buzzle 1 Piece
Buzzle 2 Piece NE
Buzzle 3 Piece Dogleg NSW
Buzzle 3 Piece Smile
Buzzle 4 Piece 3NE 1NE
Buzzle 4 Piece 3NW 1SE - Orange
Buzzle 1 Piece
Buzzle 2 Piece NE
Buzzle 2 Piece NS
Buzzle 2 Piece NW
Buzzle 3 Piece Frown
Buzzle 3 Piece Straight NE - Pink
Buzzle 1 Piece
Buzzle 3 Piece Dogleg NSE
Buzzle 3 Piece Straight NE
Buzzle 4 Piece 3NS 1SE
Buzzle 4 Piece 3NW 1NW
Buzzle 4 Piece Y - Purple
Buzzle 1 Piece
Buzzle 2 Piece NS
Buzzle 3 Piece Dogleg NWS
Buzzle 3 Piece Triangle NSE
Buzzle 4 Piece Straight NE
Buzzle 4 Piece Straight NW - Red
Buzzle 2 Piece NE
Buzzle 2 Piece NS
Buzzle 2 Piece NW
Buzzle 3 Piece Dogleg NSW
Buzzle 3 Piece Smile
Buzzle 4 Piece Straight NW - Turquoise
Buzzle 4 Piece 3NS 1SW
Buzzle 4 Piece Straight NE - White
Buzzle 2 Piece NS
Buzzle 3 Piece Dogleg NES
Buzzle 3 Piece Dogleg NSE
Buzzle 3 Piece Frown
Buzzle 3 Piece Triangle NSW
Buzzle 4 Piece 3NS 1NW - Yellow
Buzzle 1 Piece
Buzzle 2 Piece NE
Buzzle 2 Piece NS
Buzzle 3 Piece Dogleg NSW
Buzzle 3 Piece Triangle NSE
Buzzle 4 Piece 3NW 1N
| Date published | 19/06/2018 |
| Time to do | 600 - 3250 minutes |
| Material Quantity | 482 |
| Dimensions | 122mm x 79mm x 15mm |
| Technology | FDM |
| Complexity | Easy |
| Support Free | YES |