Punchbox


Punchbox
Published 2018-06-17T18:12:28+00:00
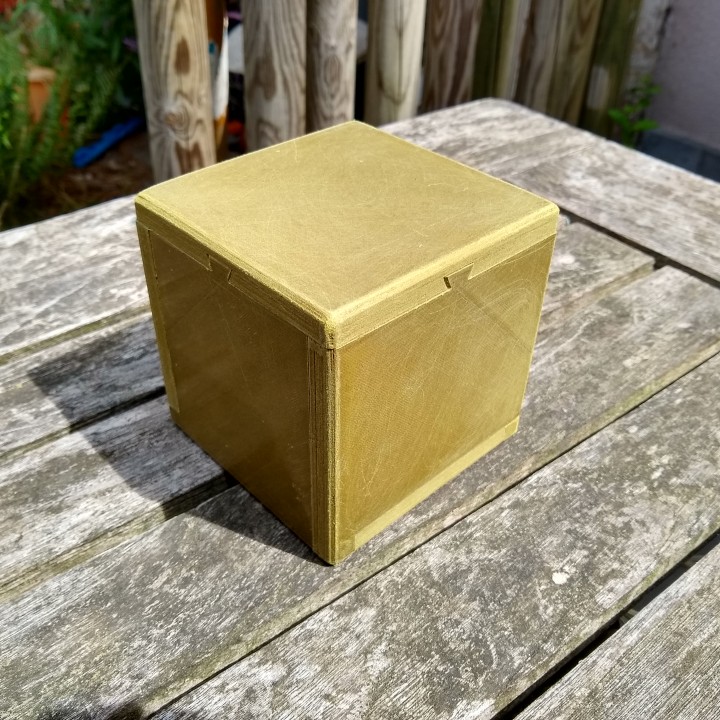
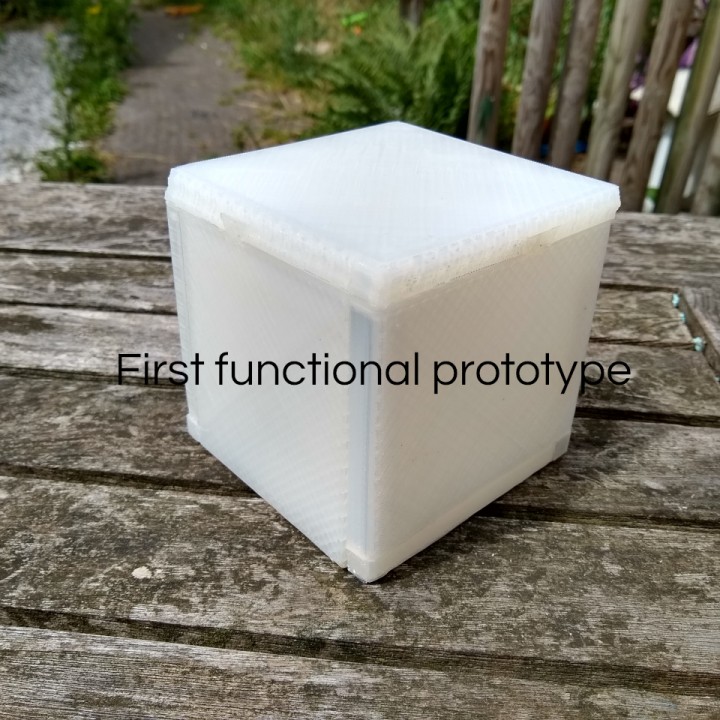
Punchbox, the puzzle in a puzzle and a secret box
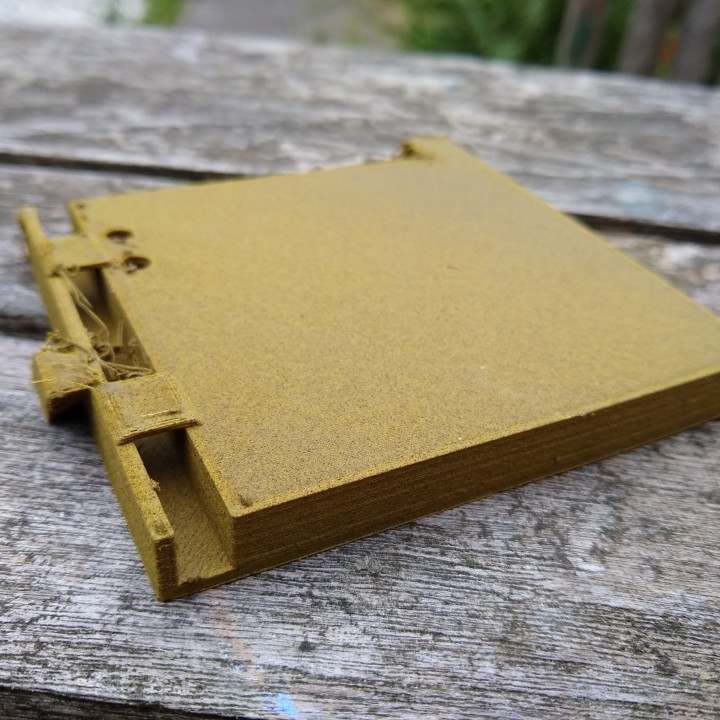
I finally managed to get a decent print for each part using a wood fill filament, but the printer still needs a lot of work to be more reliable. I've been plagued with problems beyond imagination (y-axis leveling, motors overheating, thermal runaways, bed adhesion, z-probe failures, destroyed nozzles, the list goes on..)
I initially wanted this box to be smaller, 6cm x 6cm x 6cm, but the ordered neodimium magnet balls of 3mm haven't arrived so I had to redesign with the 5mm version.
Spoiler alert: viewing the 3D model files or reading this text thouroughly will make solving this puzzle a lot easier, so if you're into puzzling, don't look into the stl files as this will spoil any fun trying to solving this.
I'm in no way a professional designer, photographer or content provider. 3D printing turned into a hobby because of how these machines work. More information below in the background section.
Update: the hotend cooling fan died during my last attempt (I'm still trying) resulting in a completely blocked heatbrake and nozzle. The 3mm magnet balls have finally arrived (see shared Google album) and they look amazing! Currently designing the smaller version.
After extensive testing of the punchbox, I still feel there's room for improvment in many areas. The most important area is the overall sturdyness of the box once put together: there's simply too much play for it to function properly when being punched, so the pegs don't always move as intented since the punch itself displaces some of the sides just little enough for the pegs to not slide out. I'm currenlty investigating how I can redesign the parts so they lock better, without sacrifycing the printability or the supportless print option.
Introduction
I was heavily inspired by the amazing puzzles I've seen being reviewed on YouTube (thanks Mr.Puzzle and Chris Ramsay) and especially the ones where hidden pegs are holding the puzzle together intrigued me. I'm also a huge fan of the neodimium magnet balls so I started my design using these tiny but powerfull magnets as locking mechanism. Since I love the idea to punch or slap the puzzle box, I came up with the idea to design a box that requires at least five punches to be opened. These punches have to be executed in a particular way for the box to open, turning it into some kind of cryptex if you would label the sides of the cube.
Design Process
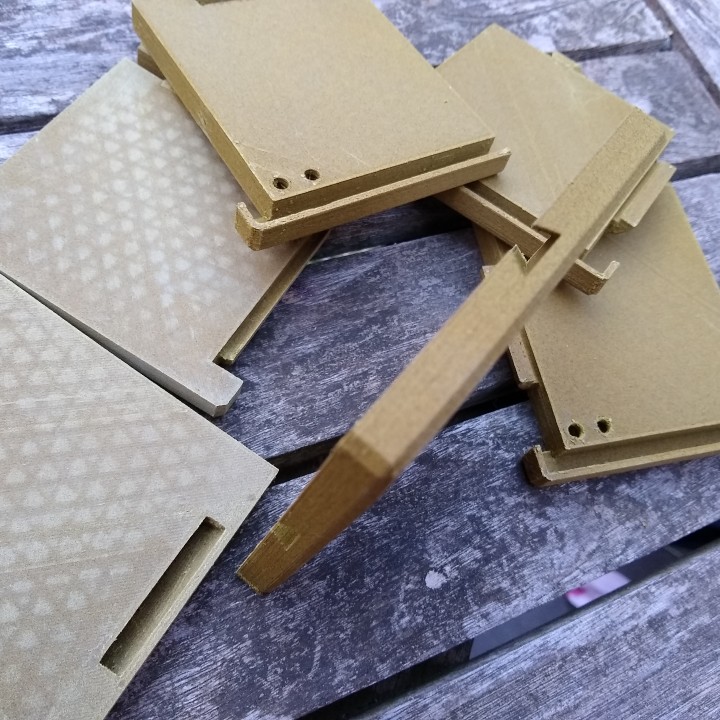
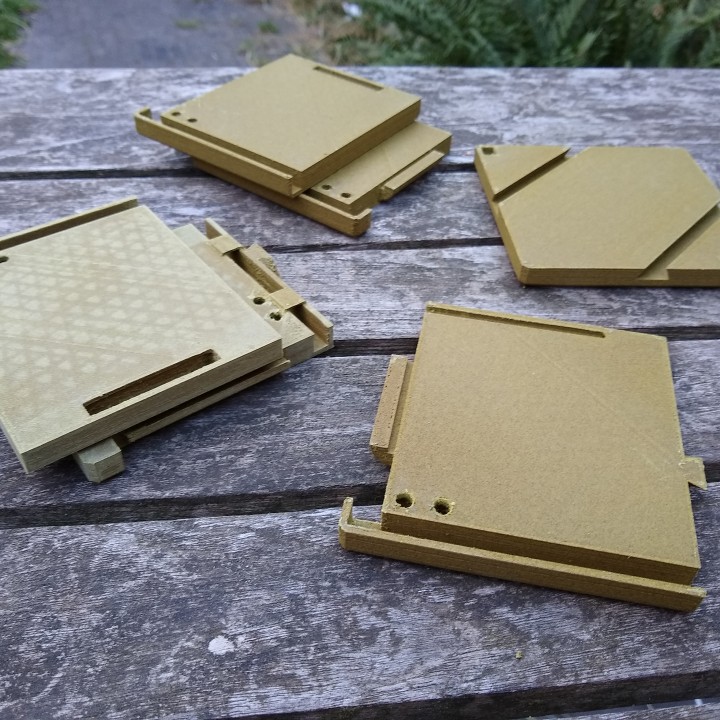
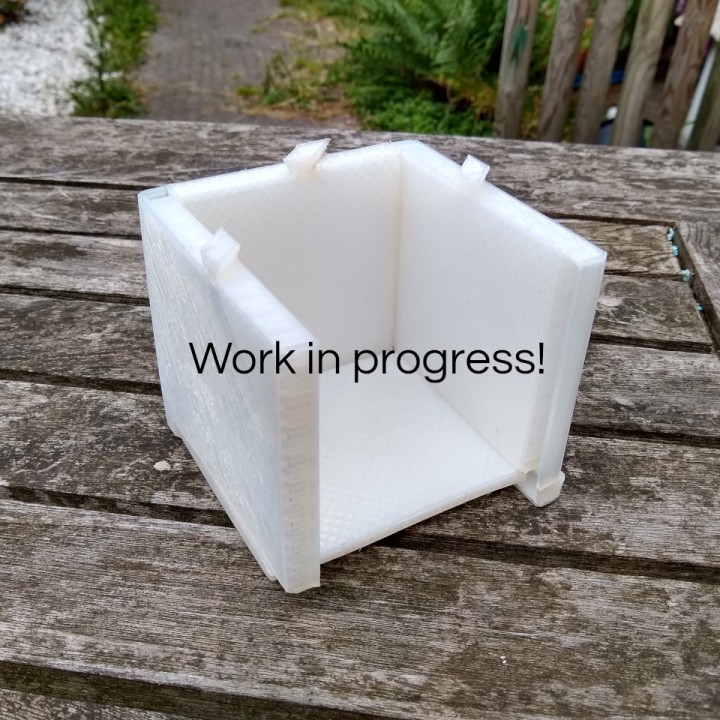
I started with a pencil draft trying to figure out where to put the sliding pegs in each side of the cube (since I wanted to have a lot of punches). I quickly figured that the best place to put them is inside the edges of the cube, leaving as much inner space available as possible. I though of designing this in one piece (except for the lid), trying to print in place like Devin showed with his printer music video's. This however turned out to be quite difficult, so I quickly turned to redesigning the puzzle in 6 separate parts that are much easier to print. I thought it would be amazing if the six sides could be identical, but the cover had to be different anyways so I let go of this constraint early in the process. Then I wanted to not be forced to use glue, so I added some interlocking parts to the individual pieces without blocking the sides that hold the pegs. I love the Japanese woodworking skills so I thought to go with the famous dovetail joints where possible and make the lid slide off diagonally.
The pieces are similar but not identical, and assembly turned out to be a puzzle on it's own (albeit not very difficult) with the added bonus that it clearly demonstrates how the mechanism works once the box is opened. All the pegs are visible and removable once taken apart, making it a nice fiddling toy to re-assemble.
Design Experience
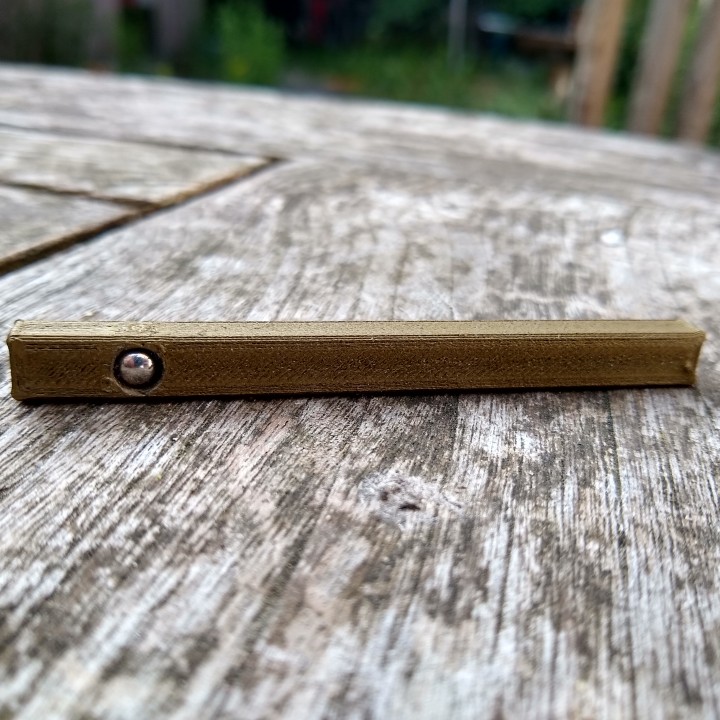
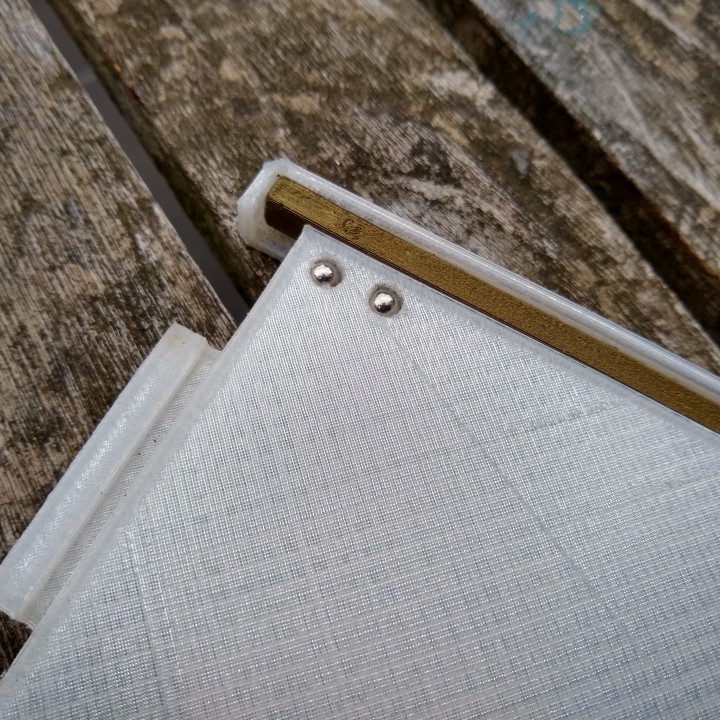
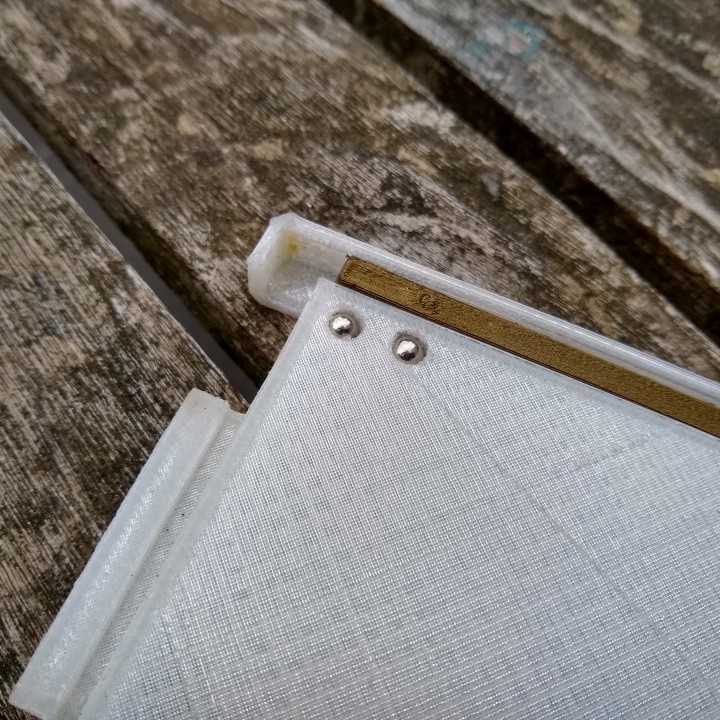
I discovered some unexpected drawbacks in every step of the process, from Fusion 360 creating cloned copies instead of individual ones to bed adhesion issues when trying to print. I added more photos in a public Google album since I feel these don't really belong here. I will still try to print the final cube in greenwood woodfill filament and use a bronze fill for the pegs since the extra weight will add some momentum to the locking mechanism. I have both filaments at hand but besides the pegs (or sliders) all my attempts to print have been fruitless due to technical issues. Currently one side takes about 2 hours to finish. I added holes in the sides to be able to push a magnet ball inside, leaving enough clearance for it to rotate freely once secured (just like with the pegs) so they can orient themselfs to have the best magnetic attraction.
The latest version (I deleted the previous ones) is the final one: I replaced the invisible dovetail joint with a version that doesn't require supports (allthough it helps if you do as explained in the printing tips). I also added the final holes to put the magnets in each side so the sliders snap nicely from one position to the other, making sure no other magnets can affect the same slider unintentionally. I tested this and a gentle punch already moves the slider back and forth. I had one minor design flaw, forcing me to redesign the right side and now this model has two small bridging sections that are crossing the 6mm gap to keep the peg from falling out. I'm still not completely satisfied with this as it feels and looks like a little modeling hack. I'm considering redesigning this but this will probably mean adding more thickness to the sides. Considered the time pressure regarding the deadline today, I'll be leaving this currently as is. I still plan on drawing the 3mm ball bearing version as well, which should enable me to make the whole model to 6x6x6cm, maintaining the current aspect ratio of 1 to 10 (wall thickness vs total cube size).
Background
I started watching some Youtube videos about 3D printing after seeing some samples at one of my previous jobs 2 years ago from printing enthousiasts. Immediately I was intrigued and the idea to be able to design something in CAD and hold it in your hands a couple of hours later really got me going. Since I'm an open source software developer with a great passion for mechanics but a limited budget, I didn't want to spend a ton of money so I went with the cheapest solution I could find 2 years ago: an Anet A8 after seeing a review by DIY Perks. Since then, I've spent most of my time changing this machine to become more safe (Mosfets!) and reliable. After I managed those, I started investigating how to add multiple extruders and I got the Diamond hotend working with a CNC extension board for less than 50 euro. This required me to dive into Marlin and change some pin assignments as explained on the Reprap documentation (CNC Shield method) which wasn't working for me as long I was using pins D0 and D1.
But then I started using PVA which destroyed everything I achieved so far (including my Diamond hotend) so I rebuilt the machine to use Prusa's style of switching system (pull - push instead of mixing) with up to 6 filaments. This didn't work out of the box with Prusa's Slic3r edition since my splitter was mounted on a standard E3D clone hotend and required a longer retraction during tool changes. At the time being this wasn't possible to configure from the UI so I ended up modding the primetower script to add more length to the loading and unloading sections. Since git is kind of a second nature and I'm not afraid to build software on my machine, I managed to keep this approach working through the various new releases.
Then I helped a friend's father with the upgrade of his Prusa MK2S to MK3 and as a result, I received all the original MK2S parts he didn't need anymore. So I went on the change everything over to the new frame. So currently I have some kind of hybrid printer, where the Nema 17 motors, the Z-axis threaded rods and switches are still from the Anet A8, the board is a standard Ramps setup with the DRV8825 drivers (huge difference!) and a bigger display, and all the other parts are the remnants of the Prusa MK2S. Needless to say this was not an easy task and I did end up loosing some max height on my print volume but that doesn't bother me much. At least the machine is now very solid and ridgid, but due to my own custom splitter, I have quite some friction in the extrusion path. I ended up cranking up the current to the extruder motors, but since they were getting quite hot because of the added current, I mounted 30x30mm fans on each motor mount to help them keep cool. I also added a self built enclosure made from standard sized 18mm plywood and plexi glass. Some day I'll be creating a step by step guide on how to add more than one extra extruder to a standard Ramps board using a CNC shield. Bed leveling on the Prusa printbed without their pinda probe was not an easy task as there seem to be different magnetic parts embedded and I can't find their exact location, resulting in a useless bed autolevel system.
Final Words & Credits
First of all, I have to thank my kids for allowing me to spend so much time on this (and 3D printing in general) despite them needing my attention (I'm sure they really dislike my printer by now). Also my partner who allowed me to ignore her today (on the deadline day) despite it being her birthday!
I have, since I discovered Devin's channel, always enjoyed his video's. He has this kind of funny and intelligent take on a lot of things and is not afraid to look silly in public, just love that kind of openness and honesty! I hope he can continue providing the quality content I've come to get used to, he inspired me a lot and his tutorial style approach has really improved my design process as well. Thanks again Devin, you really inspire me and make me smile.
Also a big shout out to Mr.Puzzle, who I personally think has a similar honest and open style and for the many interesting puzzles he manages to solve. You make it look too easy! I also like his kind of spoiler alert warning.. I hope I can send him one without him seeing the plans - as this will spoil the fun solving the punchbox (maybe even the name is a giveaway that makes it too easy for him). The same applies for Chris Ramsay, and allthough I'm not a huge fan of the magic thing he has going besides his puzzle solving video's, I really enjoy watching his struggle to figure out new challenging puzzles, as if one can feel the satisfaction when he finally manages! I will send both of them a puzzle box as soon as possible (= as soon as my printer stops being haunted).
Ofcourse I wouldn't have been nearly as good in DIY 3D printing if it wasn't for Thomas Sanladerer's amazing channel. Just like Mr.Puzzle, he has this honest approach and since I speak some German myself, I just love both of their accents. Beside Tom, there's obviously Angus from Makes's Muse and Joel from 3D Printing Nerd who keep inspiring me, where Angus has often blown my mind with his interesing mechanical findings and great tutorials, and Joel keeps surprising me with his very funny ways and oversizing things! Honorable mentions are defintiley due to Stephan from CNC Kitchen, Simon from RCLifeOn and so many others I cannot possibly list here.
A big thank you should also be going to Joseph Prusa and his amazing team: not only do they make terrific printers, their attitude and contributions towards the open source community should be an example for every manufacturer in my opinion.
I've tried many opensource CAD applications but none makes the job as easy as Autodesk's Fusion 360 and Thinkercad. I do most of my brainstorm session with these tools and start a new project when I'm done messing around. FreeCAD does the job pretty well too, but requires (as most OSS) a deeper understanding of how 3D modelling is handled internally. It does has very handy parameter features that I still need to discover in Fusion so as long as your model is not using advanced shapes (like bent helixes) you should definitely give it a try as an opensource alternative that runs on almost every machine. Currently I'm very impressed by OpenScad since it allows for truly parametric modeling (where I could eg. change tolerances by adjusting a single value) but this can be challinging to say the least as there's practically no ui and you have to get back to your trigonometrical skills from your student time..
I'd also like to thank MyMiniFactory for organizing this contest and ofcourse, Dremel for offering a really impressive machine for this! I sure hope I can get my hands on one ;-) I'm also very impressed with the quality of the other competing design, amazing how many creative people are being sparked by contests like this one!
Thanks again and just like Devin likes to conclude, stay inspired!


Print slider-875 3 times and slider 775 twice. all other parts are only needed once.
Before pushing in the neodimium magnet balls in the sliders, make sure to check how much clearance your printer left you with. Forcing the magnet in with too much power will break the slider.
The parts are exported from Fusion 360 and still need to be oriented in your slicer (usually a 90 degree turn on the X axis should suffice). Use your own common sense to lay them out so they can be printed flat and without supports. Although supports are not required per se, I do suggest using a minimal support structure on the build-plate only for the small overhangs in the locking parts. You can get away without supports since there's no parts where perimeters are isolated in mid-air, but you'll save yourself some filing or sanding to fit the pieces together afterwards (compared to removing supports).
For drafting I used a 3mm layer height with constant speeds for all print moves since my extrusion path has quite some friction and this reduces the side effects of the volumetric pressure changes.
I designed all the parts with 0.25mm tolerances, but if your printer tends to bulge the corners a little (mine does), some filing or sanding might be required.
I always print on a thin glass layer (standard cheapest photo frame glass) on top of the printbed. Most PLA materials I've tried stick very well without any hairspray or tape as long as you degrease the glass thouroughly with eg. brake cleaner. You'll have to wait for it to cool down to remove the parts easily. When needed, I always use water soluble hairspray since cleaning up requires nothing more than heating up the print bed and let some waterdrops dissolve the residues after which you can take the goo off with a standard spatula.
| Date published | 17/06/2018 |
| Dimensions | 100mm x 100mm x 100mm |
| Support Free | YES |