Sign Posts


Sign Posts
Published 2017-09-05T16:25:44+00:00
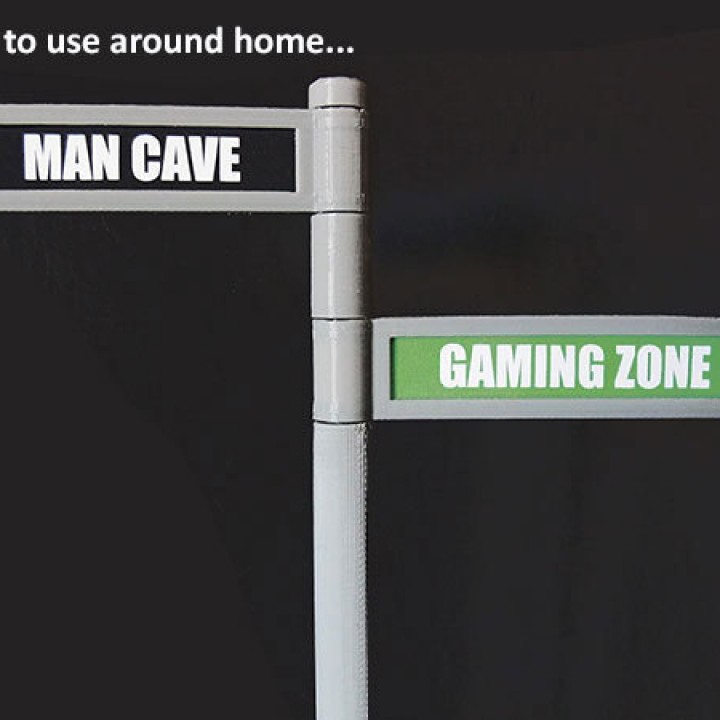
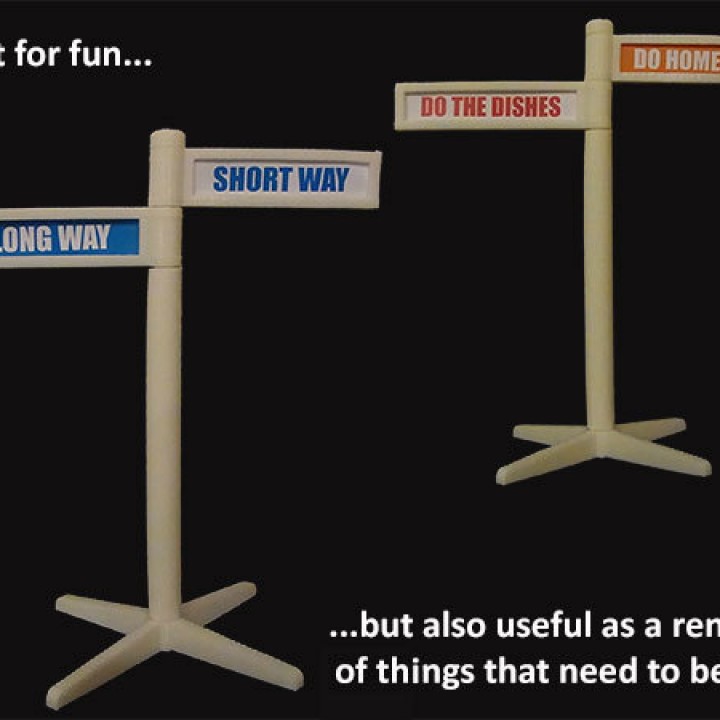
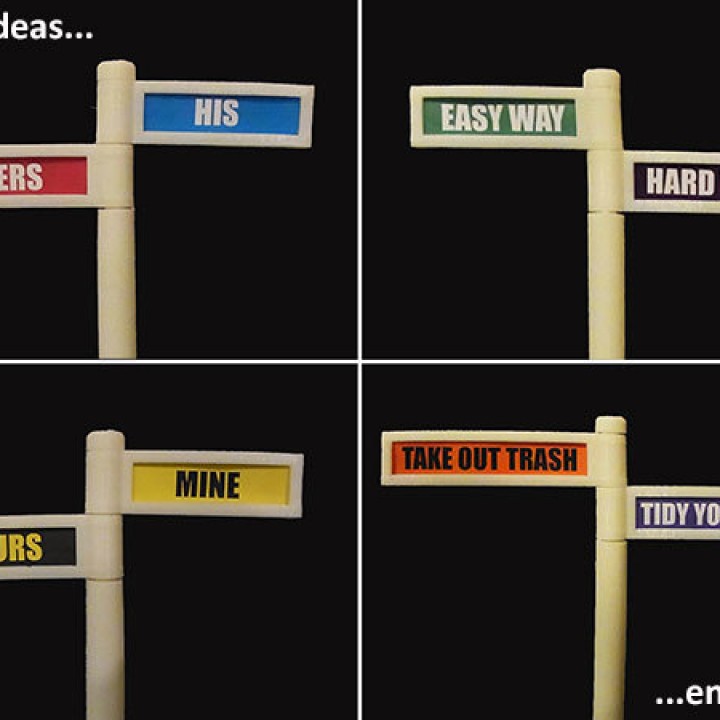
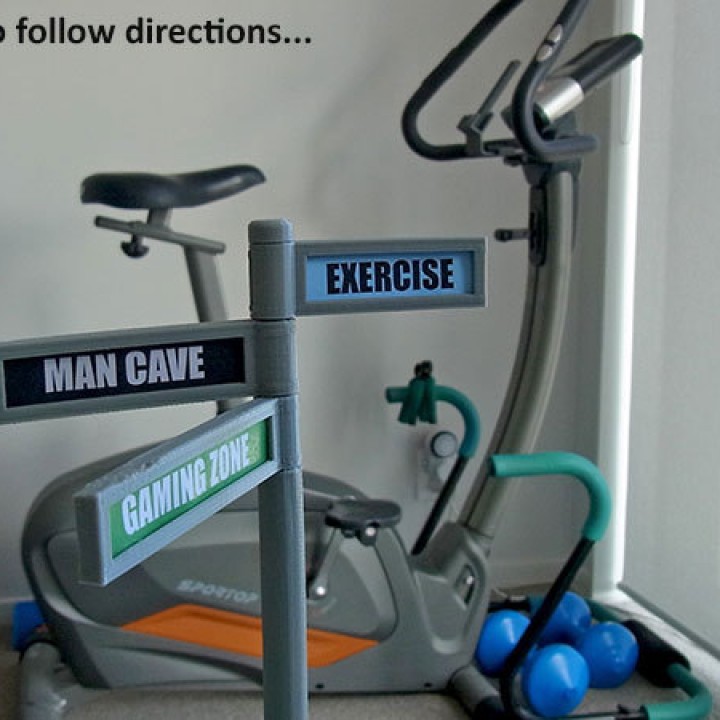
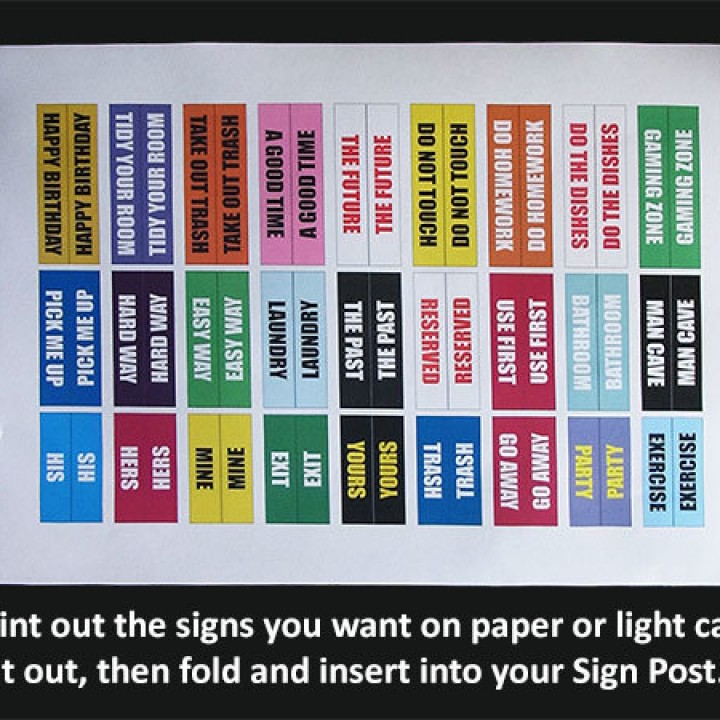
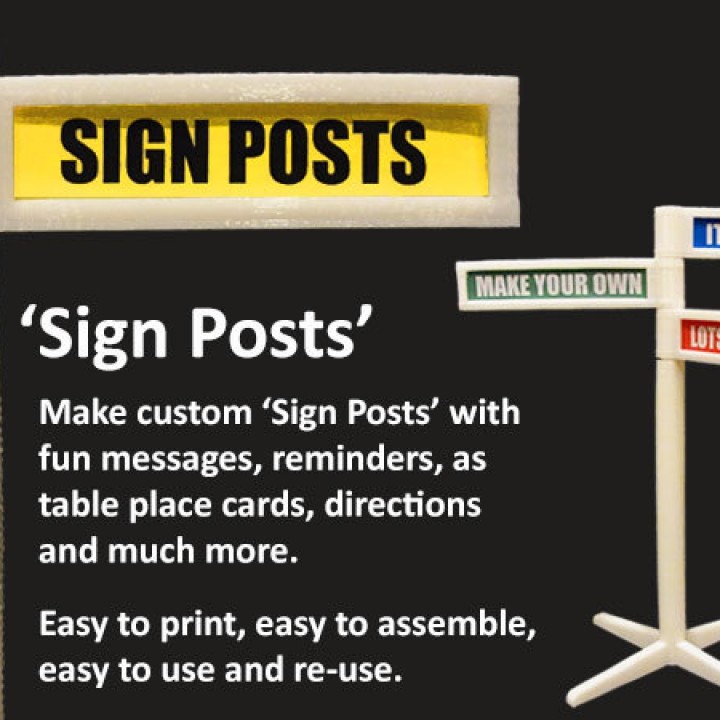
'Sign Posts' can be used in all sorts of fun and practical ways....
- Fun messages
- Not so subtle hints...
- Instructions
- Messages
- Directions (for house guests etc.)
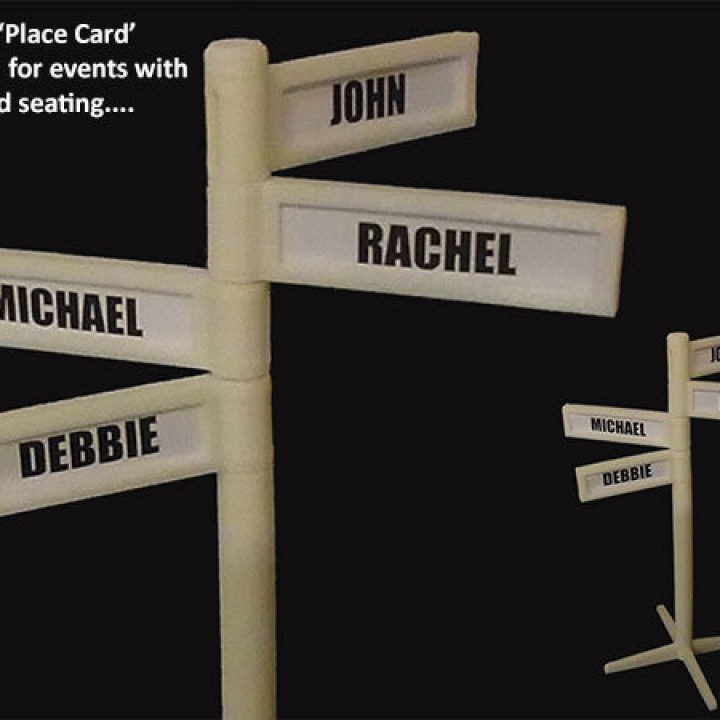
- Table place cards (for events)
- Whatever else you can imagine!
Easy to print, easy to assemble and custom configurable. Apart from 3D printing the necessary parts all you need to do is make up your signs to insert. These look great printed on a laser / inkjet printer but can also be hand written.
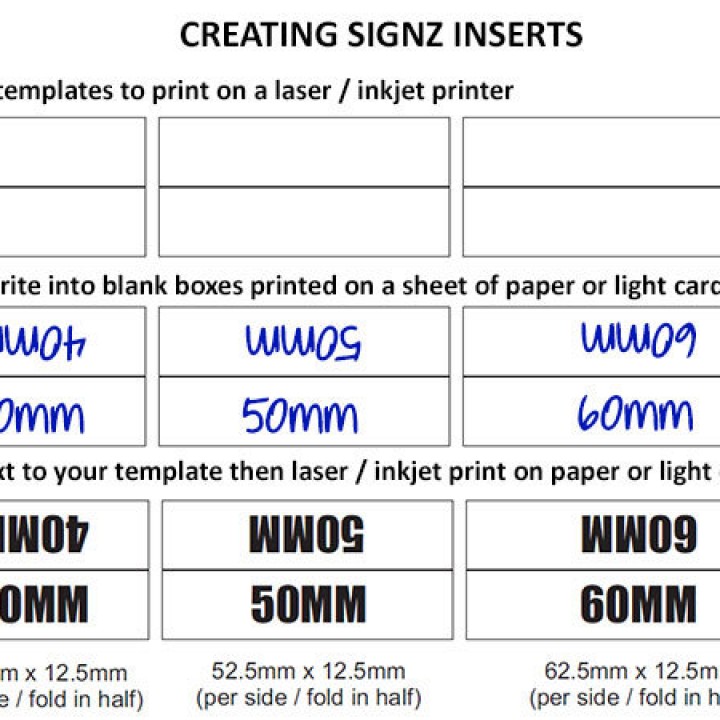
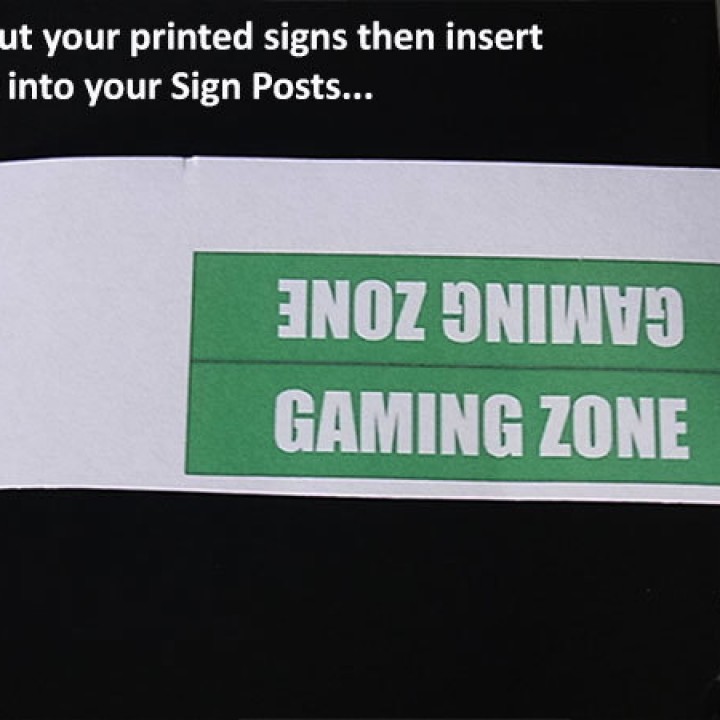
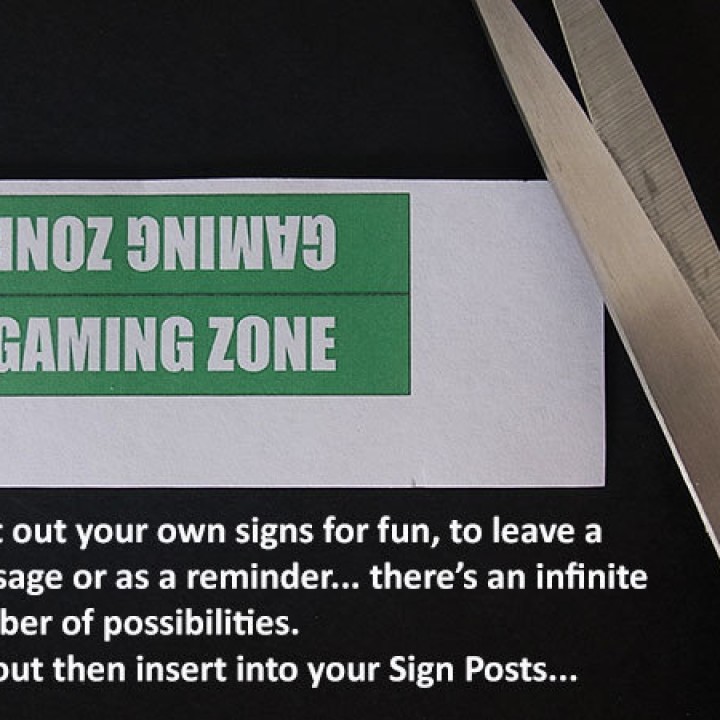
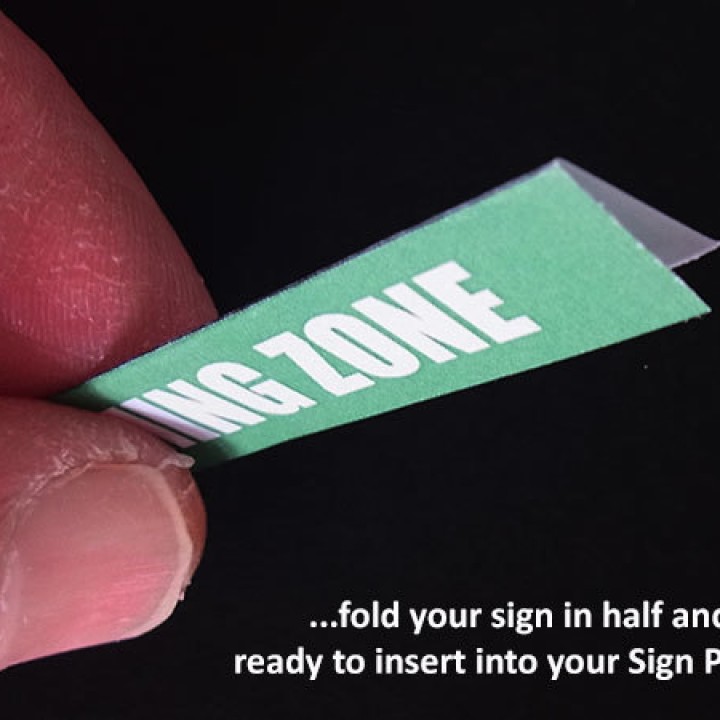
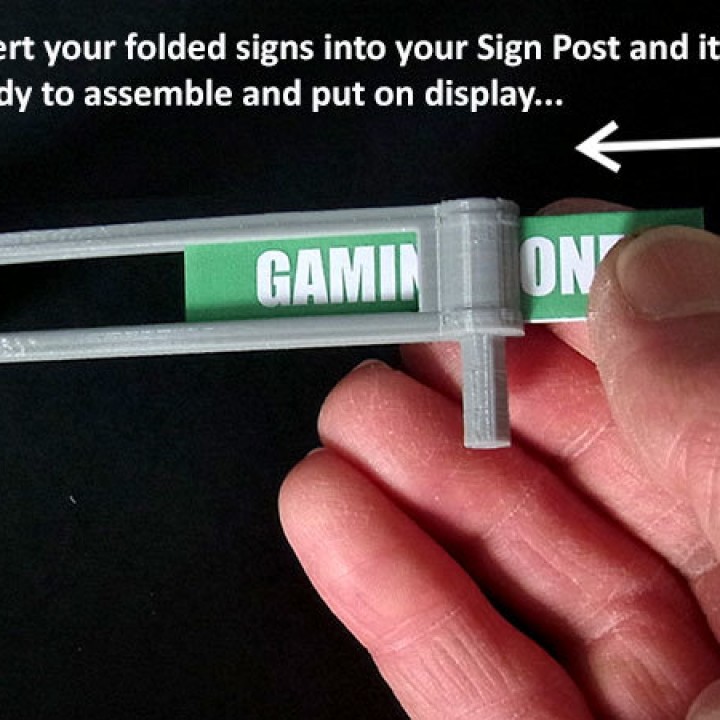
Making up you signs is easy as well (refer to the images for sizes). Print out your signs, as shown in the template image, cut out, fold in half then insert into your sign holder... easy as that.
Your own unique custom signs on demand!
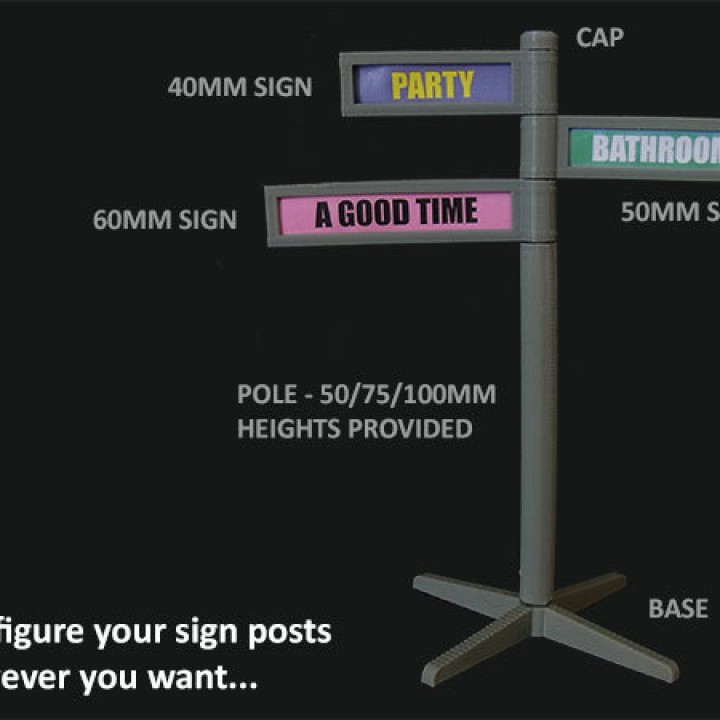
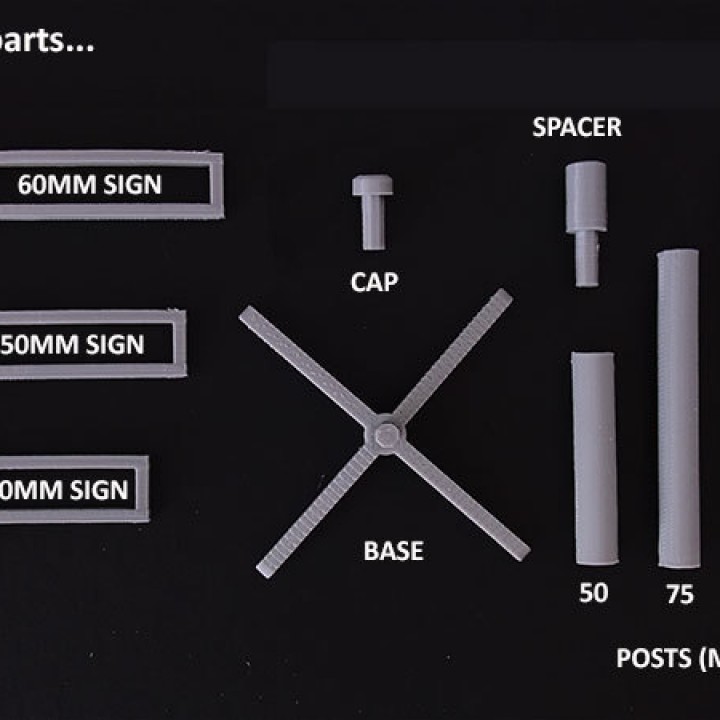
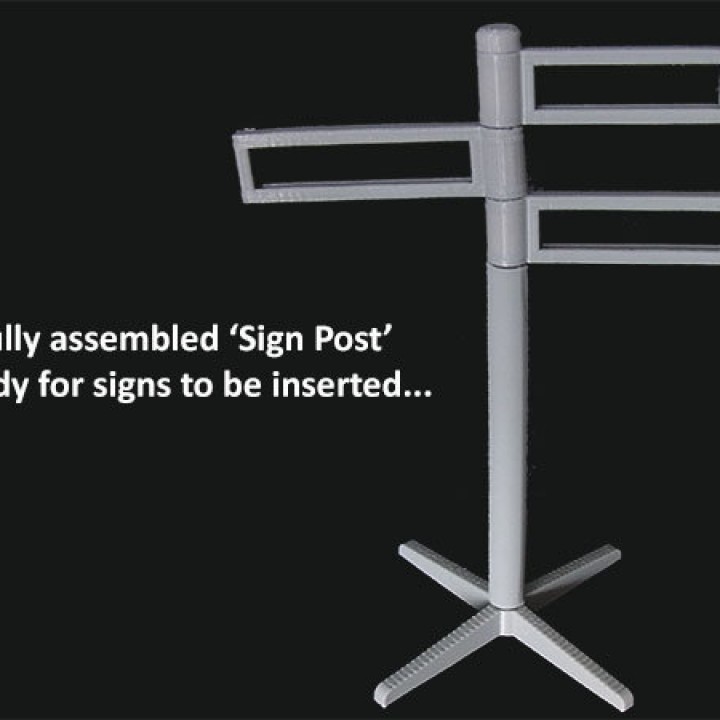
The parts included are:
Base - to keep your sign post standing
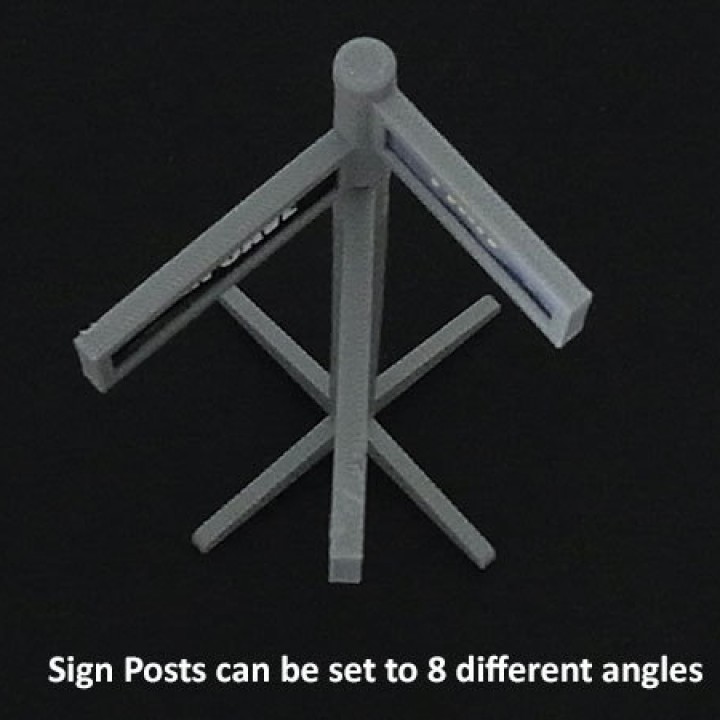
Posts - three lengths are provided (50 / 75 / 100mm)... use shorter if you plan to have lots of signs on top.
Signs - to insert your signs (printed on paper or card) into. Three lengths are provided (40 / 50 / 60mm)
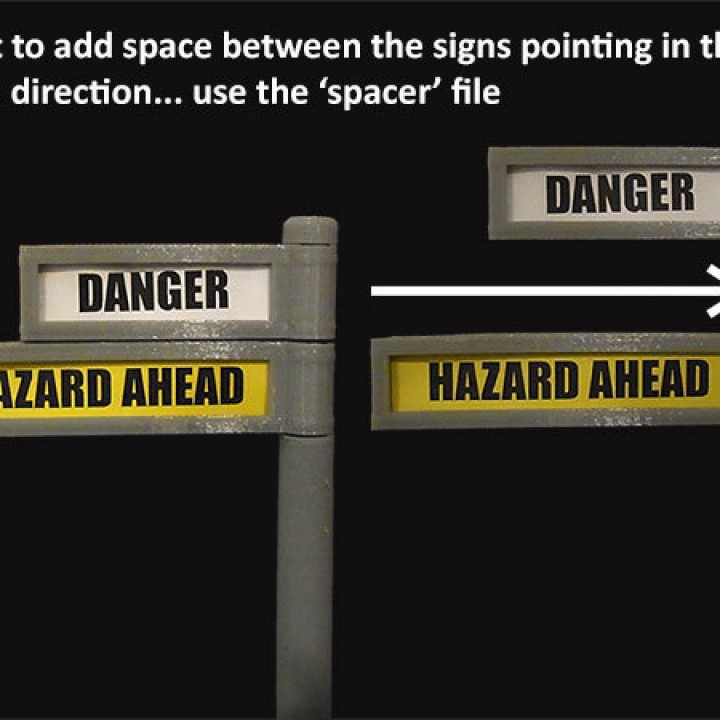
Spacer - use if you want to add space in between signs. Helps if you want multiple signs pointing in the same direction.
Cap - seals off the top of your Sign Post for a finished look.
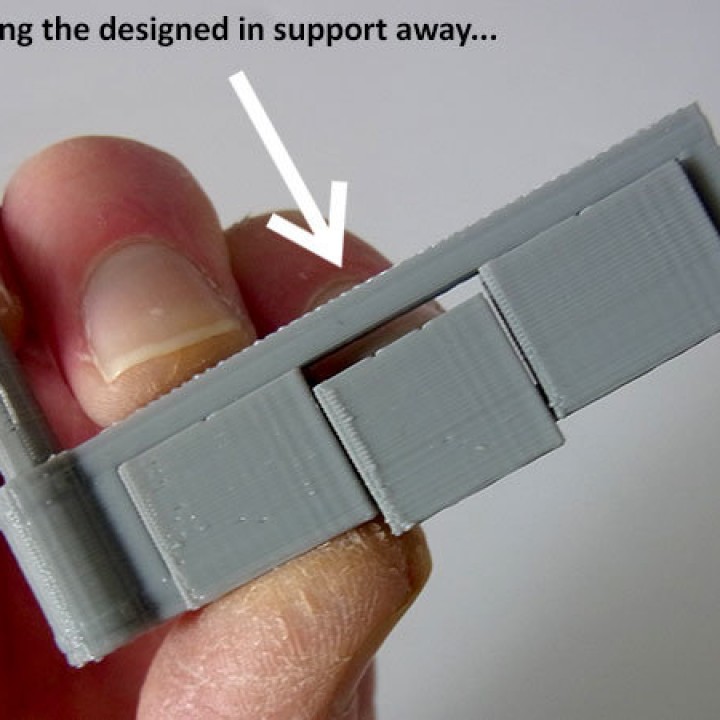
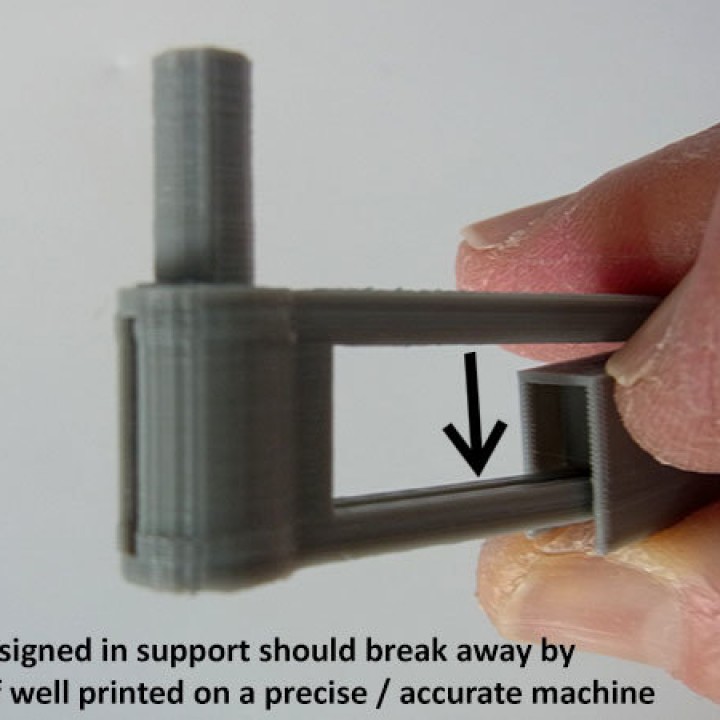
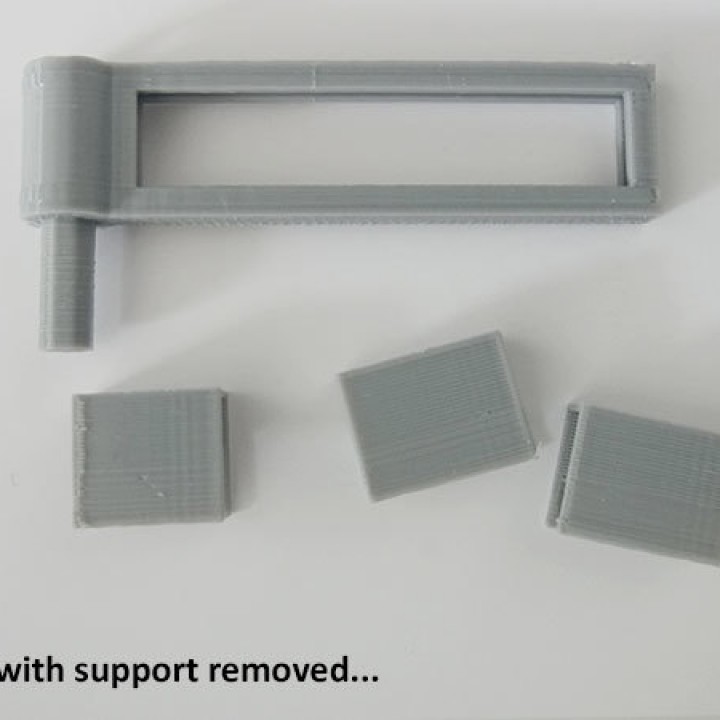
Please refer to the images and instructions provided for additional information (particularly around support removal). And, because there are "endless" possibilities for these signs... post images showing them in use. Have fun with them...
Note: If you like this check out the rest of my fun and practical designs.


Printer brand : MakerBot
Printer : MakerBot Replicator+
Rafts : Yes
Supports : No
Resolution : Standard / 0.20mm
Infill : PLA / 2 Shells / 20% or more infill recommended
Notes : Do not select any support as the necessary support has been designed in. Well sliced files printed on a precise / accurate machines should result in support that will snap away relatively easily (usually by hand). Raft is recommended to ensure good build plate adhesion due to the minimal contact surfaces of some parts. Please refer to the images for additional information.
Post printing
Assembly is quick and easy...
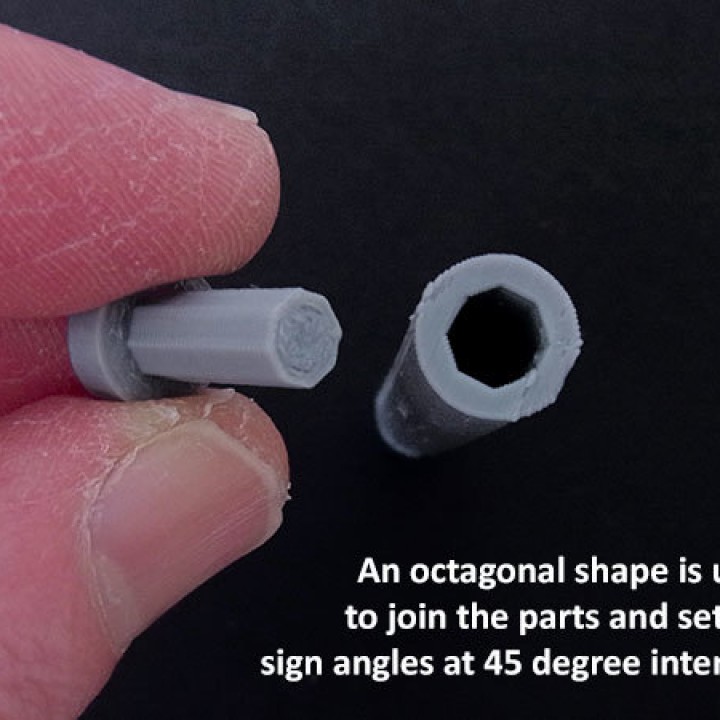
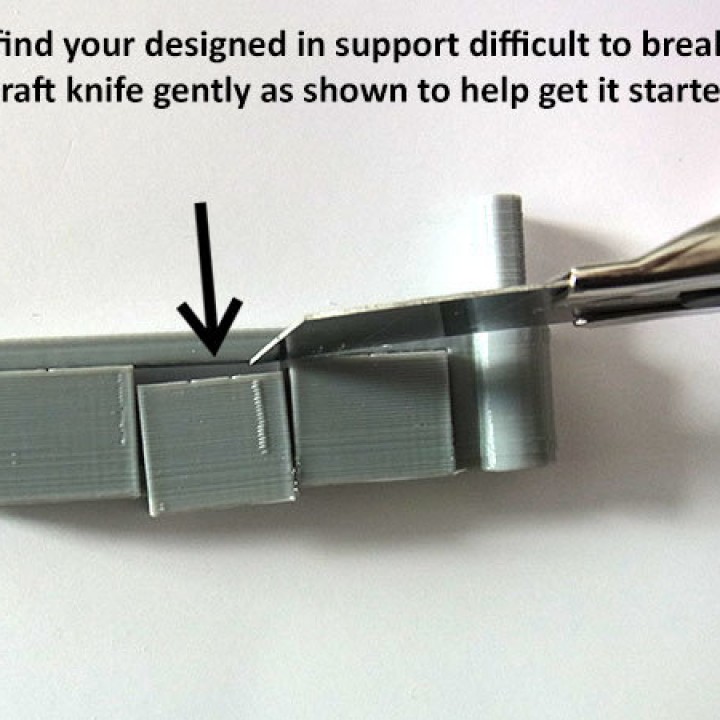
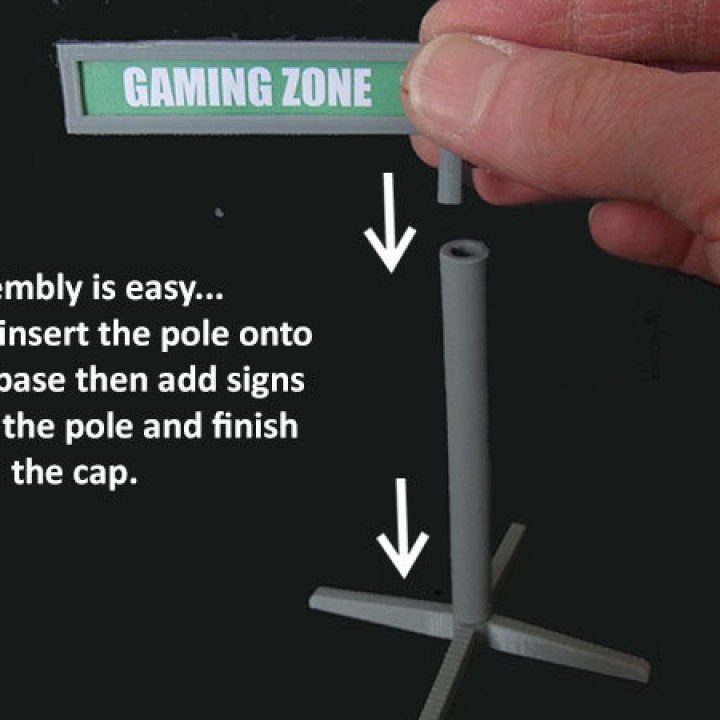
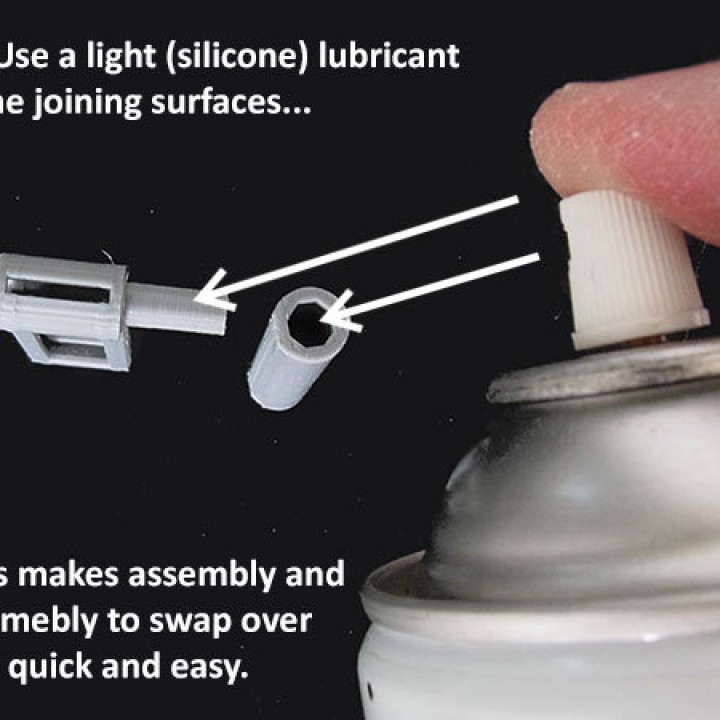
Firstly remove the designed in support (Refer to the images for additional information). Well sliced files printed on a precise / accurate machine should result in support that can be snapped away by hand. However, if your support is slightly fused using a craft knife gently should clear it away fairly easily. Next check all the intersecting parts are clean of any imperfections so they will slide together snugly. Using a light silicone spray will help with slicing the parts in / out (as dry layered PLA can cause resistance between parts). Final assembly time... Make up the signs (names / messages / instructions) you want to use and insert them into your signs(Refer to the images provided). Then just assemble everything... fit the pole to the base, add a sign set to a first angle (octagonal positioning), add another sign set to the next angle required etc. etc. Lastly, fit the cap to top your 'Sign Post' off. Easy to do, useful... and fun!
| Date published | 05/09/2017 |
| Technology | FDM |
| Complexity | Very Easy |
| Support Free | YES |