Pokeball Switch Cartridges Holder

Remixed by
Copyright Claim

Pokeball Switch Cartridges Holder

Remixed by
Boost
53
95
23

Print Profile(3)

All
P1S
P1P
X1
X1 Carbon
X1E
A1

RED DOWN: 0.2mm layer, 2 walls, 20% infill
Designer
7.6 h
3 plates
4.6(18)

VERTICAL: 0.2mm layer, 2 walls, 20% infill
Designer
7.6 h
3 plates

RED UP: 0.2mm layer, 2 walls, 20% infill
Designer
7.5 h
3 plates
3.0(1)

Boost
53
95
23
1
178
207
Released

Description

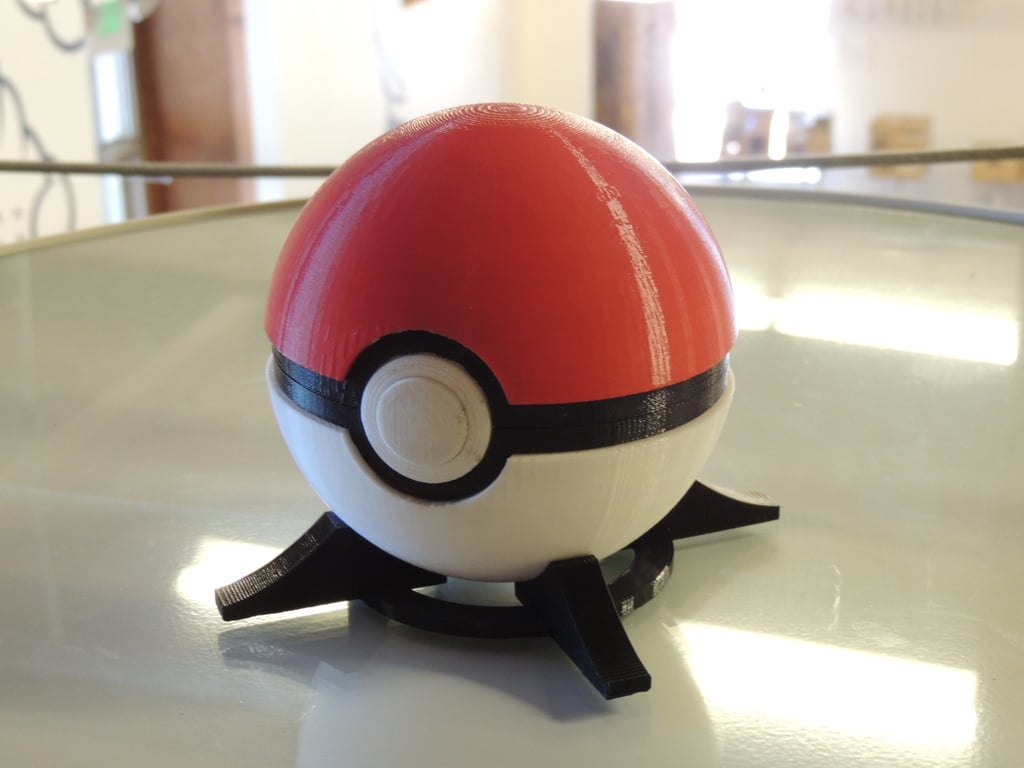
I wanted a functional Pokeball to store my Switch cartridges, so I made some adjustments. This Pokeball stores 10 cartridges but can be upgraded to store up to 11 or maybe even 12 if you want to.


Materials Needed:

     Super Glue;

     Toothpick or a ~4cm/~1.5in piece of filament;

     Small Spring (see your ballpoint pens);

     White PLA;

     Black PLA;

     Red PLA.


Print Instructions:

     20% infill

     Supports Yes

     Print the lids upright or ‘flat’ on the bed, or choose to print it vertically as someone successfully did in the comments section.


Before starting to put everything together, make sure all the parts fit together and function perfectly, if needed sand them down a bit.


Print everything and start putting them together like this:

     1st - Slot the Ring on the Button;

     2nd - Insert the Ring and Button on the Bottom Loop;

     3rd - On the Button back there is a tiny hole, insert a small spring (like one of a ballpoint pen) and slide it underneath the Bottom Loop;

     4th - Put the Cartridge Holder inside the Bottom White Lid, you can glue the sides of it so it doesn't wiggle but this is opcional as it doesn't move much;

     5th - Super Glue the Bottom Loop and the Bottom White;

     6th - Now insert the Top Loop on the Ring and Super Glue the Bottom and the Top Loop, this maintains the small spring in place;

     7th - Put the Top Red Lid on top of the Top Loop and slide a piece of filament or even a toothpick between the small holes on the two pieces back and cut out what sticks out, also you can super glue the filament/toothpick in place but be careful to not glue the Top Red Lid;

     8th - Put you Pokeball on its stand, you can always glue it to the stand if you like it better that way.

     9th - Enjoy!

Comment & Rating (23)

Please fill in your opinion
(0/5000)

Print Profile
RED DOWN: 0.2mm layer, 2 walls, 20% infill
Ein wunderschönes Model.
The designer has replied
1
Reply
Vielen Dank, ich hoffe, Sie genießen es genauso sehr wie ich! Hope I wrote that right :)
0
Reply
Print Profile
RED DOWN: 0.2mm layer, 2 walls, 20% infill
Printed the red top piece right side up with supports for best results.
The designer has replied
1
Reply
That came out very nicely! Thanks a lot for your feedback! I just added a new printing profile with tree supports and where the red lid is slightly vertical, hope this helps future prints and it is easier to clean it up. If you want you can always share your printing profile of this model so other people could try printing it like you did. Thanks a lot for your feedback!
(Edited)
0
Reply
Print Profile
RED DOWN: 0.2mm layer, 2 walls, 20% infill
Genial!!
(Edited)
0
Reply
Printed it red down, did not wanna risk it with vertical, but i guess the inside of red part would be cleaner and easier to remove supports. Maybe other time, this was a birthday present, kinda wanna print one for me also :) Turned out nicely anyway, thanks for the model.
0
Reply
Print Profile
RED DOWN: 0.2mm layer, 2 walls, 20% infill
It’s great. Everything fits perfectly. My son loves it. The inside has the part of the locker a little bit bigger and there’s a gap, but I think I can use it to put another game card. Thanks.
0
Reply
Print Profile
RED DOWN: 0.2mm layer, 2 walls, 20% infill
Nice print.
(Edited)
0
Reply
Print Profile
RED DOWN: 0.2mm layer, 2 walls, 20% infill
Overall, well done print orientations. However, the orientation of the top of the Pokeball inevitably had severe issues since it is upside down. I printed both orientations with supports and the best choice is entirely dependent on which part of the print you want to spend the most time sanding down and cleaning up.
The designer has replied
1
Reply
Well, I initially printed it upside down so the sanding marks could be hidden inside. I added a new printing profile with tree supports and a slightly vertical red lid, hope this helps cleaning up a bit. Thanks for the feedback and I hope you enjoy the print!
(Edited)
0
Reply
Print Profile
RED DOWN: 0.2mm layer, 2 walls, 20% infill
Great model
0
Reply
Print Profile
RED DOWN: 0.2mm layer, 2 walls, 20% infill
printed well, wished it could be a little smoother on the white parts
0
Reply
Print Profile
RED DOWN: 0.2mm layer, 2 walls, 20% infill
the bottom kind of spaghettied but turned out awesome
0
Reply