X1C/P1s Magnetic Rear Vent Hose Adapter
X1C/P1s Magnetic Rear Vent Hose Adapter


Print Profile(3)
Description
NEWS
In order to expand upon my hose adapter design, I created a generic version. This version has a base plate that can be mounted via wood screws or M3 bolts to various surfaces. This affords the ability to attach to more things, like a resin printer which I'm currently using it for. The parts work with each other, so you can use your existing parts to attach to the new base. The new design can be found at: https://makerworld.com/en/models/374008#profileId-273980.
Update 2/19/24
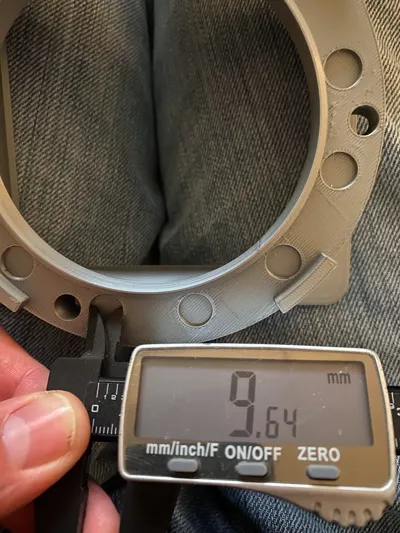
Some users have experienced issues with fitting the magnets in the holes. The design is meant to have the magnets press fit into the holes, so there's some expectation that they are a bit tight. Since the tolerances are a bit tight and there can be variations in the printed result, not to mention any size variances with the magnets, I've included a test print. I suggest printing out the Magnet_fit_test.stl file to test fit magnets before printing out the larger parts so you don't waste the filament. Make sure to test with the filament you plan on using for your final part. If you find that the magnets aren't fitting as expected, you can tweak your X-Y hole compensation in Bambu Studio/Orca Slicer. Make small adjustments up or down as required.

Update 1/18/24
After reviewing user feedback on the parts, I've made changes to the 3 inch and 4 inch adapters.
- 3 inch adapter
- Rounded the corners of the base plate and central body to improve print reliability and reduce warping with ASA/ABS
- Increased the thickness of the model where the middle section meets the base plate to increase structural integrity and improve reliability while printing with ASA/ABS
- Increased the height by 10mm to increase print reliability with overhangs by reducing the steepness of the internal angles. This matches the height of the 4 inch adapter
- 4 inch adapter
- Rounded the corners of the base plate and central body to improve print reliability and reduce warping with ASA/ABS
- Increased the thickness of the model where the middle section meets the base plate to increase structural integrity and improve reliability while printing with ASA/ABS
- Redesigned the placement of the magnets to fix an issue where you could only attach the hose in two directions instead of 4. This increased the amount of magnets required by 2.
** EDIT **
Per request, I added a 4 inch adapter. Due to the size of the hose, I had to make quite a bit of modifications to the model in order to be able to mount to the printer. To be able mount the base to the printer I had to add holes through the plate that holds the magnets in order to pass a wrench through to tighten the screws. To make this feasible, I had to adjust the amount of magnets and adjust the angle of the guides. Kind of ruins the symmetry that I had going, but it works.

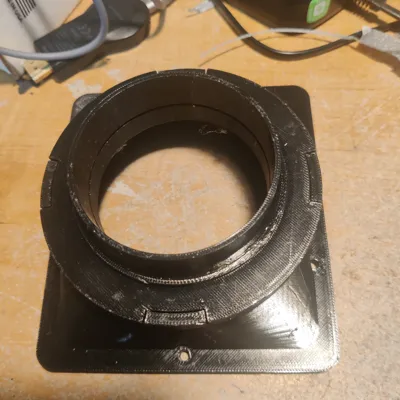
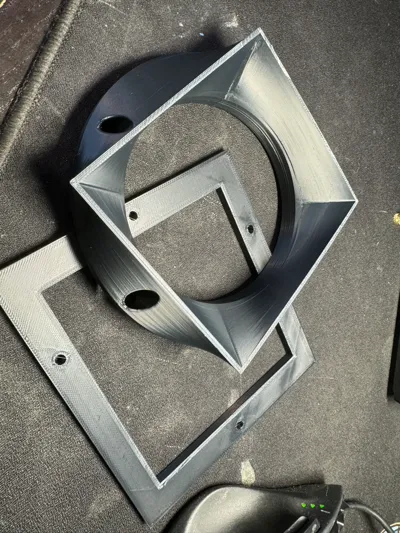
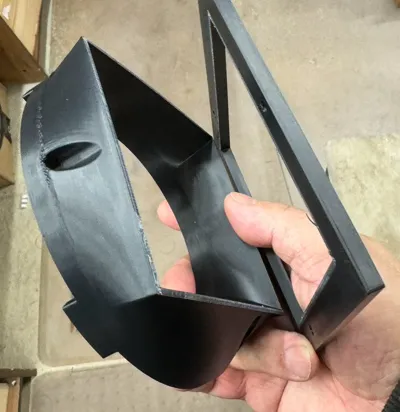
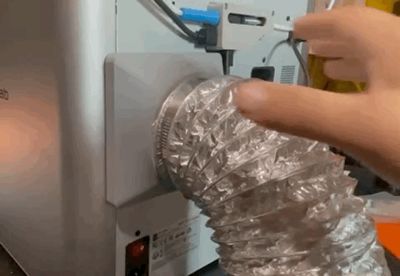
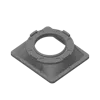
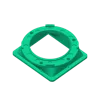
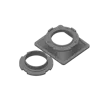
Rear vent hose adapter for Bambu Labs X1C/P1S printers.
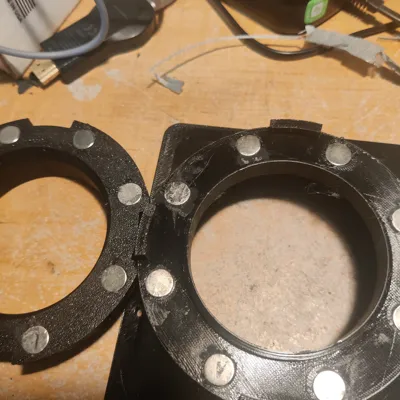
I designed this exhaust vent adapter so that I could attach a 3 inch hose to my X1C in order to vent outside. I wanted to have the base permanently attached to the back of the printer, while the hose could attach/detach via magnets. This gives me the flexiblity to easy remove the hose for maintenance or move to another printer/device. The 4 guides are there to provide stability and to help guide the magnets together for a strong attachment. I also wanted to be able to close off the vent hose when not in use, so I created a cover that's also attached with magnets.
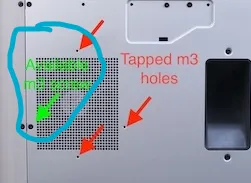
In order to attach the base, I was able to utilize the 3 existing holes and the 1 available screw that are around the exhaust fan. I cut threads in the holes with an m3 tap, which is the same size as the other screws on the printer. You may be able to use small machines crews if you are unable to thread the holes yourself.

The magnets are 10x2mm cylinder neodymium magnets. I made the parts so that the magnets could be press/friction fit into the holes. The hose adapter magnet holes are a bit deeper to account for the loss of depth due to bridging. You could glue in the magnets of necessary. The magnets I sourced from Amazon weren't exactly as advertised, but measured 10x1.67mm which I designed the holes to fit.
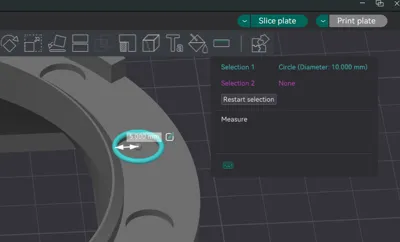
The hose adapter diameter is a bit undersized on purpose. It's easier to fit and clamp the hose onto the smaller diameter, I hate fighting to clamp on vent hoses.
I've printed the parts using PLA, which is probably not the best choice for long term. I may reprint later on using ASA, but so far the PLA parts have held up okay. The base and hose adapter do not need supports to print. The hose cover does unfortunately need supports due to the large overhang/bridging requirements.
Parts:
- 10x2mm (10x1.67mm) magnets: https://a.co/d/aY7KSEY
- Black 3 inch vent hose: https://a.co/d/acagw97
Comment & Rating (56)