Remixed Desk-Mounted Guitar Rest
Remixed Desk-Mounted Guitar Rest


Print Profile(1)

Description
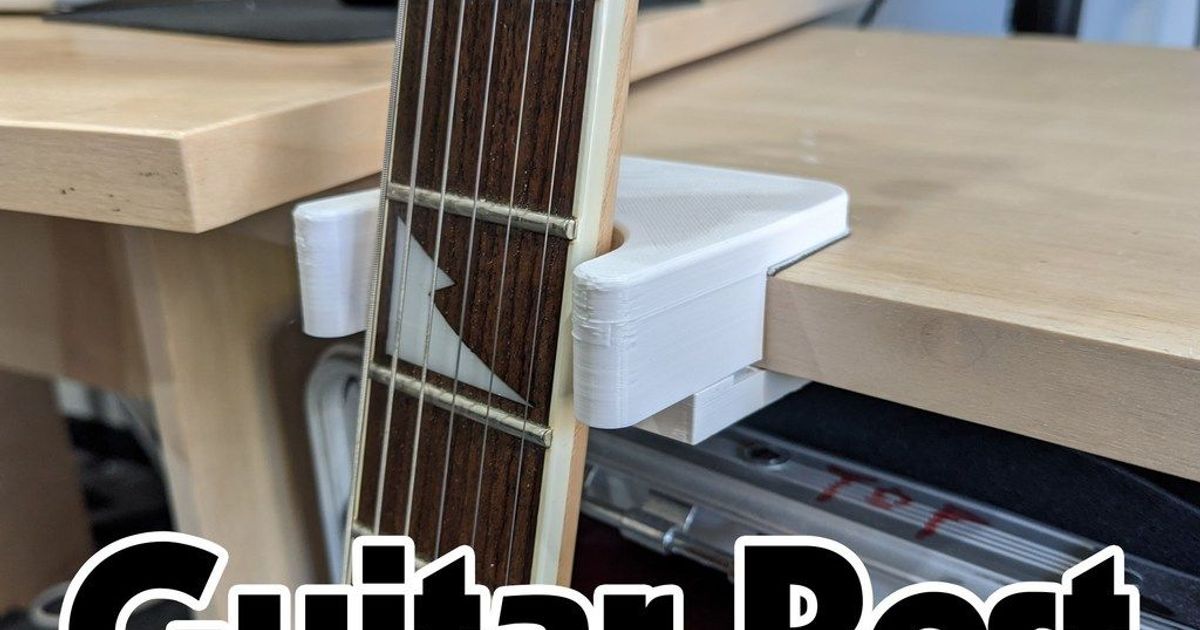
A really helpful tool for those who use a guitar at their desk, and want a hassle-free way to put it down and pick it up. Even with a proper stand/holder/mount nearby, this can be a very useful addition to your music setup (source: my musically-inclined partner this was for).
Requirements
To complete the build you will need some adhesive, as well as a grip material to create the desk-friendly friction-fit. I used what I had on hand, which was Gorilla Super Glue Gel and pieces cut to size from This Mousepad (yes, really).
Whatever you use should be the right surface and thickness/squishability to allow for a strong enough hold that the rest won't move unintentionally. The slot in the provided STL should measure 22.2mm. You can change this slot based on the grip you choose to use and the surface you want to mount it to.
Take care, as you don't want to harm your precious guitar(s)!
Printing It
If you plan to use a different grip material and/or a different surface to mount this to than I did, I HIGHLY recommend printing out a small part of the model like I did and using it to verify if it is a good fit first (see the included “…fitment test” file). Even if you are using the same mouse pad and drawer unit as me, it's probably not a bad idea. Even if it seems good on a small scale, it will likely fit much tighter when you add more gripped surface area for the real print. So keep that in mind! See photo:

Once you have your model the way you want it (or are just using the included one as-is), there are a couple of things to be aware of:
- You will need supports for the slot if you print it as it is oriented (which I did). You may be able to print it on its side without them, but I have not tested this or modified the actual guitar rest part with that in mind. With the regular orientation, you get the benefits of horizontal layer lines and a build plate surface that is on the bottom (I'd rather not see it).
- You should probably use tree supports as I did for ease of removal and possible savings of print time/material used. This was my first time ever using tree supports, and let me just say… wow. Very cool and effective (I'm using Cura btw). They snapped right off quite nicely with needle nose pliers. See photos:


(I generally try not to use support material where I can avoid it. I found it worth the results in this case. Don't forget to recycle your materials if you can! That may simply look like saving it for someone else with the means to do so!)
Finishing It
After printing and removing the supports I simply:
- Cut the pad to the size/shape desired 2 times (remembering it expands outward when compressed by the desk).
- Applied the glue as directed to one side of the print.
- Applied the first pad, being careful not to smudge glue where I didn't want it. (I used some tweezers for this as the slot is pretty narrow in my case)
- Repeated steps 2 and 3 for the other pad.
- Took more photos for you folks! See below…
- REALIZED THE FITMENT WASN'T IDEAL FOR THE INTENDED DESK BUT THAT IT HAPPENED TO BE PERFECT FOR THE ALEX UNIT NEXT TO IT AND THAT IT ACTUALLY IS A BETTER SPOT FOR IT ANYWAY??? PROFIT??? LOL!


Note
The model shown wasn't printed with any special quality settings. Honestly, I was too afraid it would come out poorly (between new filament, the fitment being uncertain, and never having used tree supports before this) that I did a pretty basic and fast print. If I were to make another, I'd certainly amp up the quality (mainly a lower layer height, higher wall counts, possibly higher infill…). But it works great and it didn't seem worth a reprint so here it is, as-is! Enjoy.
Closing
I hope you find use in this model / guide!
Thank you very much Tony Bullard for sharing your original design!