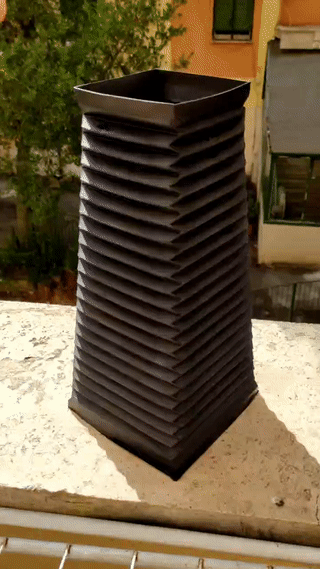
Vega 4x5 View Camera
Vega 4x5 View Camera


Print Profile(0)
No Print Profile yet. Add one to earn points.
Description
This is a remix of The Standard 4x5 from Standard Cameras (https://standardcameras.com) and has been shared with permission from the owner Drew Nikonowicz (https://nikonowicz.com). The bellows and ground glass needed for the camera can be purchased directly from them!
I was building the Standard 4x5 when ideas on how to improve the desing started to flow. My goals were to add features, simplify assembly and use more widely avaliable materials. I called this redesign Vega 4x5, in honor of the first star ever photographed. The project file is open and avaliable in .f3d format as i want to make it easy for everyone to modify and customize anything about the camera, i look forward to the community contributions, let's keep film photography alive!
Modifications List:
• Geometry was mostly simplified as i liked a cleaner look.
• 21 metric screws instead of 66 imperial screws of 9 different lenghts/types.
• Printed part count was reduced from 24 down to 14.
• Better tolerances for the metric rail less play and smoother operation of the sliders.
• All files are in the best orientation for printing no need for supports.
• Tripod mounting via heat-set insert instead of a tee-nut which seems impossible to find here in europe.
• Bigger knobs with a new pattern i found it difficult to tighten the old ones and to keep the files at a minimum i used the same size of knob for all of the camera.
• New printed forks allow for more movements: the rear standard now also has rise, fall and tilt, the last of which was impossible to get with a double fork arrangment due to the obstruction of the darkslide (when in landscape orientation).
• Forks simply click in the zero position thanks to recesses in the tracks, instead of having to rely on visual marks.
• Front standard is now printed in one piece for an easier assembly
• New film holder clips allow for changing film orientation (portrait/landscape) while the rear standard is tilted
• Simpler mounting of the standards via 2 bolts.
• Easier bellows swapping done by loosening 4 screws at the top of the standards.
• Rear standard overhang is now 55 degrees as it was difficult printing the original part without sagging.
• Spirit levels on both standards for more precise adjustments.
Parts list:
Fasteners:
• 14x M3X10mm Button Head Screw
• 4x M6X30mm Hex Bolt
• 3x M6x50mm Hex Bolt
• 7x M6 Hex Nut
• 1x 20x1/4” heat-set insert
Miscellaneous:
• 1x 25x25x300mm Aluminum Extrusion
• 1x 127x102mm Ground Glass
• Bellows (specifications found here: http://manual.standardcameras.com/0_e/ )
• Large Format Lens
• Linhof Lensboard (STLs provided)
• 2x 10x10x29mm Spirit Level
• About 20cm of 1.5-3mm Elastic Cord
• 2x 25x25mm Endcaps
The bellows and ground glass can be made, but i highly suggest buying them from the folks over at Standard Cameras, as they are a drop in replacement and it's not easy to source all of the required materials, here's their shop: https://standardcameras.com/collections/all. Other sources are for example ebay or http://www.custombellows.co.uk/. It's also possible to 3d print bellows with 95A tpu, either in one piece with a 400mm Z axis printer (Stl and bellows generator are in the files section) or in two parts, see Kiwi Tinkerer design: https://www.printables.com/model/250318-camera-bellows-in-two-parts-with-modified-vega-fra
Note: 3D printed bellows made lightproof with 5 coats of matte black plastidip
Printing:
All the models are provided in the best orientation for printing, no supports needed. The following parts need to be printed in black: Front Standard, Rear Standard, Film Holder. Here are the suggested slicer settings:
• PLA is fine, but PETG or ASA are better for outdoor use
• 0.2 Layer Height
• 3 perimeters
• 30% Cubic Infill
• 5 Top and Bottom Layers
• Supports turned off
With these settings the material cost for the whole camera is about 780g, at standard speed the print time is about 68 hours, no more and no less than the original files. Printing files are provided for the different materials, all settings already adjusted, divided in three batches.
Assembly:
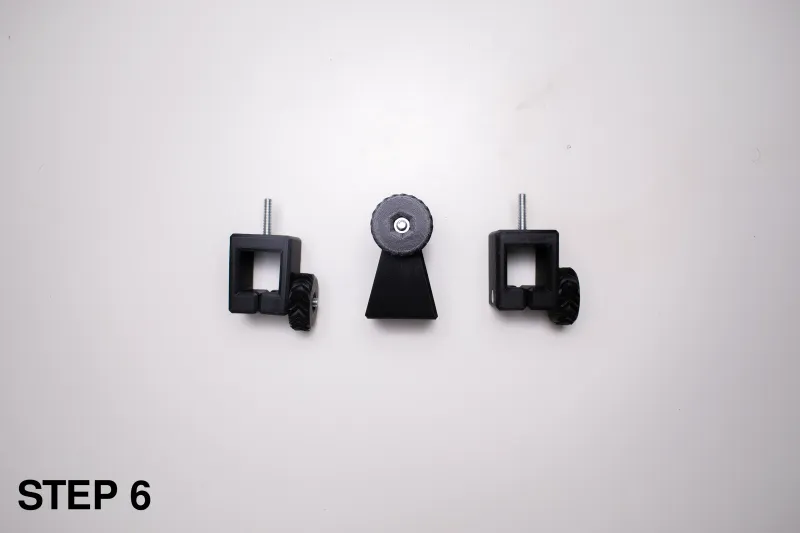
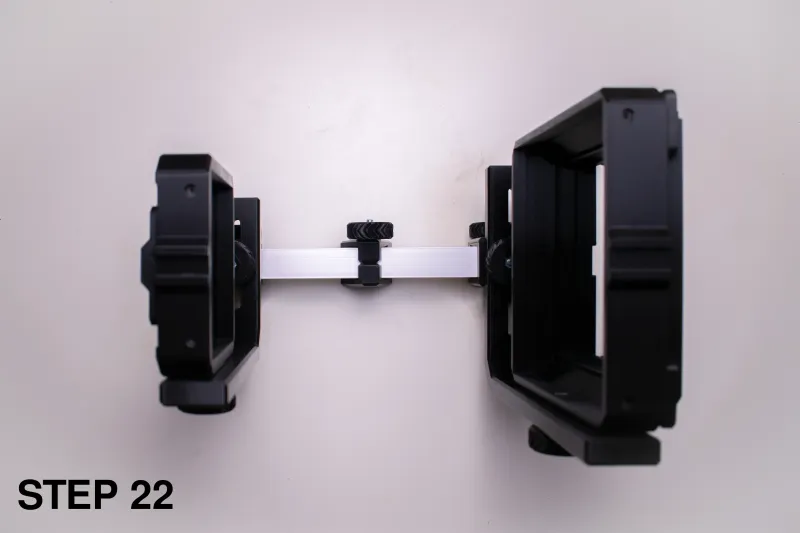
Rail:
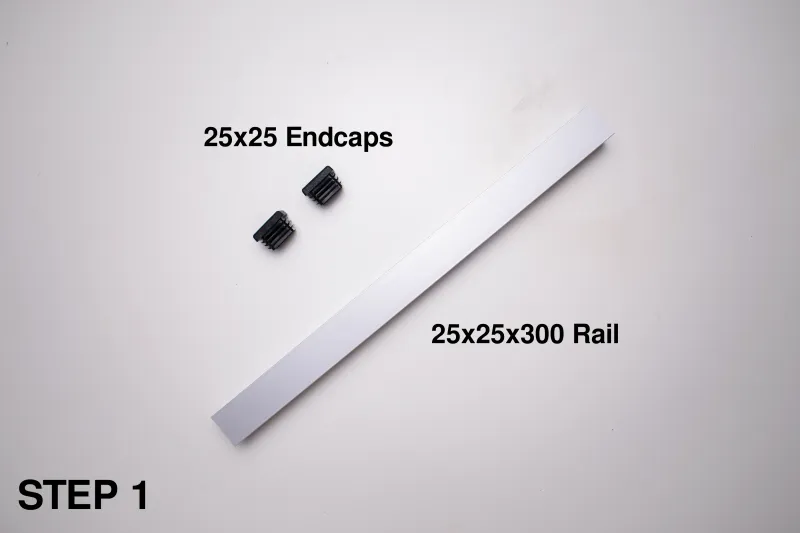
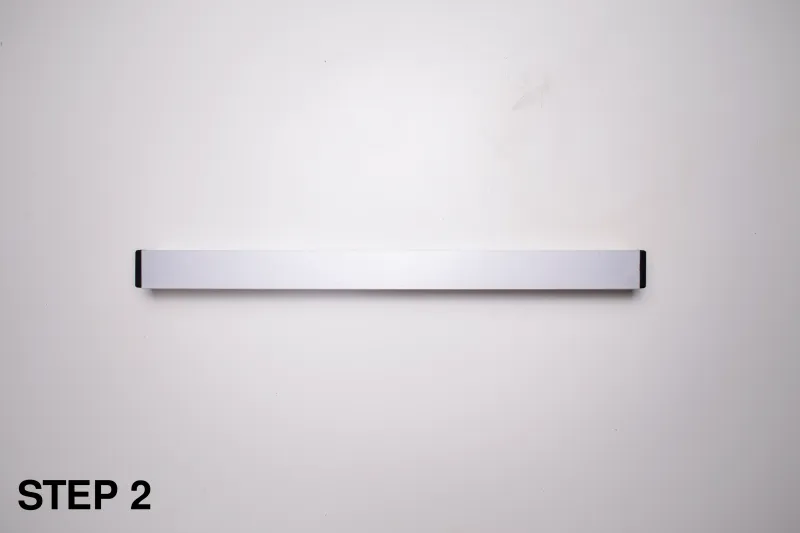
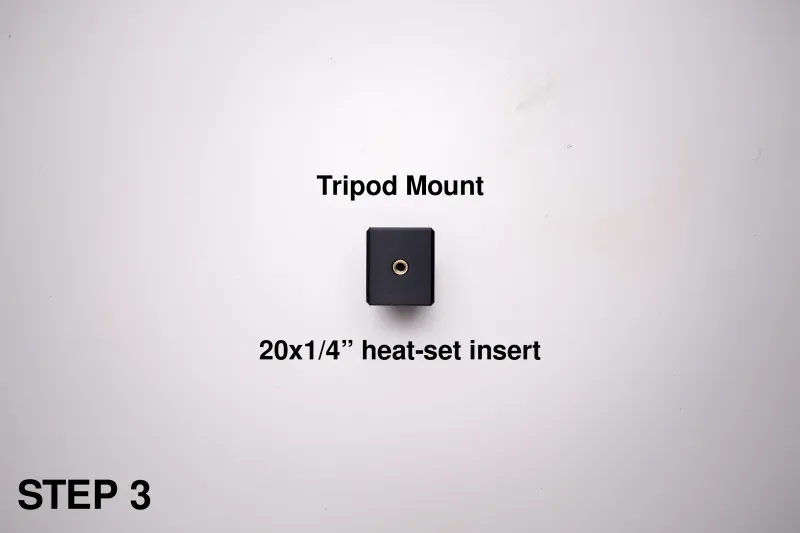
Note: To use the heat-set insert even a cheap soldering iron will work just fine.
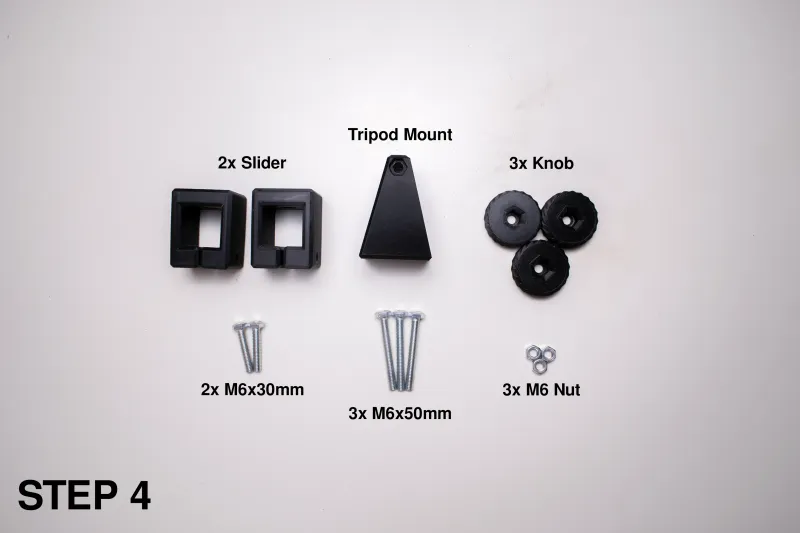
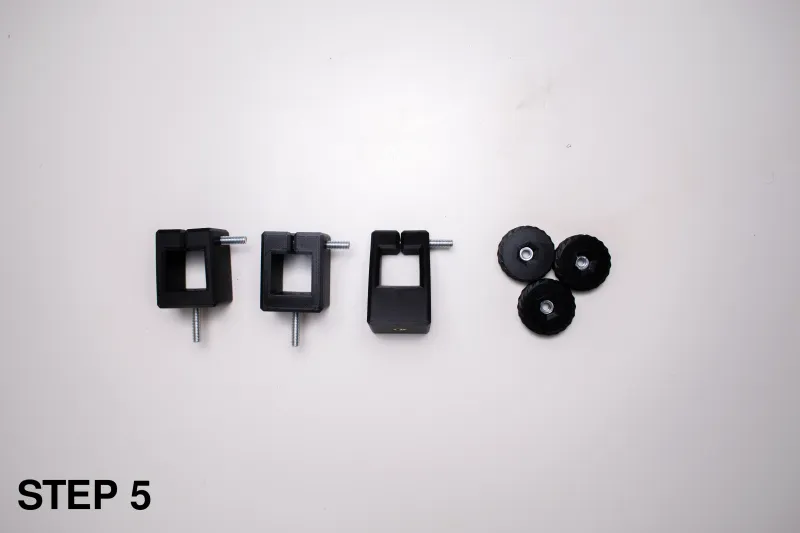
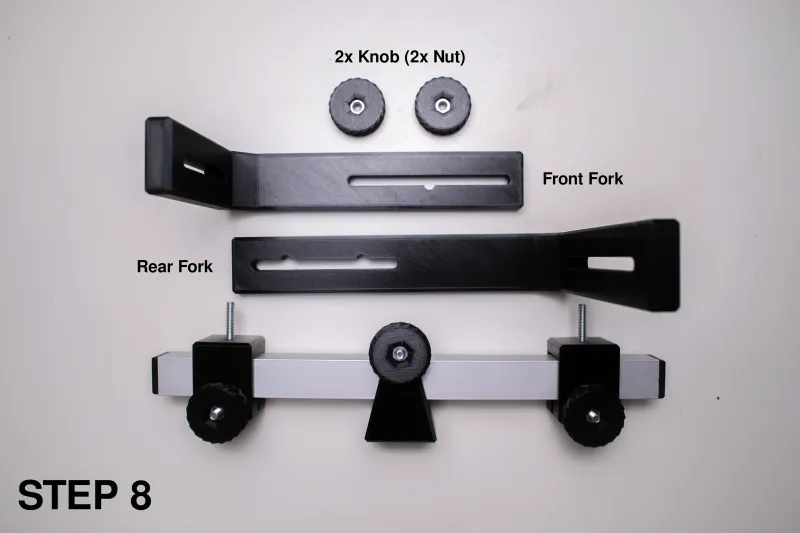
Note: Insert the M6X30mm bolts before the M6X50mm (Sliders).
Note: Make sure that the M6x30mm bolts sit flush and don't tighten the knobs yet.
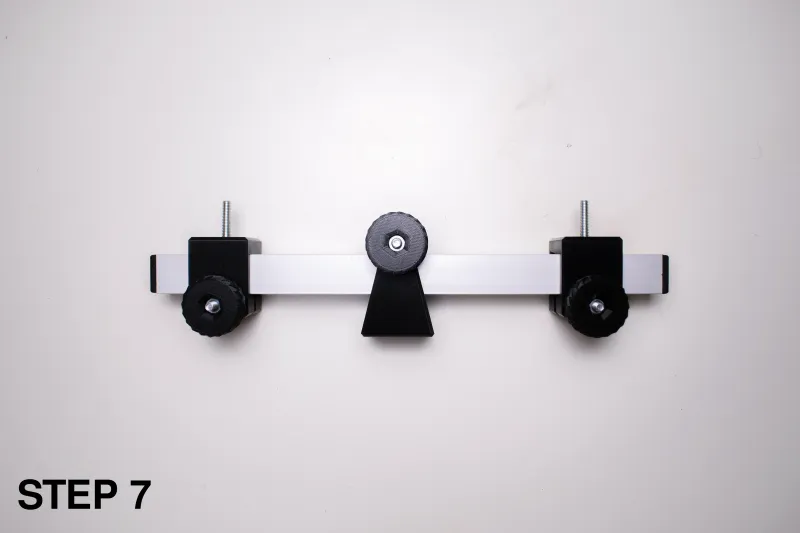
Note: Once you slide the parts on the rail, you can tighten the knobs to lock them in place. All knobs should face the right side of the rail.
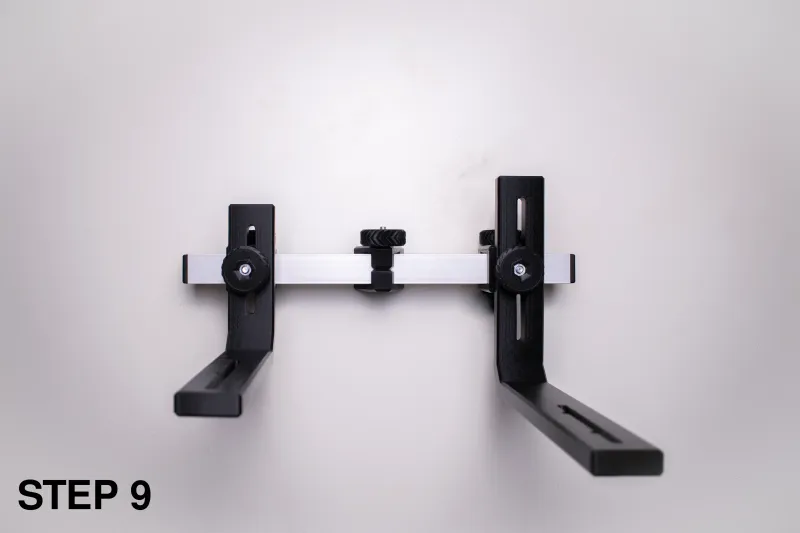
Forks:
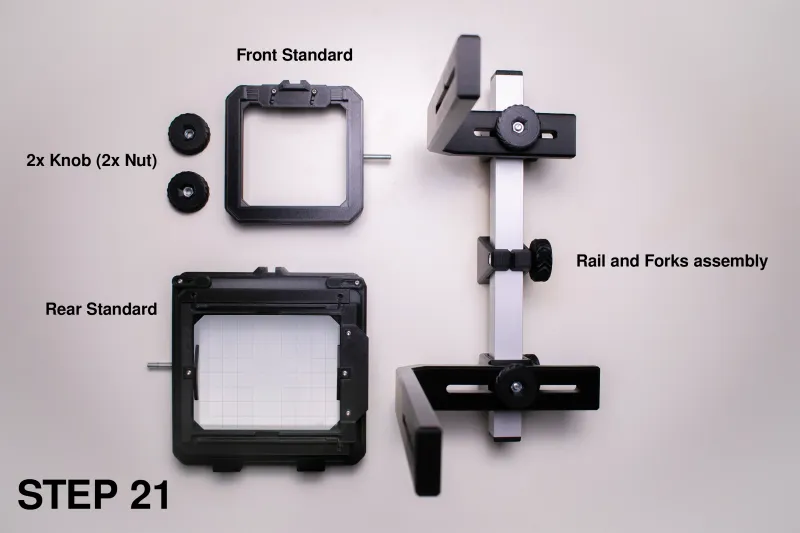
Front Standard:
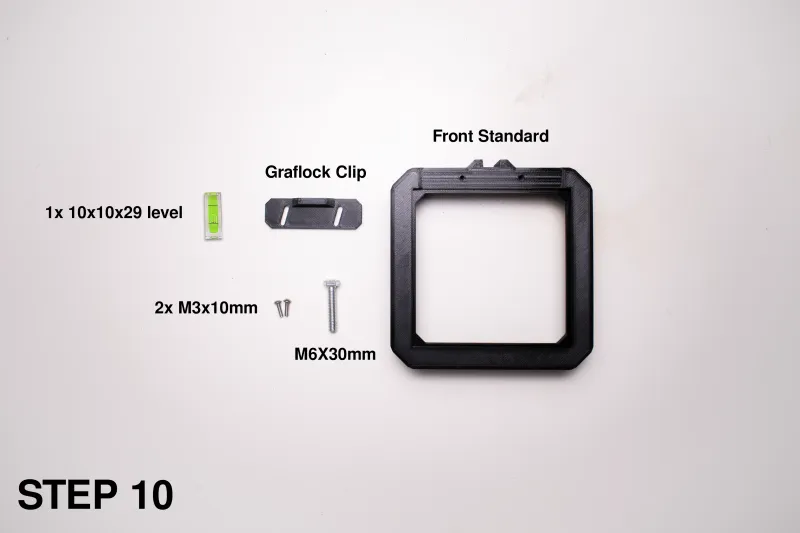
Note: I didn't have the levels on hand, so you won't see them in the other pictures. To mount them you just have to glue them in the slots at the top of the standards.

Note: Don't overtighten the graflock clip, it should feel solid but still be able to slide.
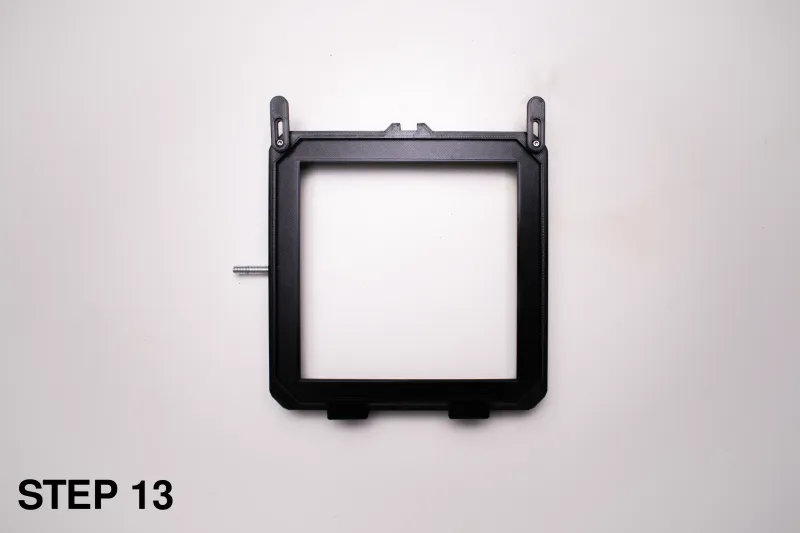
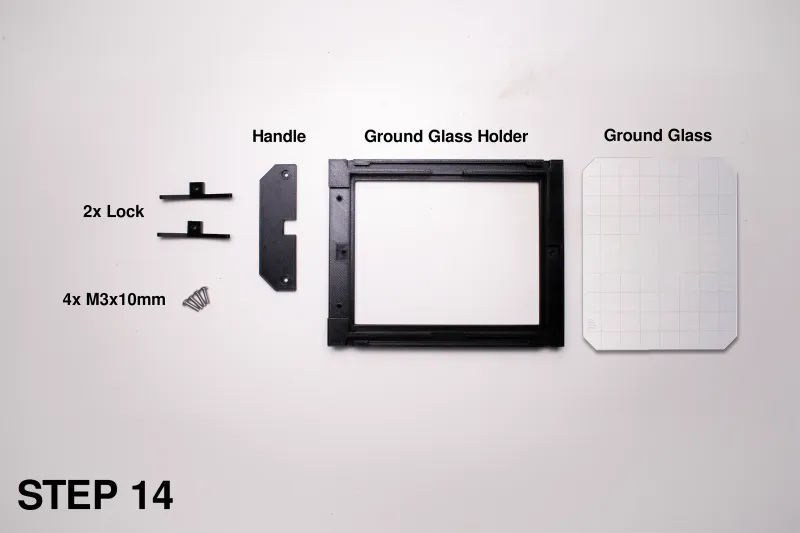
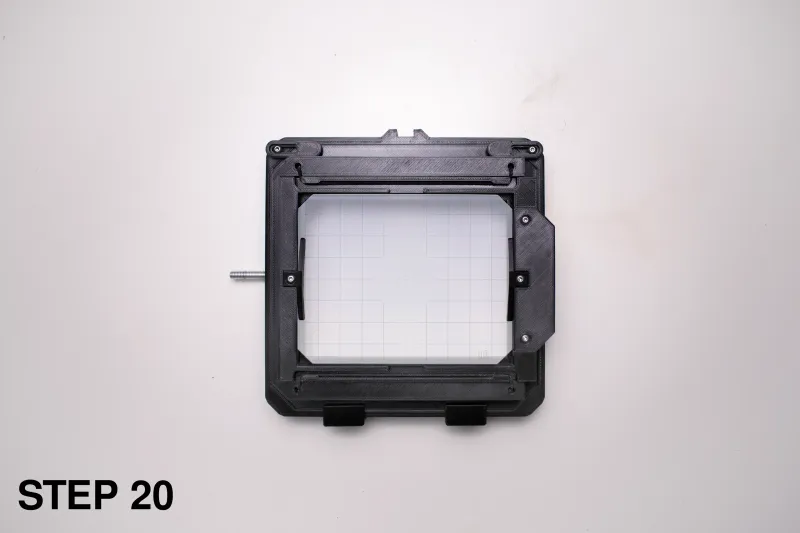
Rear Standard:
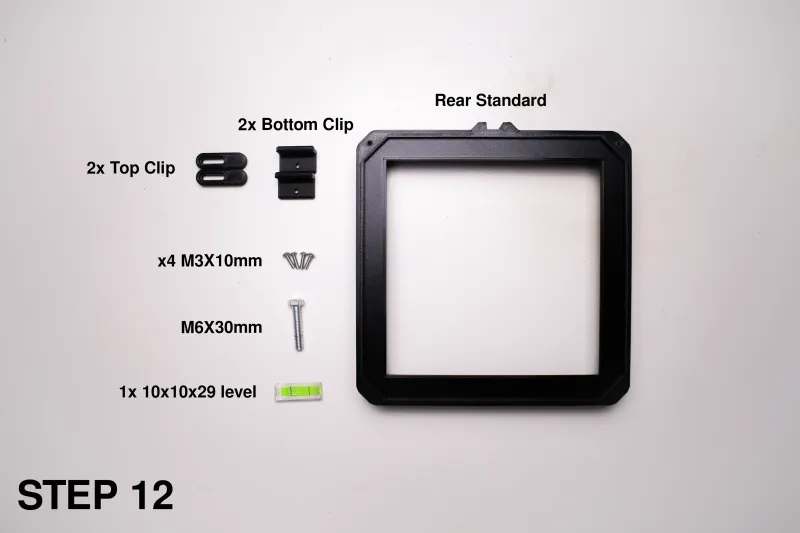
Note: Don't overtighten the top clips, they should feel solid but still be able to slide.

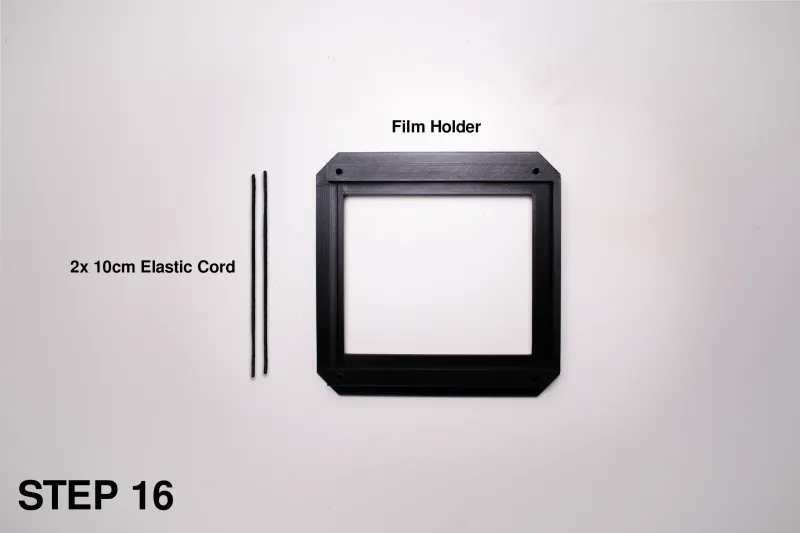
Note: Tie a knot on one end of the cord, insert it and make another knot on the other side.
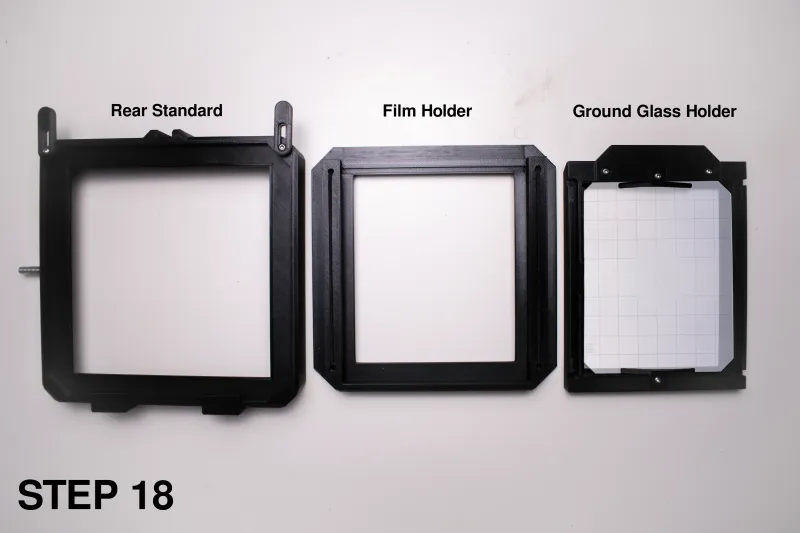
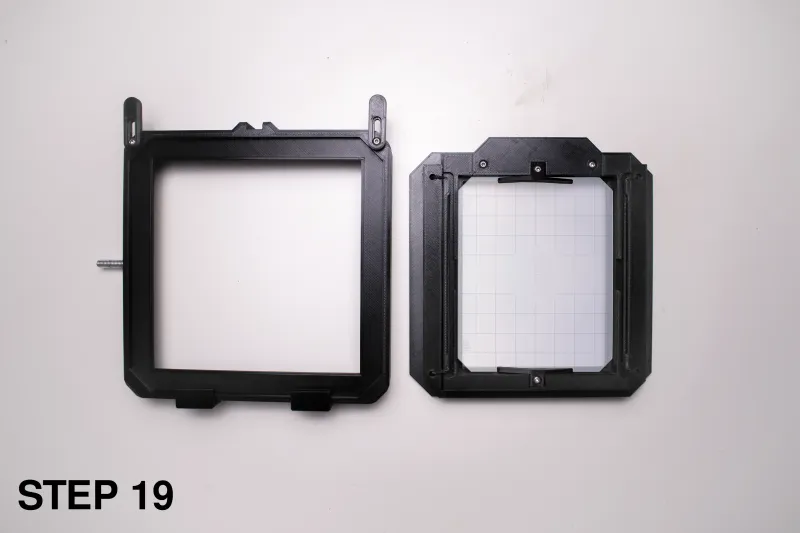
Note: Insert the elastic cord in the ground glass holder slots.
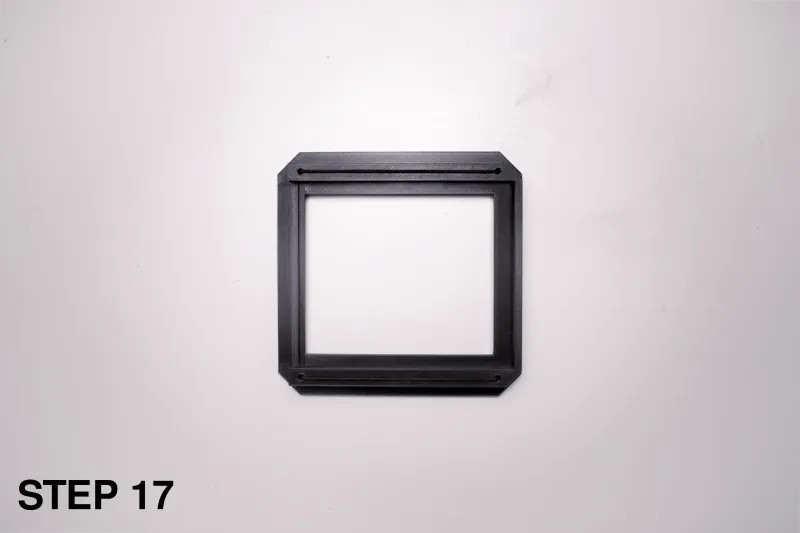
Note: The film holder can be inserted both in portrait and landscape orientation. to lock the holder in portrait orientation, slide the top clips downwards instead of rotating them.
Final assembly:
Bellows:
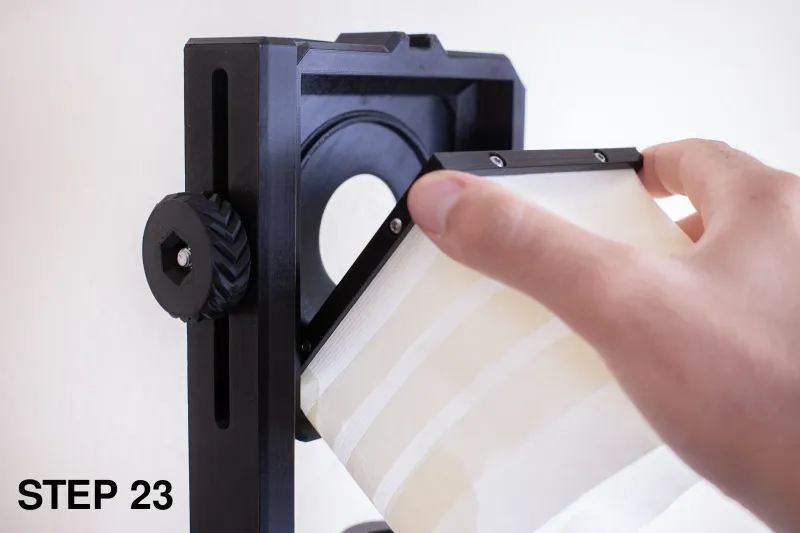
Note: Insert the bellows frame in the bottom ridge, mind the frame's orientation. I had to improvise the bellows to illustrate the procedure as i didn't have them at the time.
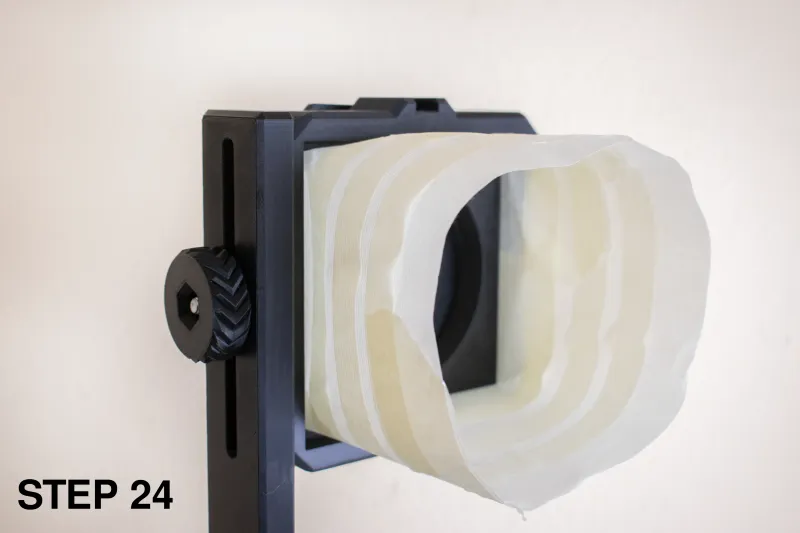
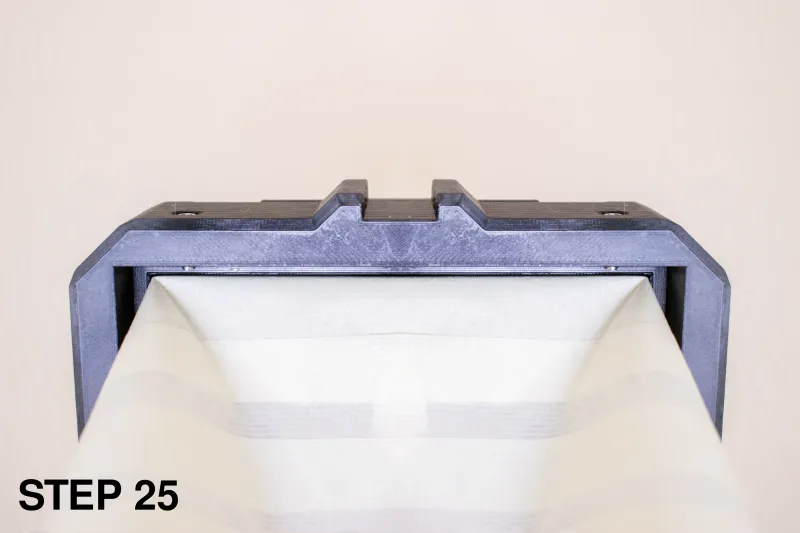
Note: Once you insert the bellows frame, lock it in place with two screws at top of the standard, these will sit just behind the frame. The process is the same for the rear.
Done, you now have your own Vega 4x5! Grab a 4x5 lens, some film holders, a tripod and go out shooting! This camera is very light and can fit in a small backpack, you just have to loosen both standards and remove them from the rail, so it's perfect to carry around. I'd love to see your builds, feel free to upload them in the make section!
How to operate:
Lens swapping:
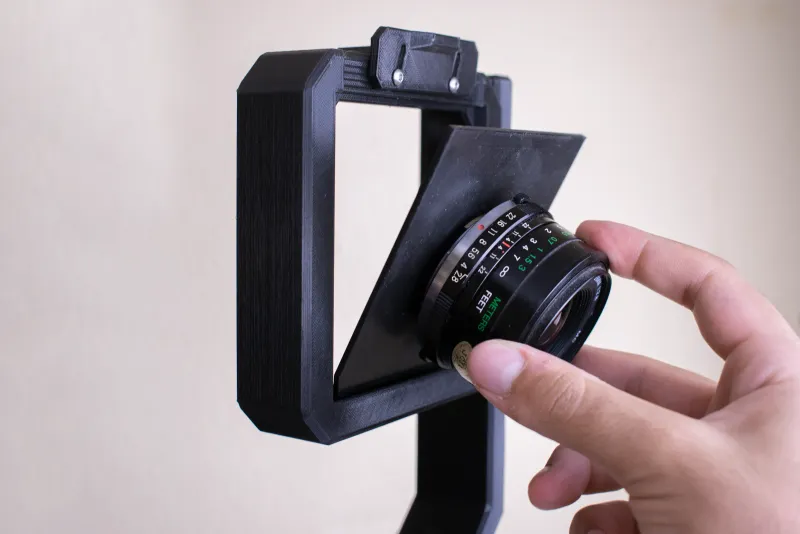
Note: Insert the lower side of the lens board in the bottom ridge. Here i'm using a 35mm lens just to illustrate the procedure as i didn't have a LF lens on hand.
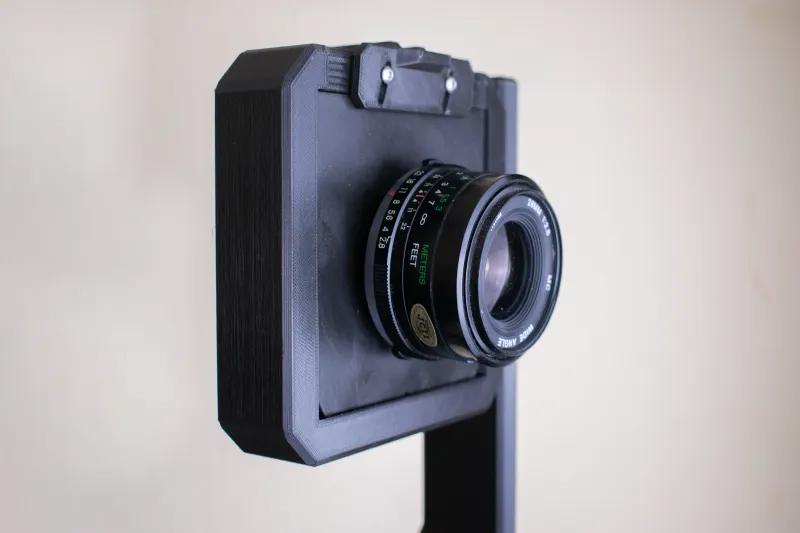
Note: Once you insert the lensboard lock it in place by lowering the graflock clip.
Exposing film:
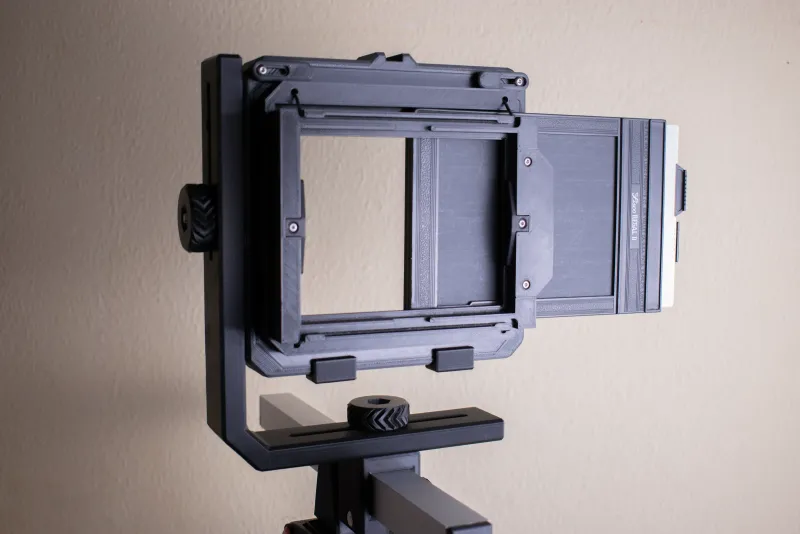
Note: Insert the magazine between the Ground glass Holder and the film holder.
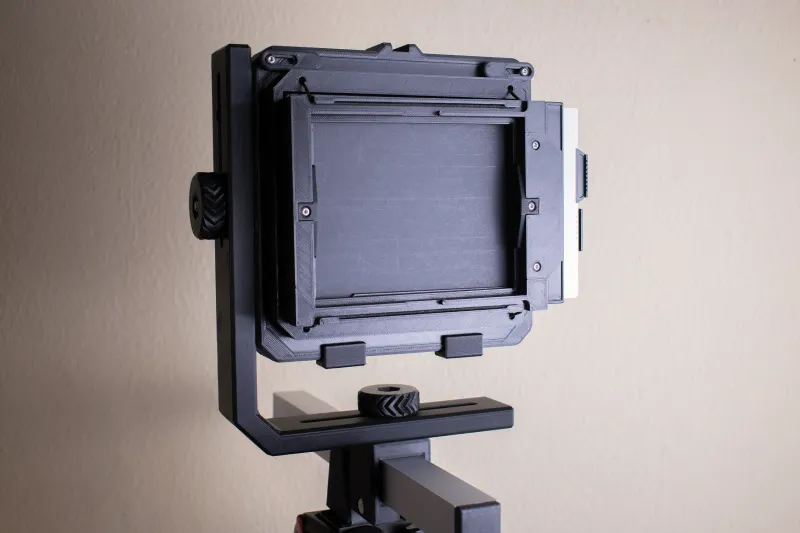
Note: When you feel a click, the holder has been correctly inserted and is now lightproof.
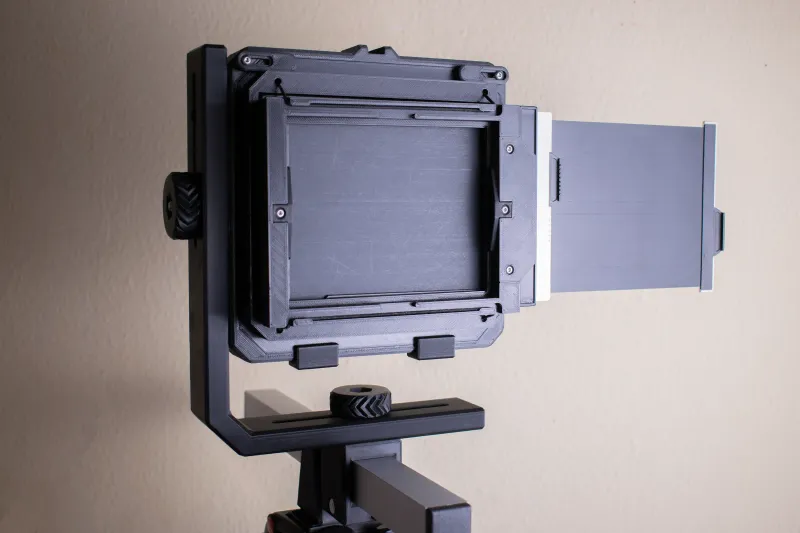
Note: When you're ready, remove the darkslide and make the exposure. to take out the film magazine pull it backwards to disengage the lock, then slide it out.
Technical Specifications:
Compatible Lensboards: Linhof style
Max Front Tilt and Swing: +/- 45°
Max Rear Tilt and Swing: +/- 45°
Front Rise/Fall: 50mm Up / 45mm Down
Rear Rise/Fall: 70mm Up / 20mm Down
Front Shift: +/- 30mm
Rear Shift: +/- 55mm
Weight: 1kg
Comment & Rating (6)


This remix is based on


