Hello everyone,
This is my new Dice Box model, the V2... It's the upgraded version of my "Death Guard" Dice box I uploaded January 2023.
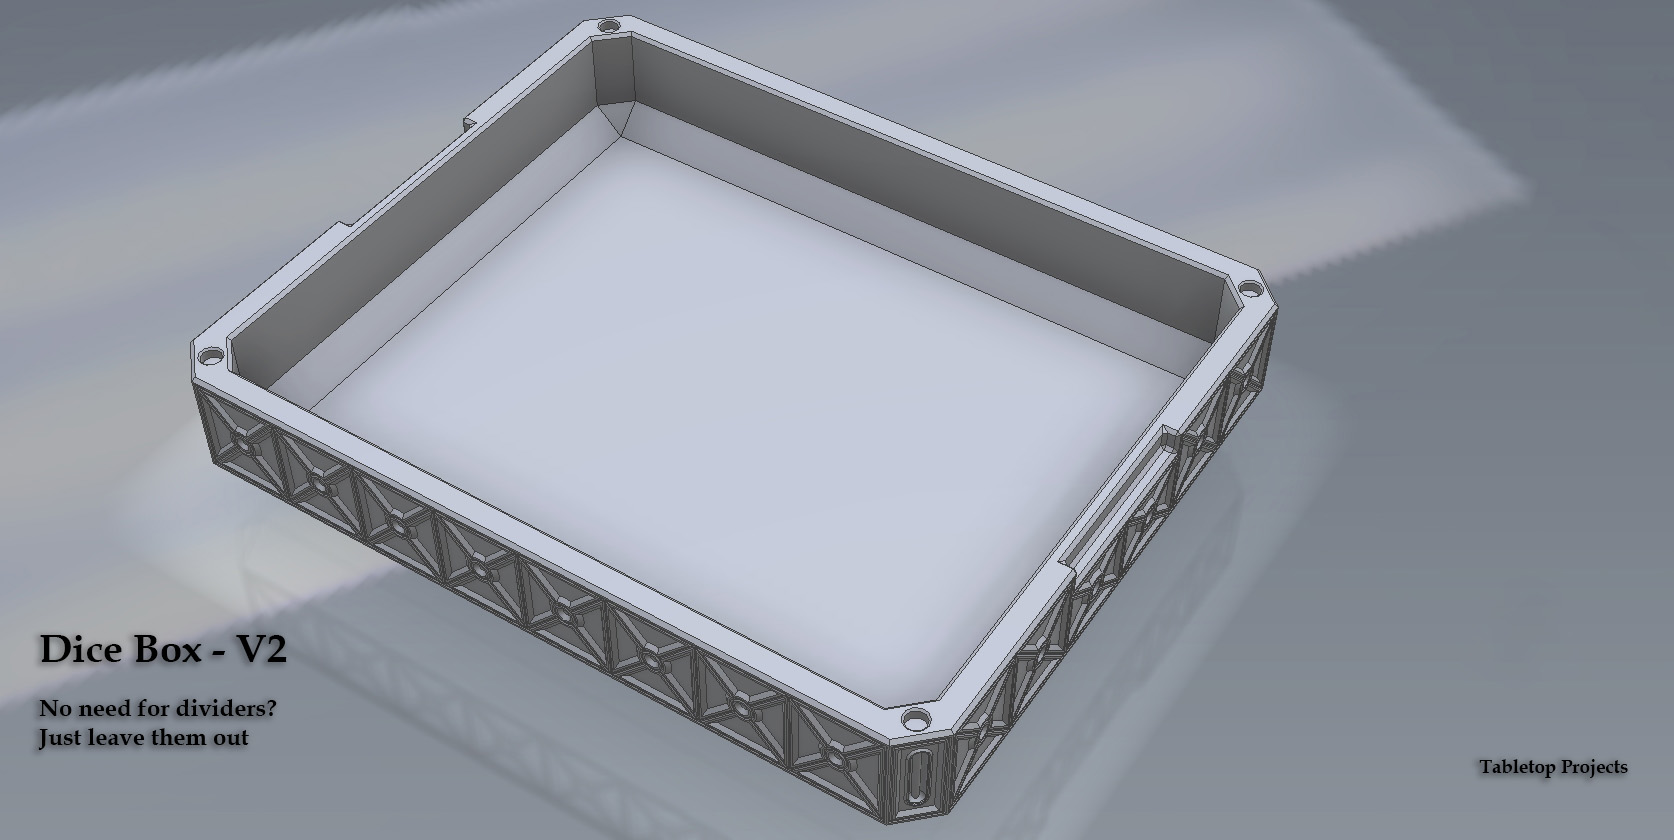
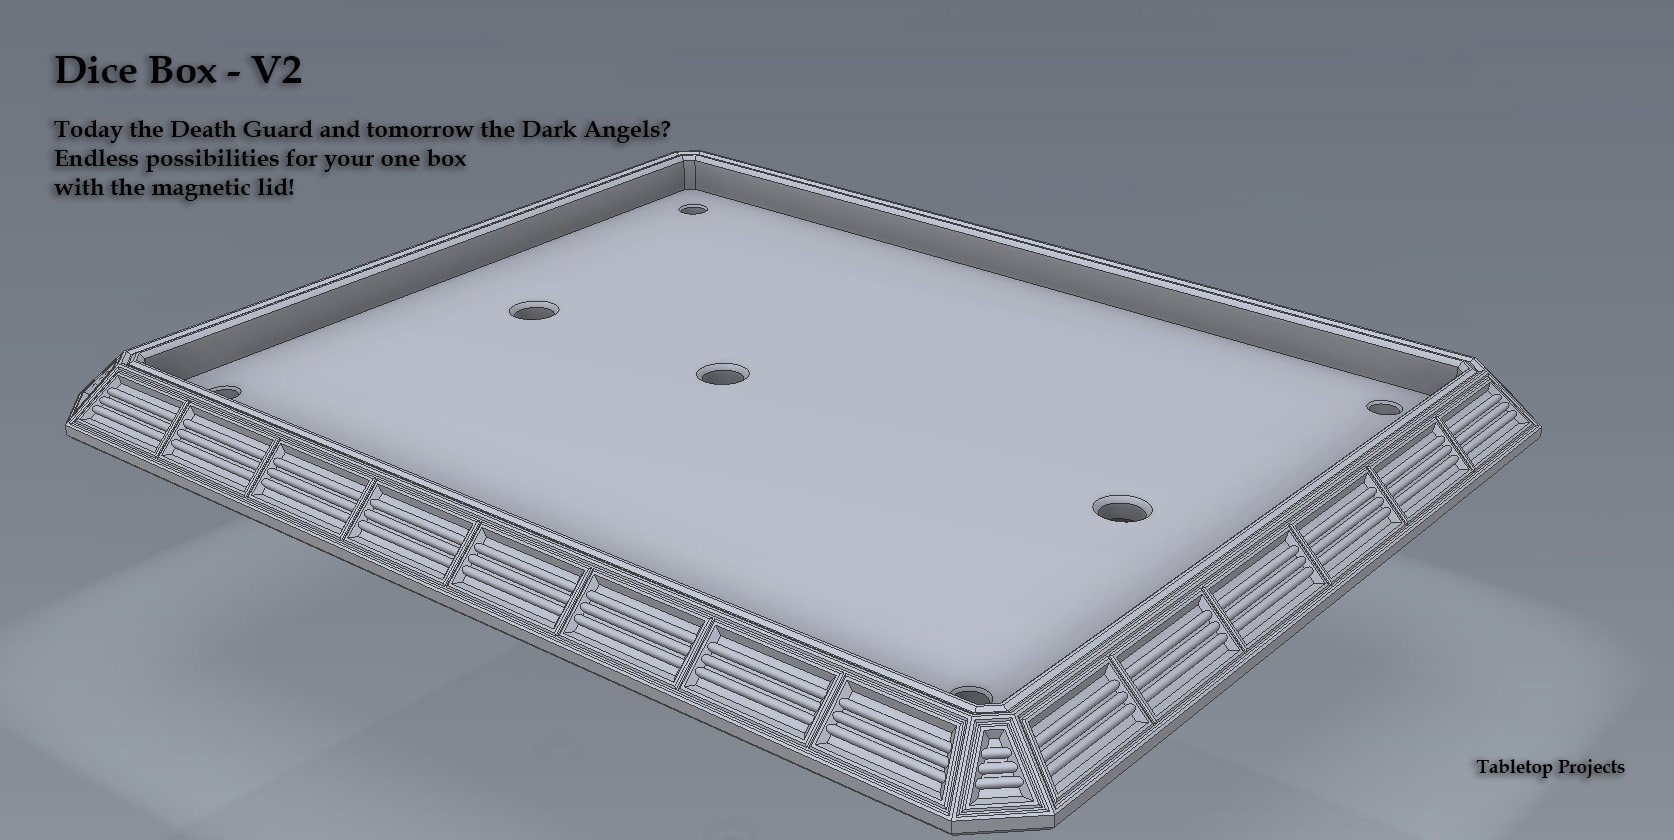
The new Dice Box packs a lot of new features that makes it suitable for every Tabletop gamer! With the switchable inlays you can switch your army on the go, and with the customizable dividers you can decide for yourself how you want to stack your dice!
The story in short…
When releasing the Dice Box back in 2023 I had lot’s of requests to make it for different factions. With the lack of time to make a whole bunch of different dice boxes I had to come up with something new. After a lot of different idea’s I finally came up with the V2. A dice box that has the ability to customize it to your own needs. With switchable lid inlays and switchable faction inlays, you have the possibility to change the box at any given moment without the need to print multiple boxes for your army’s.
As a Tabletop gamer I always love creating my own terrain, love painting my mini’s and play around with the bases. I know for a fact that there are plenty of other gamers out there that feel the same way, and enjoy their time underneath the desk lamp. So I thought, why chew it up and feed it to you like a bird if you can make your own design that stands out from others. I’ll just hand you the tools and let the creativity up to you!
The Dice Box is designed from scratch! I added a lot more detail to the box then the first version. I also changed the base measurements to 220 x 180 mm to make it fit on most printers. Of course you always have the ability to scale it to different dimensions. Down the page I added a useful tutorial on scaling.
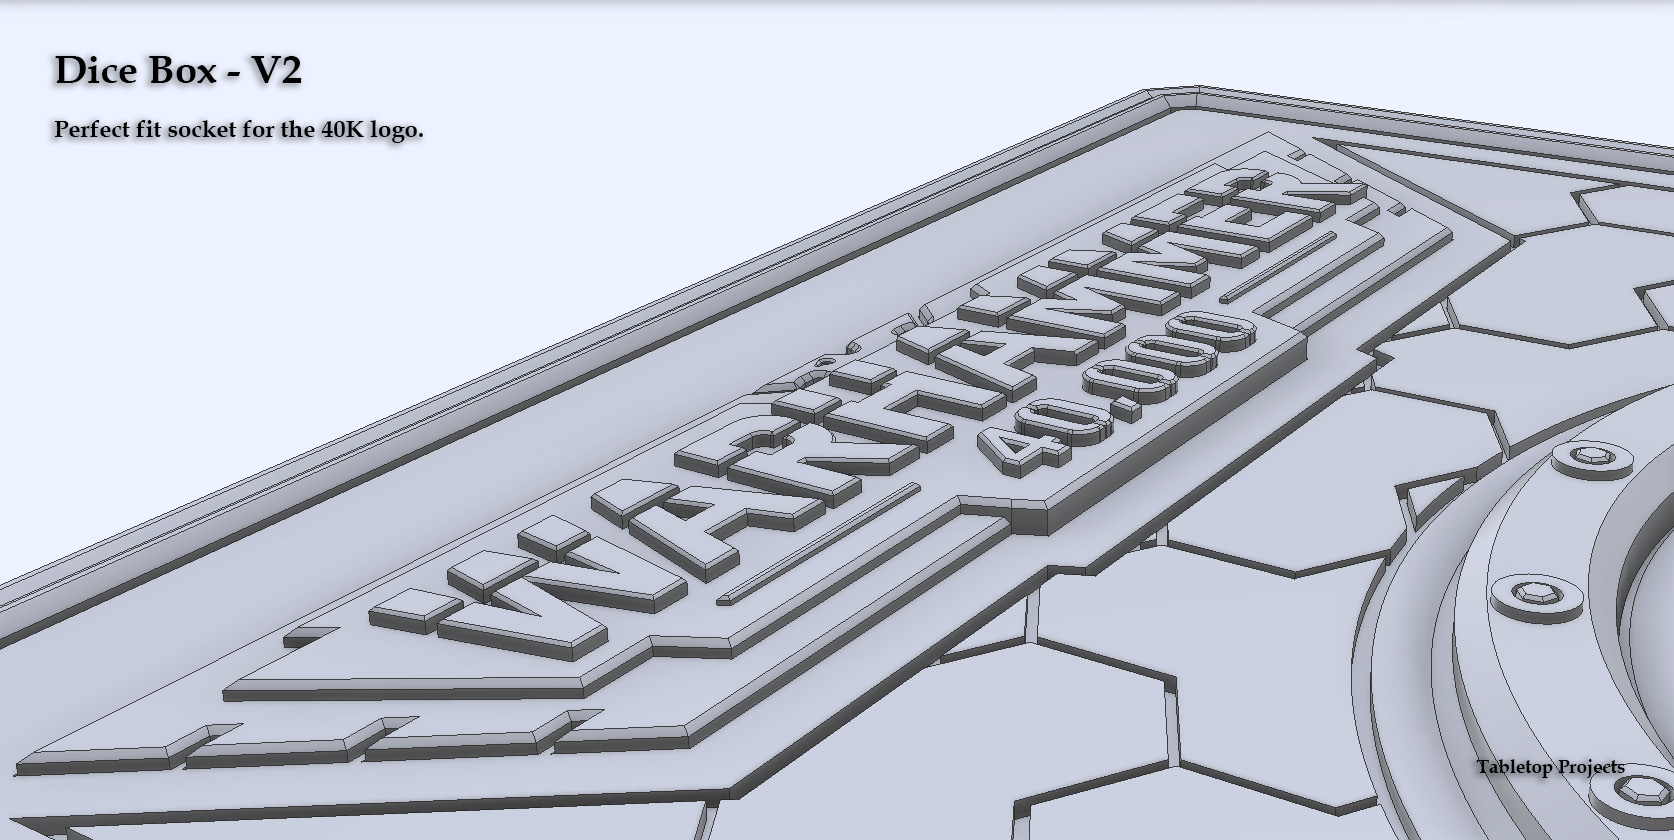
The 40 logo is designed from scratch. I made this logo available for free on my store page for everyone to download.
So what tools I’ll provide you with?
• The Box with holes for magnets (5 x 2 mm Neodymium).
• The Box without holes for magnets. Maybe you rather use an elastic band.
• A big and small divider for inside the box.
• The Lid with holes for magnets that align with the box (5 x 2 mm Neodymium).
• The Lid with holes for magnets and holes for quick release.
• The Lid without holes for magnets if want to use an elastic band.
• Lid inlay that includes an socket for the 40 logo, faction socket and has a decorative pattern.
• Lid inlay that includes an socket for the 40 logo, faction socket and has a smooth surface.
• Lid inlay that includes an socket for the 40 logo and has a Smooth surface.
• Lid inlay that includes an socket for the 40 logo and has a lightning pattern.
• Lid inlay that has a faction socket and has a smooth surface.
• Lid inlay that is fully smooth. Go wild with your own design.
• Blank Faction inlay.
• 40 Logo. (This one is also free on my page)
• Lid guides to center the lid on the box
• Quick release tool to get the Lid inlay and Faction inlay easily out.
• The model of the assembled box for whatever purpose you might need it.
But how about updates you ask! Will we see more? Maybe more tools to work with?
Well yes, of course! But for that I want to make a arrangement with you guys. I’ll keep adding updates for free to the project for people that already purchased the Dice Box V2.
• At 10 sales - I’ll add the “AOS” logo to the project (It will also be available for free in my store. I don’t want to get sued for copyright ).
• At 30 Sales – I’ll add 5 stamps (Inner and outer) of different factions. Keep a look out on www.youtube.com/@Tabletop-Projects for upcoming release.
• At 60 sales – I’ll add 5 more stamps of your request.
• At 80 sales – I’ll add a second design of the box.
• At this point the project is funded and alive. I’ll add more updates later on.
Like I said, Keep a look out on www.youtube.com/@Tabletop-Projects I’m not you average youtuber with fancy equipment but I’d like to share my projects with you in the future. First video is planned for 15-3-2024.
Just a little help to get you on the way!
Magnets polarity:
When I buy my Neodymium magnets I always mark one of the poles. This way I won’t be surprised that the lid gets pushed of automatically because I placed the magnet the wrong side up. To do so follow these steps:
• Stick all magnets together into a snake. They will automatically flick the correct way.
• Use a water resistant marker and make a dot on one side of your magnet snake
• Pull of the marked magnet and put it down on the other side of the snake. This will flick automatically in the correct position.
• Keep doing this till you reach the first magnet you marked.
Now all magnets have the dots marked on the same side. This way it is easy to see how to place our magnets in. If you place multiple magnets on a surface like the lid, you want them to all face the same direction. That’s if you turn the lid around for 180º it will still attach and not force the opposite magnet away.
To place the magnet: On one side you should see all the dots, on the other side they have to be blank. Then all magnets will attach like they should no matter how you turn the opposite side.
Glueing magnets:
To glue Neodymium nickel plated magnets I advise you to use a 2 component metal glue. This glue mostly comes in a 2 tube syringe and gets rock solid when fully hardened. One of the best properties of this glue is that it fills the gaps and doesn’t shrink. In all these years never ever has one of my magnets come loose.
Don’t try to glue magnets with your model glue. The adhesion to the magnets and PLA/ASA is not sufficient with this glue and magnets keep getting lose all the time.
Little scaling tutorial:
Most of you know how to scale a model, but do you actually know how to get to the desired dimension? For everyone that says no! keep reading. Scaling is always measured in ratio/factor. There are two types of measurements for scaling.
First one and most easy to understand is percentage (%). A 100% scale is your zeroing point, All up from here makes it bigger and everything underneath makes it smaller.
Second one used is when you zeroing point is at 1.0. Same rules as before apply. Still easy to understand right?
Now how to actually easy calculate your scaling to a desired size:
Lets say our box is 220 mm long, but you actually want it to be exactly 240mm long. So we take our desired length and divide it by it actual length.
240 : 220 = 1,09
This means our scaling factor is 1,09. Now you can also easy calculate how wide your box actually gets. Just multiply the original size of 180 to the scaling factor you just calculated.
180 x 1,09 = 196,4
Now your base size is 240 x 196,4 instead of 220 x 180.
Now how to put that to use in percentage? Well, that very easy. If 1.0 is equal to 100% it means that 1.09 is equal to 109%! This is a value that we can use in our slicer.
Now to scale down we use the same calculation. Just take a look at this: My box is 220mm and my printer only allows me to print like 150mm. Here we go! 150 : 220 = 0,68. 0,68 is equal to 68%
Now success with your project. Just don’t forget to show it off!
:format(webp)/https://fbi.cults3d.com/uploaders/14703993/illustration-file/8dd30b98-5df3-4f2c-bbc7-58268c33bf54/Dicebox-V2-render-1.jpg)


/https://preview3d-images.cults3d.com/s9yr7xb4dl50ppr2y1uyyunp15qa)
/https://preview3d-images.cults3d.com/qphhdzqc92sz6jbuqtzfe1rfkitz)
/https://preview3d-images.cults3d.com/22kyyeu7njy35z7g9w5kovv37w7d)
/https://preview3d-images.cults3d.com/qob2k1cz4wyn57zsce4nam8vka8h)
/https://preview3d-images.cults3d.com/e0ut41qvipex6oqk4iacchu9g6qu)
/https://preview3d-images.cults3d.com/ubm775qn6b79aw4s9edmtf0isu0b)
/https://preview3d-images.cults3d.com/i3svnlvdovhqpfyi4ybr8vejnoqd)
/https://preview3d-images.cults3d.com/4ajcvilad2opfqvam2knycuwxc3p)
/https://preview3d-images.cults3d.com/8n61eslr51j8t7r2tggqxi4c18oi)
/https://preview3d-images.cults3d.com/jl6tvgispha23r12lbehadjyc7du)
/https://preview3d-images.cults3d.com/5gujjy3d7r9ogsxufisui7tzfsyh)
/https://preview3d-images.cults3d.com/0qd08ucbego3crgw8qrnoakg95al)
/https://preview3d-images.cults3d.com/3n9ueqakk6k30083aratkaz0yuqw)
/https://preview3d-images.cults3d.com/ofgsnjk853gn9khf0ibny6t4lwch)
/https://preview3d-images.cults3d.com/hxsx622i0yzfk53zio9jtdeew4b8)
/https://preview3d-images.cults3d.com/y4wz62n2q514j560w5c6pigg056n)
/https://preview3d-images.cults3d.com/qwubq4e27r6ru76onfdof4dtr89n)
/https://preview3d-images.cults3d.com/dhkvfa9ud9d59ag0p6mn44fspta9)
/https://preview3d-images.cults3d.com/2zhw6mcceh3vrc8x7ywjckdh3jjs)
/https://preview3d-images.cults3d.com/joab4wqoibedxt5hqxvbnh60nbqx)


:format(webp)/https://fbi.cults3d.com/uploaders/14703993/illustration-file/6e6fb708-435c-452d-b759-c39d153bb8f1/20221117_173228.jpg)
:format(webp)/https://fbi.cults3d.com/uploaders/14703993/illustration-file/da23e9aa-09ed-4ed7-897d-8a02a7ea6509/20200105_112700_resized.jpg)
:format(webp)/https://fbi.cults3d.com/uploaders/14703993/illustration-file/05373176-7cbc-45b4-b497-30e4b7f4c6d3/20191116_215912_resized_1.jpg)