This listing consists of a diy kit with DIGITAL files designed for 3d printing and the code for creating a crypto ticker that displays the price of specific coins, in real time.
PLEASE NOTE! This is a digital product, no physical products will be sent to you!
The price is taken from binance api wich can support "1,200 request weight per minute, 50 orders per 10 seconds. 160,000 orders per 24 hours" so the price update rate will not be a problem and the only limitation will be the code and the esp8266, wich is the brain in this configuration, to be able to comunicate as fast as you can. Keep in mind that my shop is based on selling digital models designed for laser engraving/3d printing, i will be providing the arduino ide code i used in combination with the electronics needed to make the project work but i am not a programmer so the code optimization part remains at your latitude but please feel free to contact me if you encounter any problem in the process.
I will present to you my current configuration i used to make the ticker work;
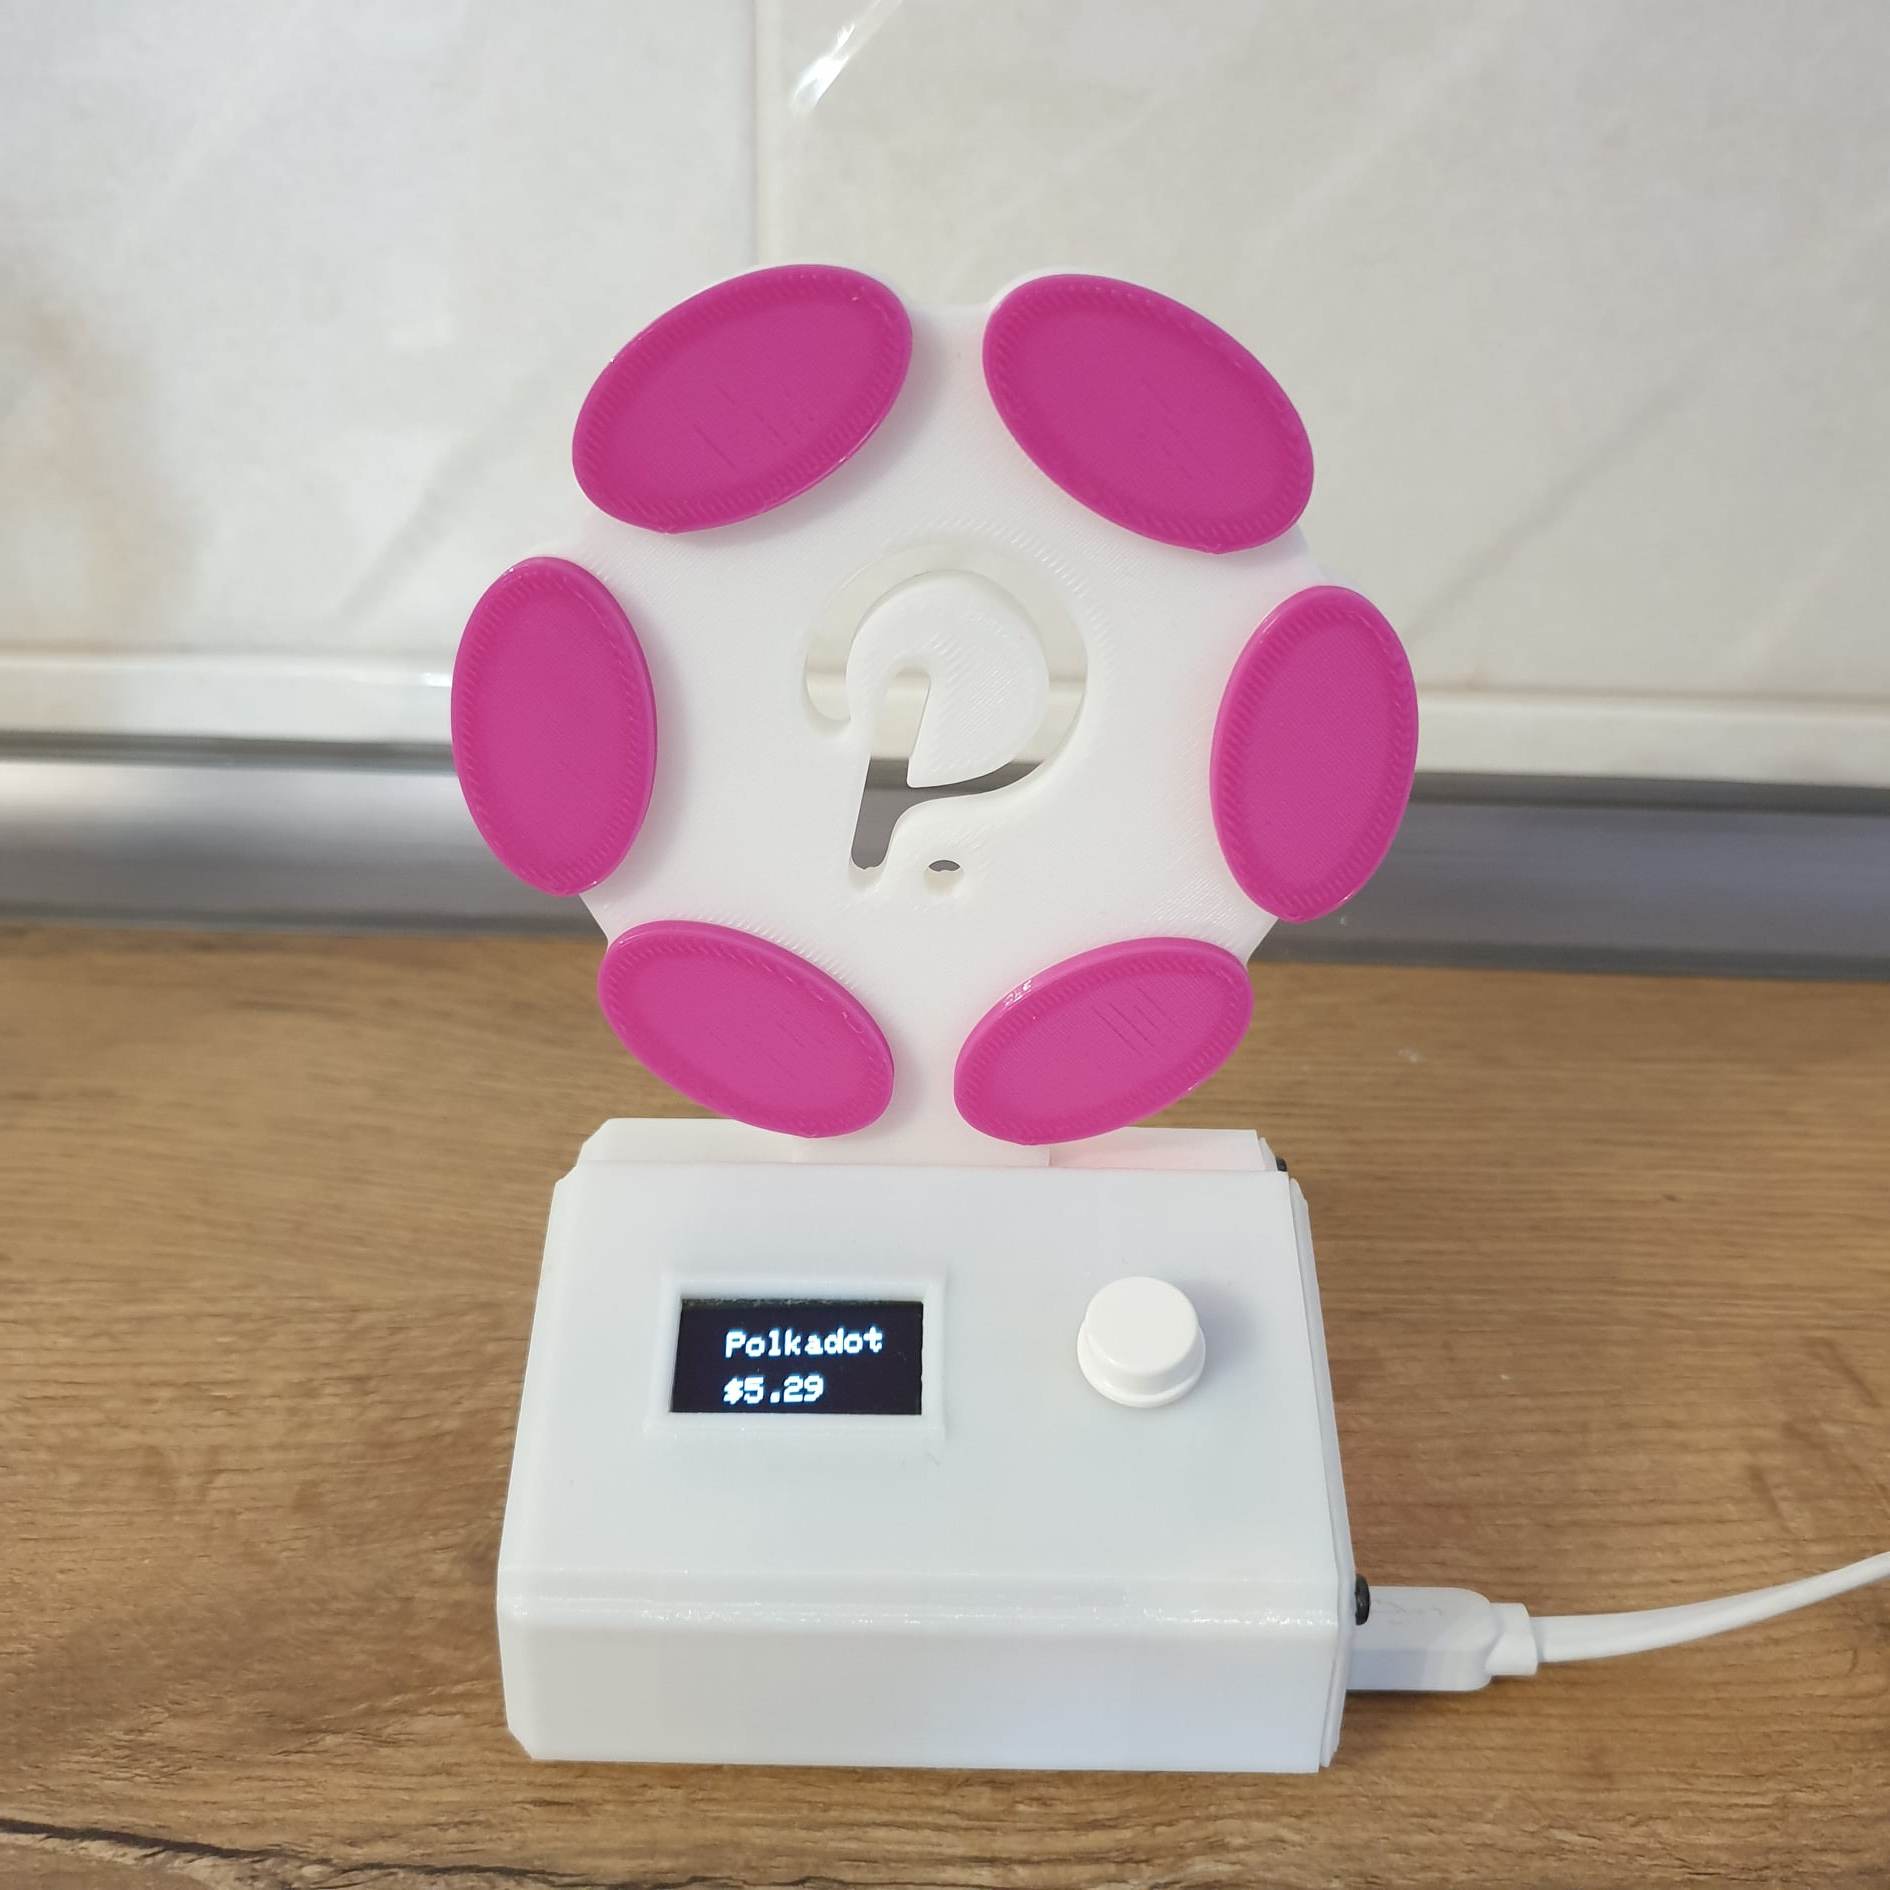
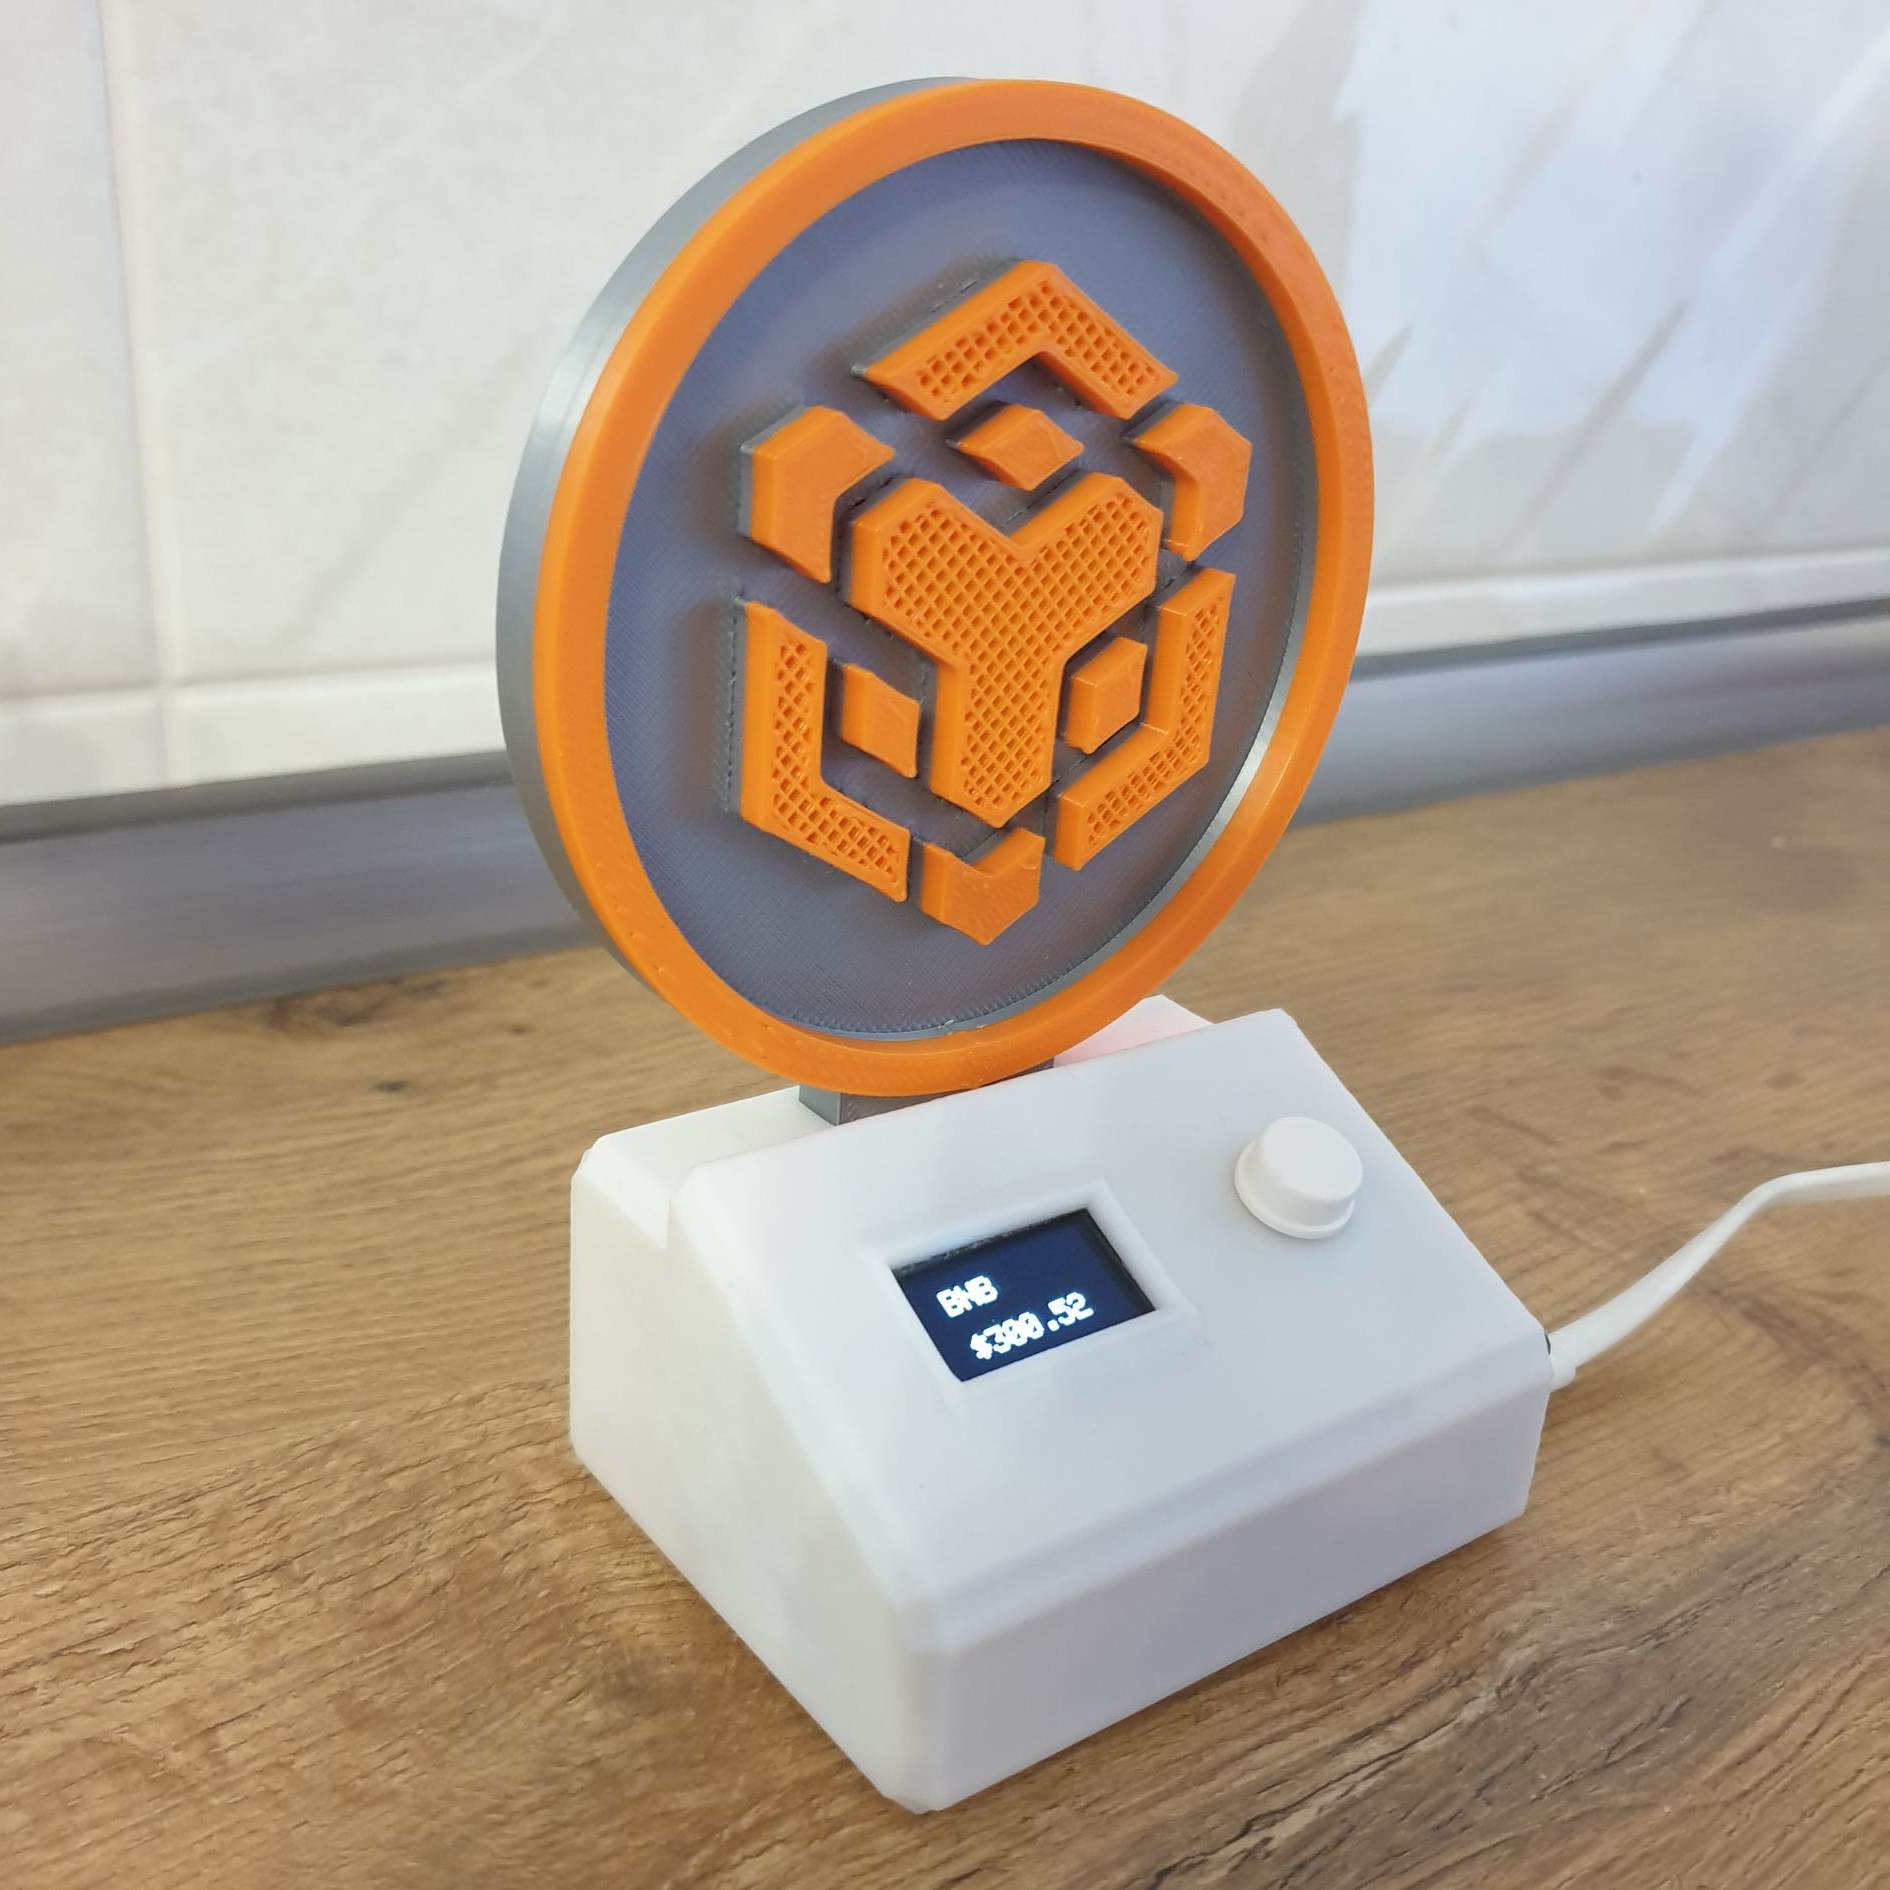
The brain of the system is an esp8266 mcu with a wall charger that comunicate with the binance api every 5 sec for receiving the price of the current crypto that is placed in the base reader or selected using the pushbutton.
- https://www.make-it.ca/nodemcu-details-specifications/
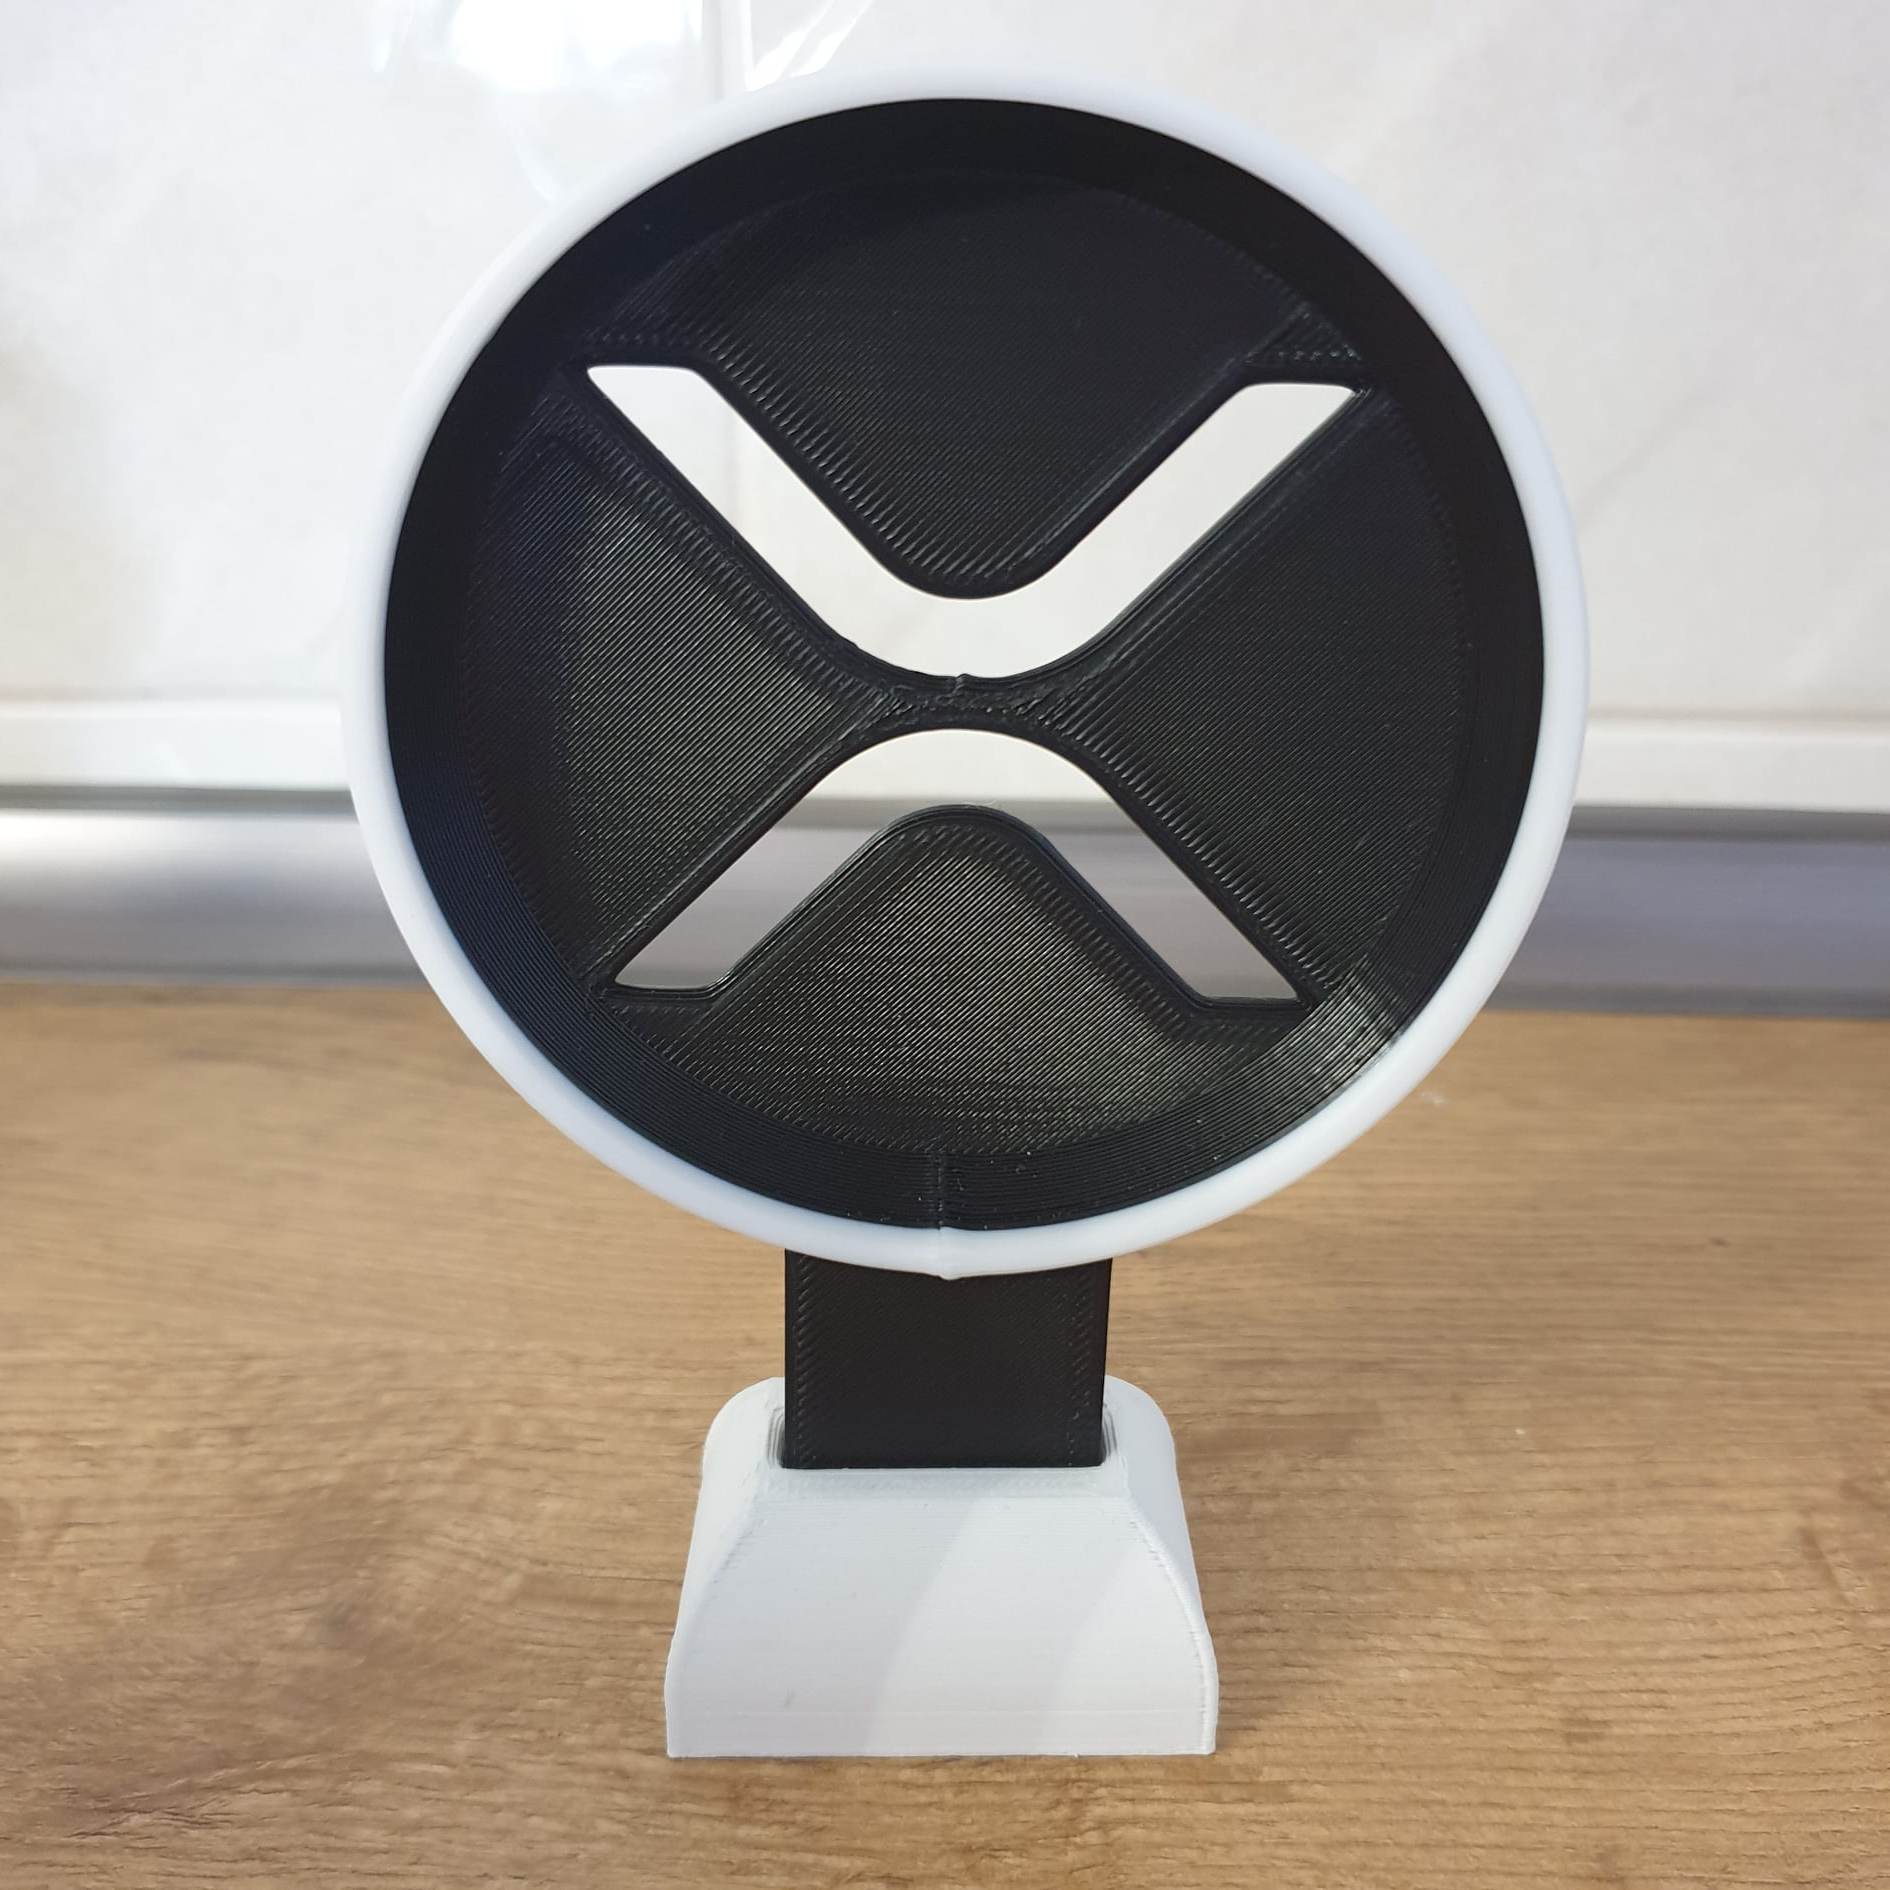
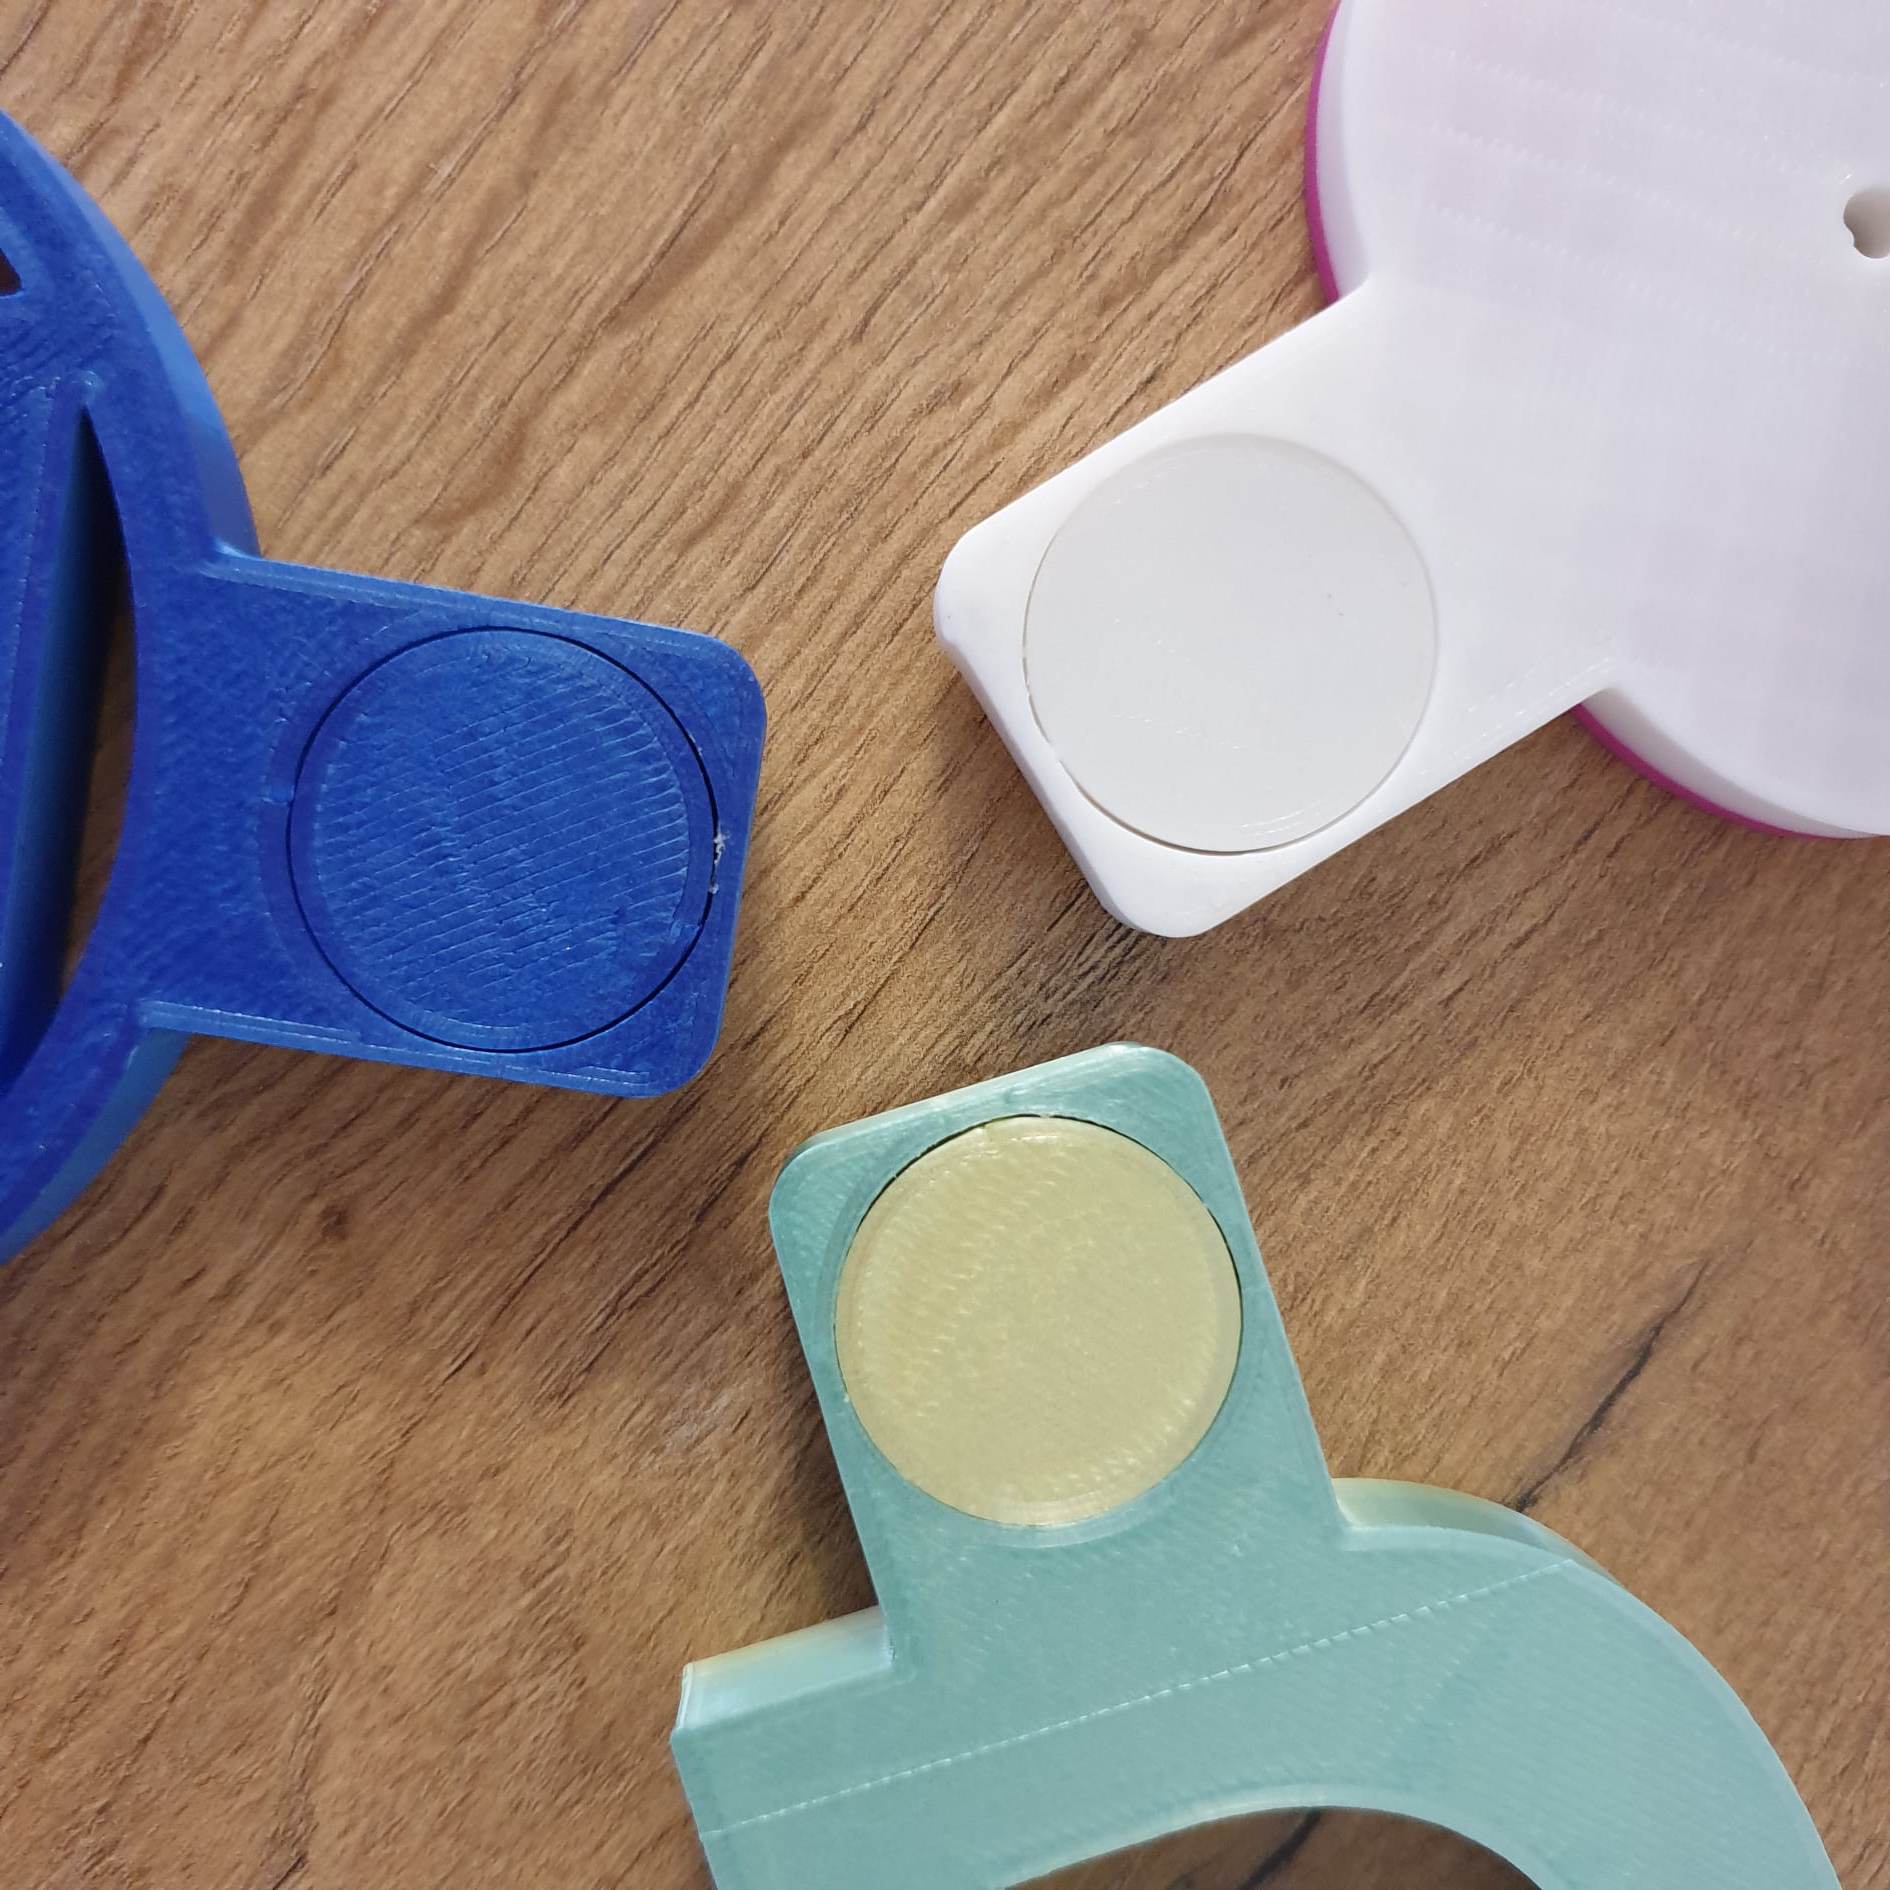
Each coin figurine has an 13.56mhz rfid tag sticker placed in the rectangular bottom wich gets inserted in the base where a RC522 rfid reader is positioned.
- https://www.amazon.com/YARONGTECH-50pcs-MIFARE-Classic-adhesive-Sticker/dp/B01LZYOR7P
- https://www.alibaba.com/product-detail/Rc522-Rfid-Module-Okystar-OEM-ODM_62499691613.html?spm=a2700.7735675.0.0.160brVB4rVB4Q6&s=p
When a new rfid tag is inserted, the esp notices and change the current coin that gets displayed on the screen, same when the pushbutton is getting pressed, you can navigate trough the crypto coins list, you can add as many coins as you want even if you don't have a figurine for it but then you can access it only trough the button or assign a new tag for each new one.
The screen is an OLED 0.96" I2C screen on wich i am displaying the name of the curent crypto coin and it's price.
- https://randomnerdtutorials.com/guide-for-oled-display-with-arduino/
When the ESP first boots up, it will try to connect to wifi's in a hardcoded list until successful, then it must get in touch with the binance api to first get the price for the current coin, for that the price might take a few seconds to update when you change to a new coin.
This is because trough binace api you can only get specific coins price, one at a time, for example BITCOIN price in real time is at;
https://api.binance.com/api/v3/avgPrice?symbol=BTCUSDT
or the prices for all coins;
https://www.binance.com/api/v3/ticker/price
from wich you will have to filter the needed ones. I thought that it is enough to get the price just for the current coin even if the others are not up to date in the background but when you switch the price will just take 5 sec to update the price the first time and then keep the 5 sec update rate wich i have used in my code.
One thing to know it that if you push the button when the ESP communicate with binance api, since it is an intense process, the signal from the button might very well get ignored until the procces is done. For that i used a 5 sec update interval, so if you push the button in that interval there will be no problem but if you push it when the API request was made and the ESP is busy receiving the data, it will get ignored until the process is done and the price has been received.
In this case an update rate lower than 5sec, let say 2 sec will lead to the button signal being poorly read.
You can go around this problem by implementing "interrupts" wich will stop whatever the ESP is doing and execute the code you will write, that must be done when the button is pressed and an interrupt is made, i am still working in this aspect for myself.
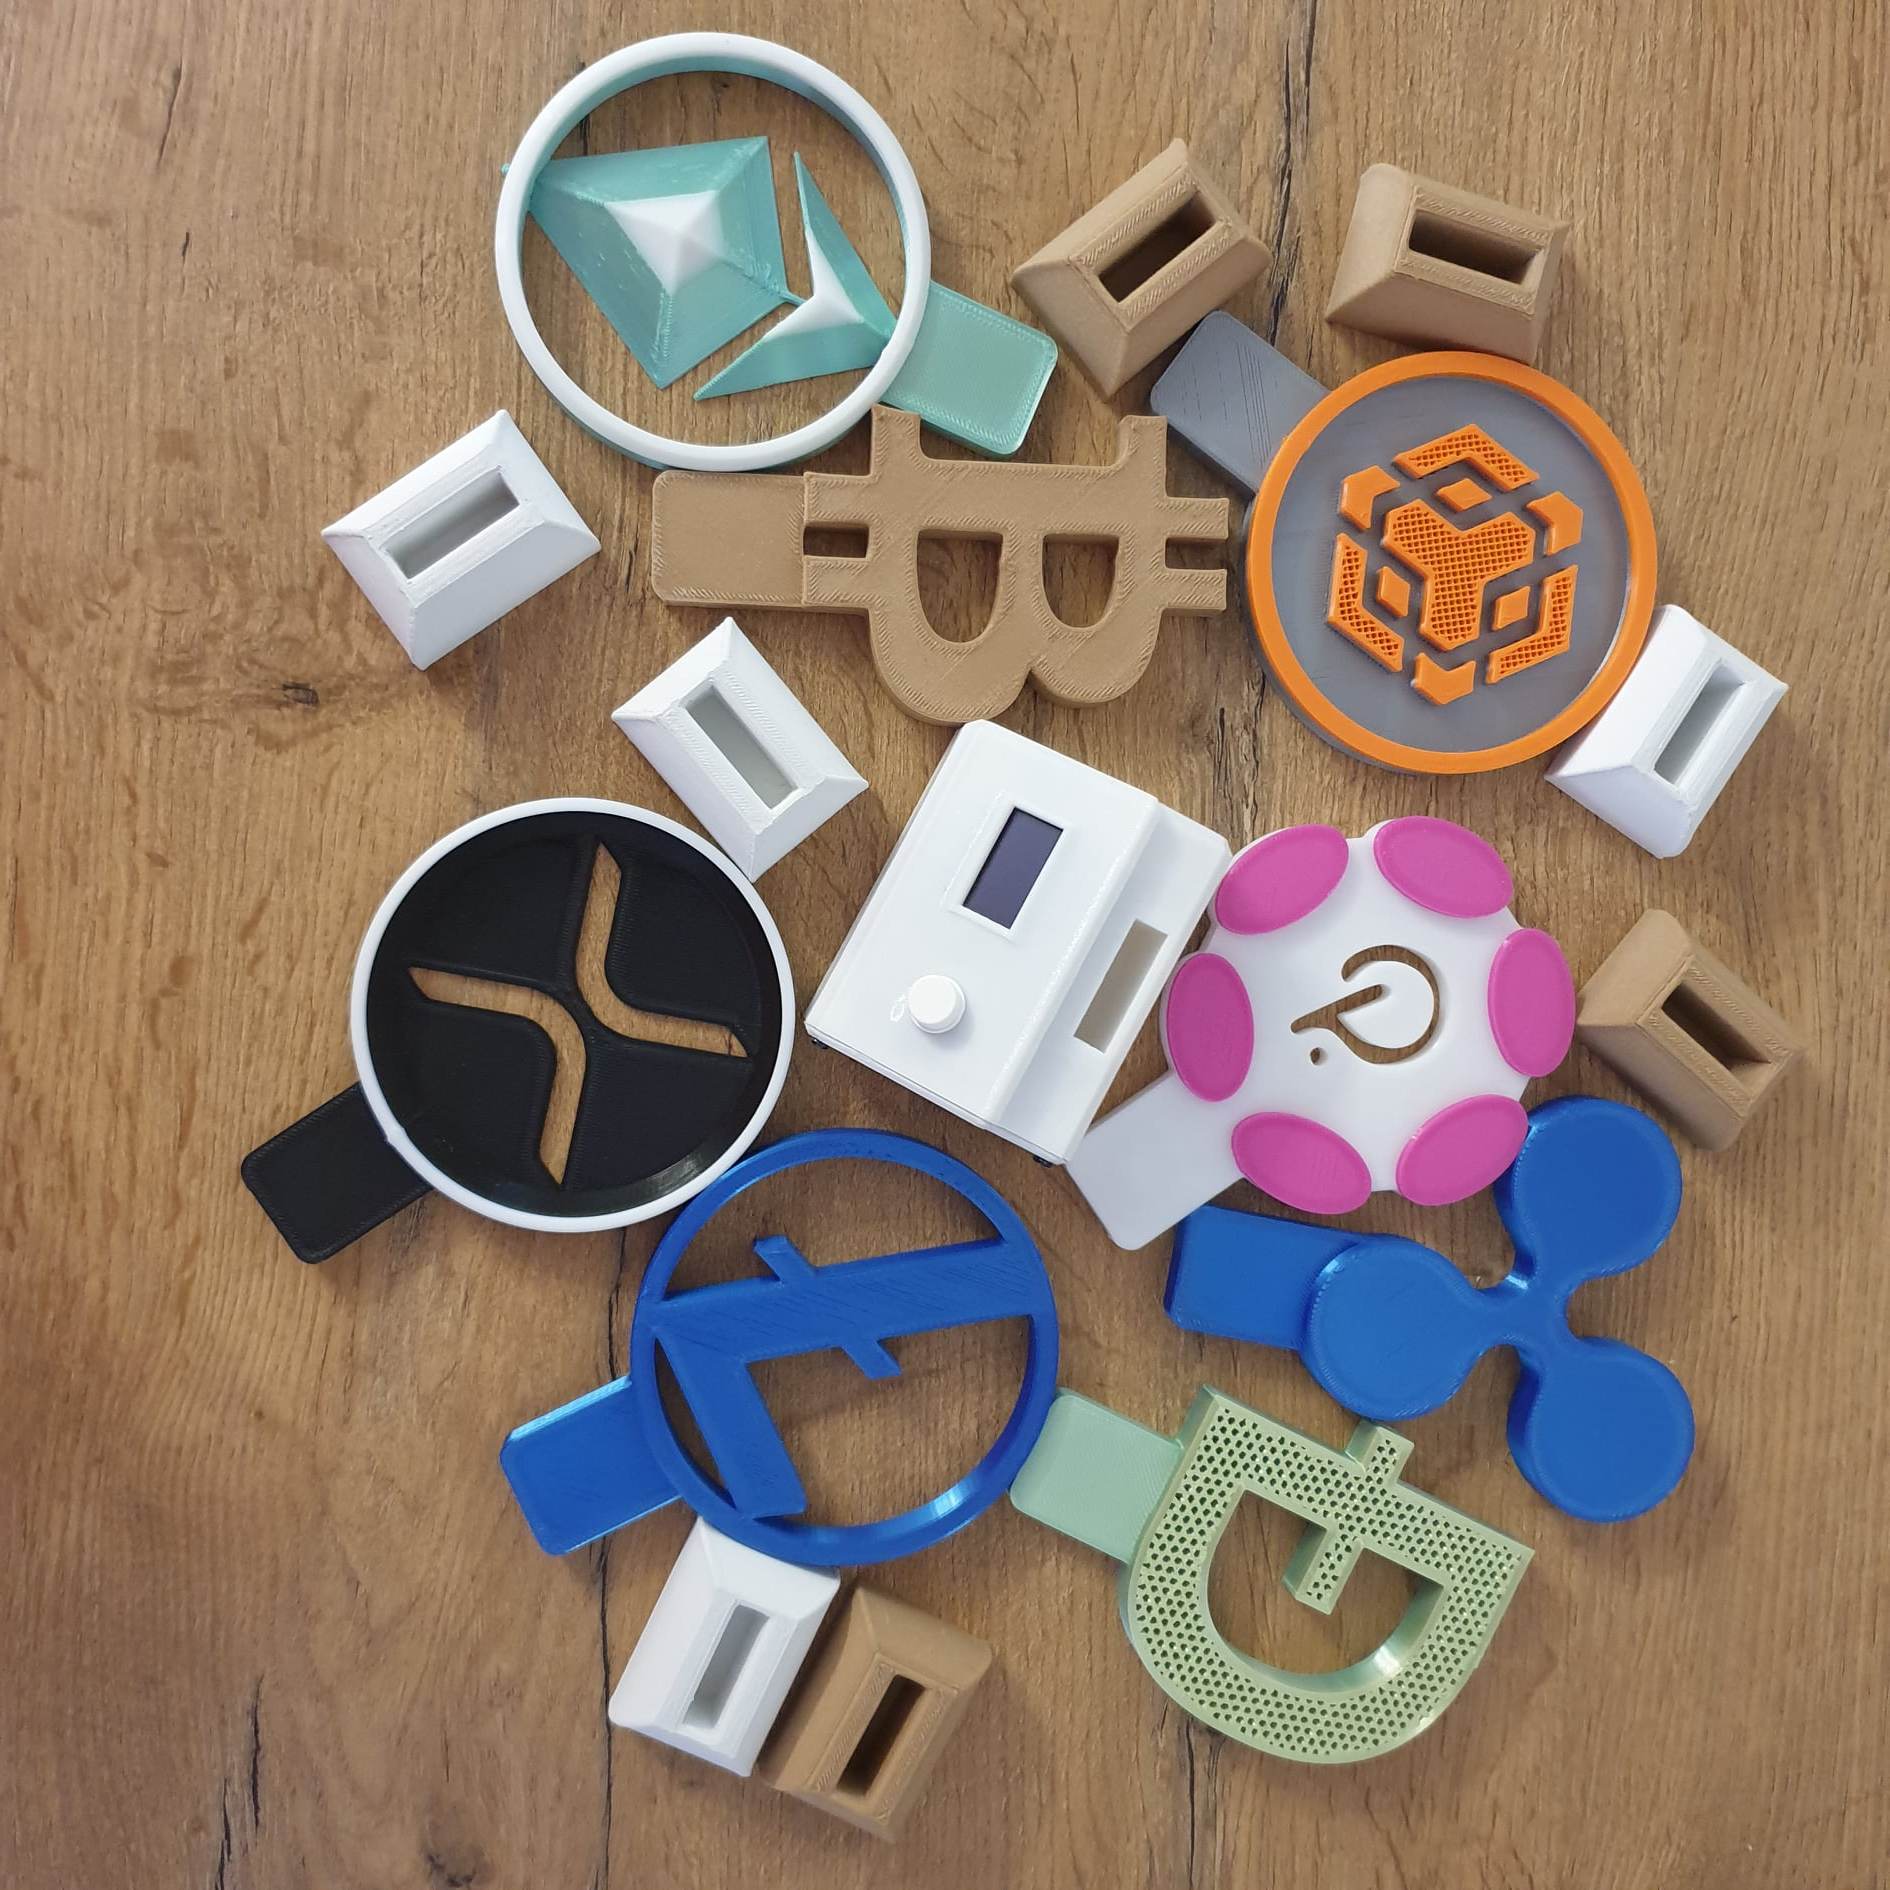
This kit will be providing the following things;
- 12 x STL files designed for 3D printing multiple coins (BNB, BITCOIN, XRP, RIPPLE, ETHEREUM, POLKADOT, DOGECOIN, LITECOIN), the common base with a lid, caps for covering rfid tag placed inside each coin's bottom, a simple base for the coins that will not be inserted in the reader base
- 12 x 3MF files, same files as above but in different formal
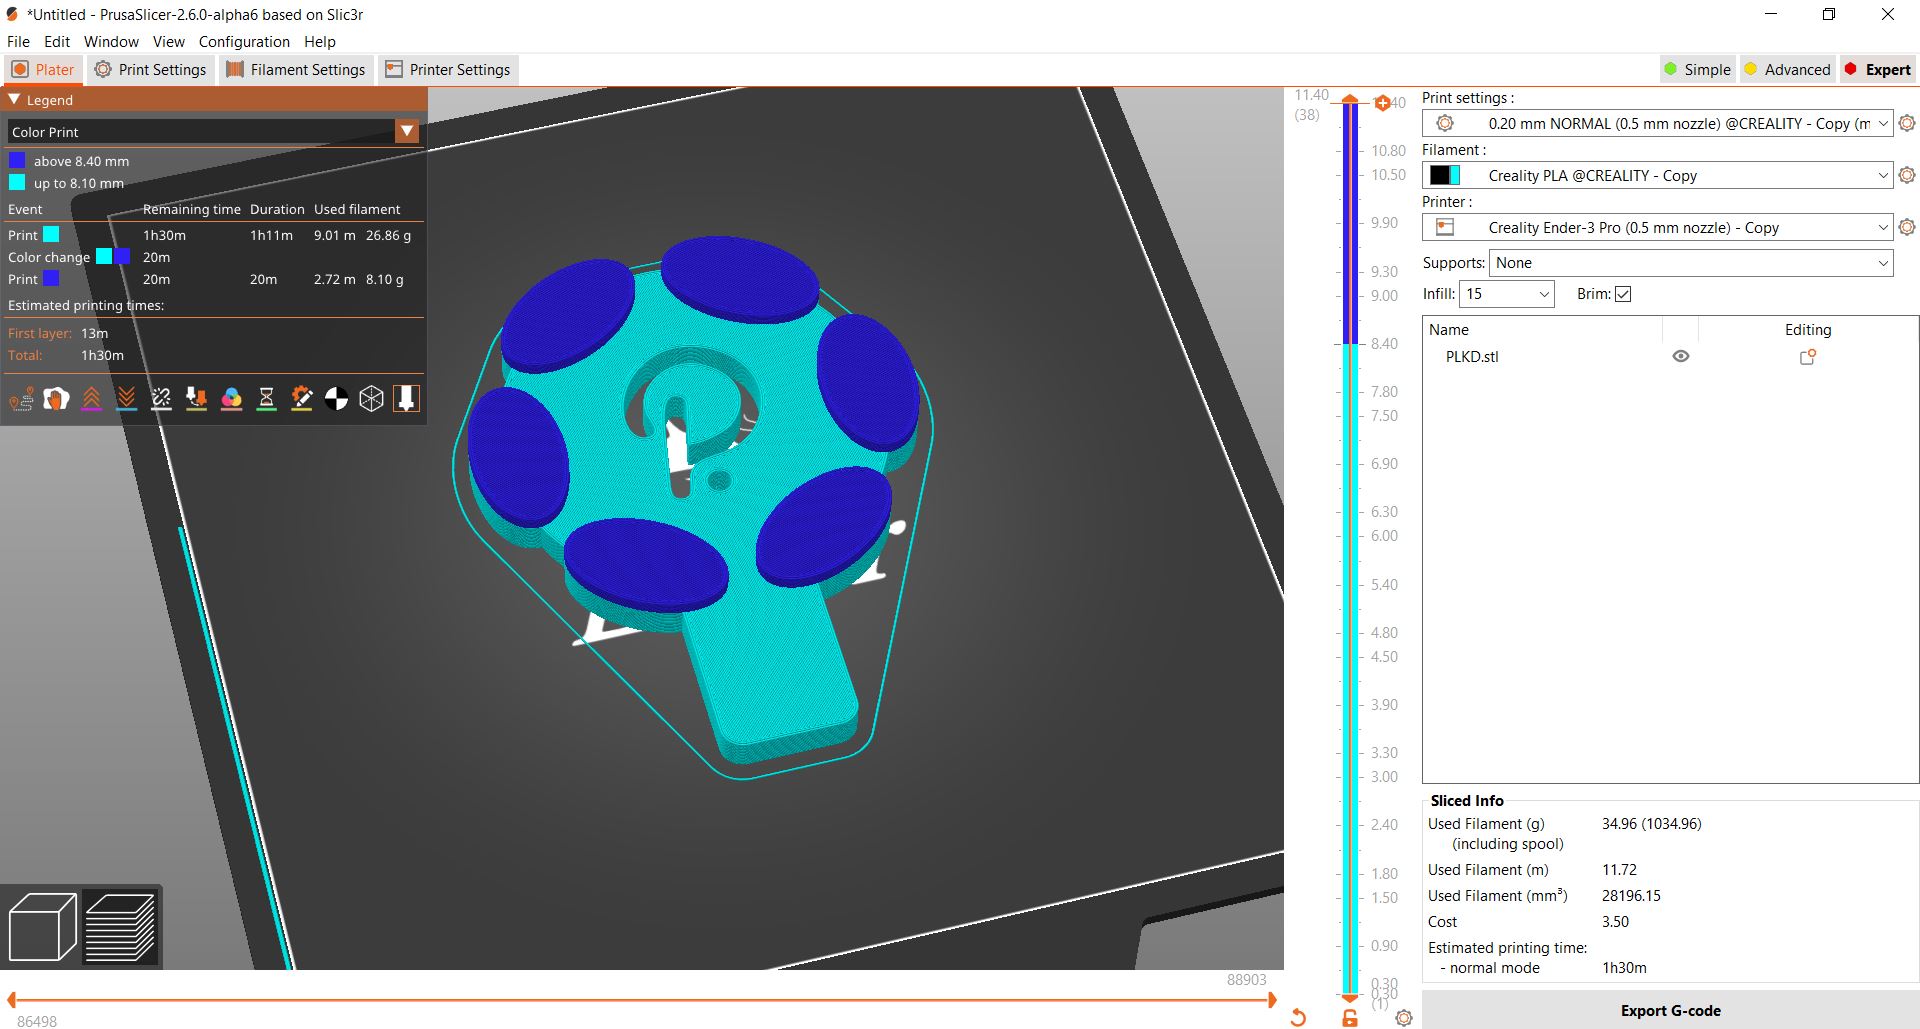
- a few extra STLs for entering modifiers in prusaslicer to make the infill pattern exposed by setting top perimeters to 0 (shown for BNB coin where only some areas have a star pattern on top)
- arduino ide code for programing the ESP8266 in current configuration, fell free to modify the setup to your likings
Enough about the electronics side, let talk about the manufacturing process of the items!
Each element shown in the pictures above is printed using PLA - https://en.wikipedia.org/wiki/Polylactic_acid
on my modified ender 3 pro and my anycubic mega x.
The coins each take about 1:30 - 2 hours pro print and the reading base about 2-3 hours depending on the settings you use, the small display base about half and hour and the rfid cap 5-10 minutes.
Since they are display items that will sit on the desk, they don't have to be very strong so you can choose setting to benefit fast printing time.
As a reference I have used the setting below;
- Layer height 0.3 mm with a 0.5mm nozzle
- External perimeters 2 wich is equivalent to about 1.06mm thickness of the wall
- Bottom perimeters 2
- Top perimeters - 4 these are important if you want a smooth surface on top
- Infill 15% cubic
- Speed 60 mm/sec
- Filament 215 C with bed 60 C
- Cooling 50-60% using dual 5015 blower fans
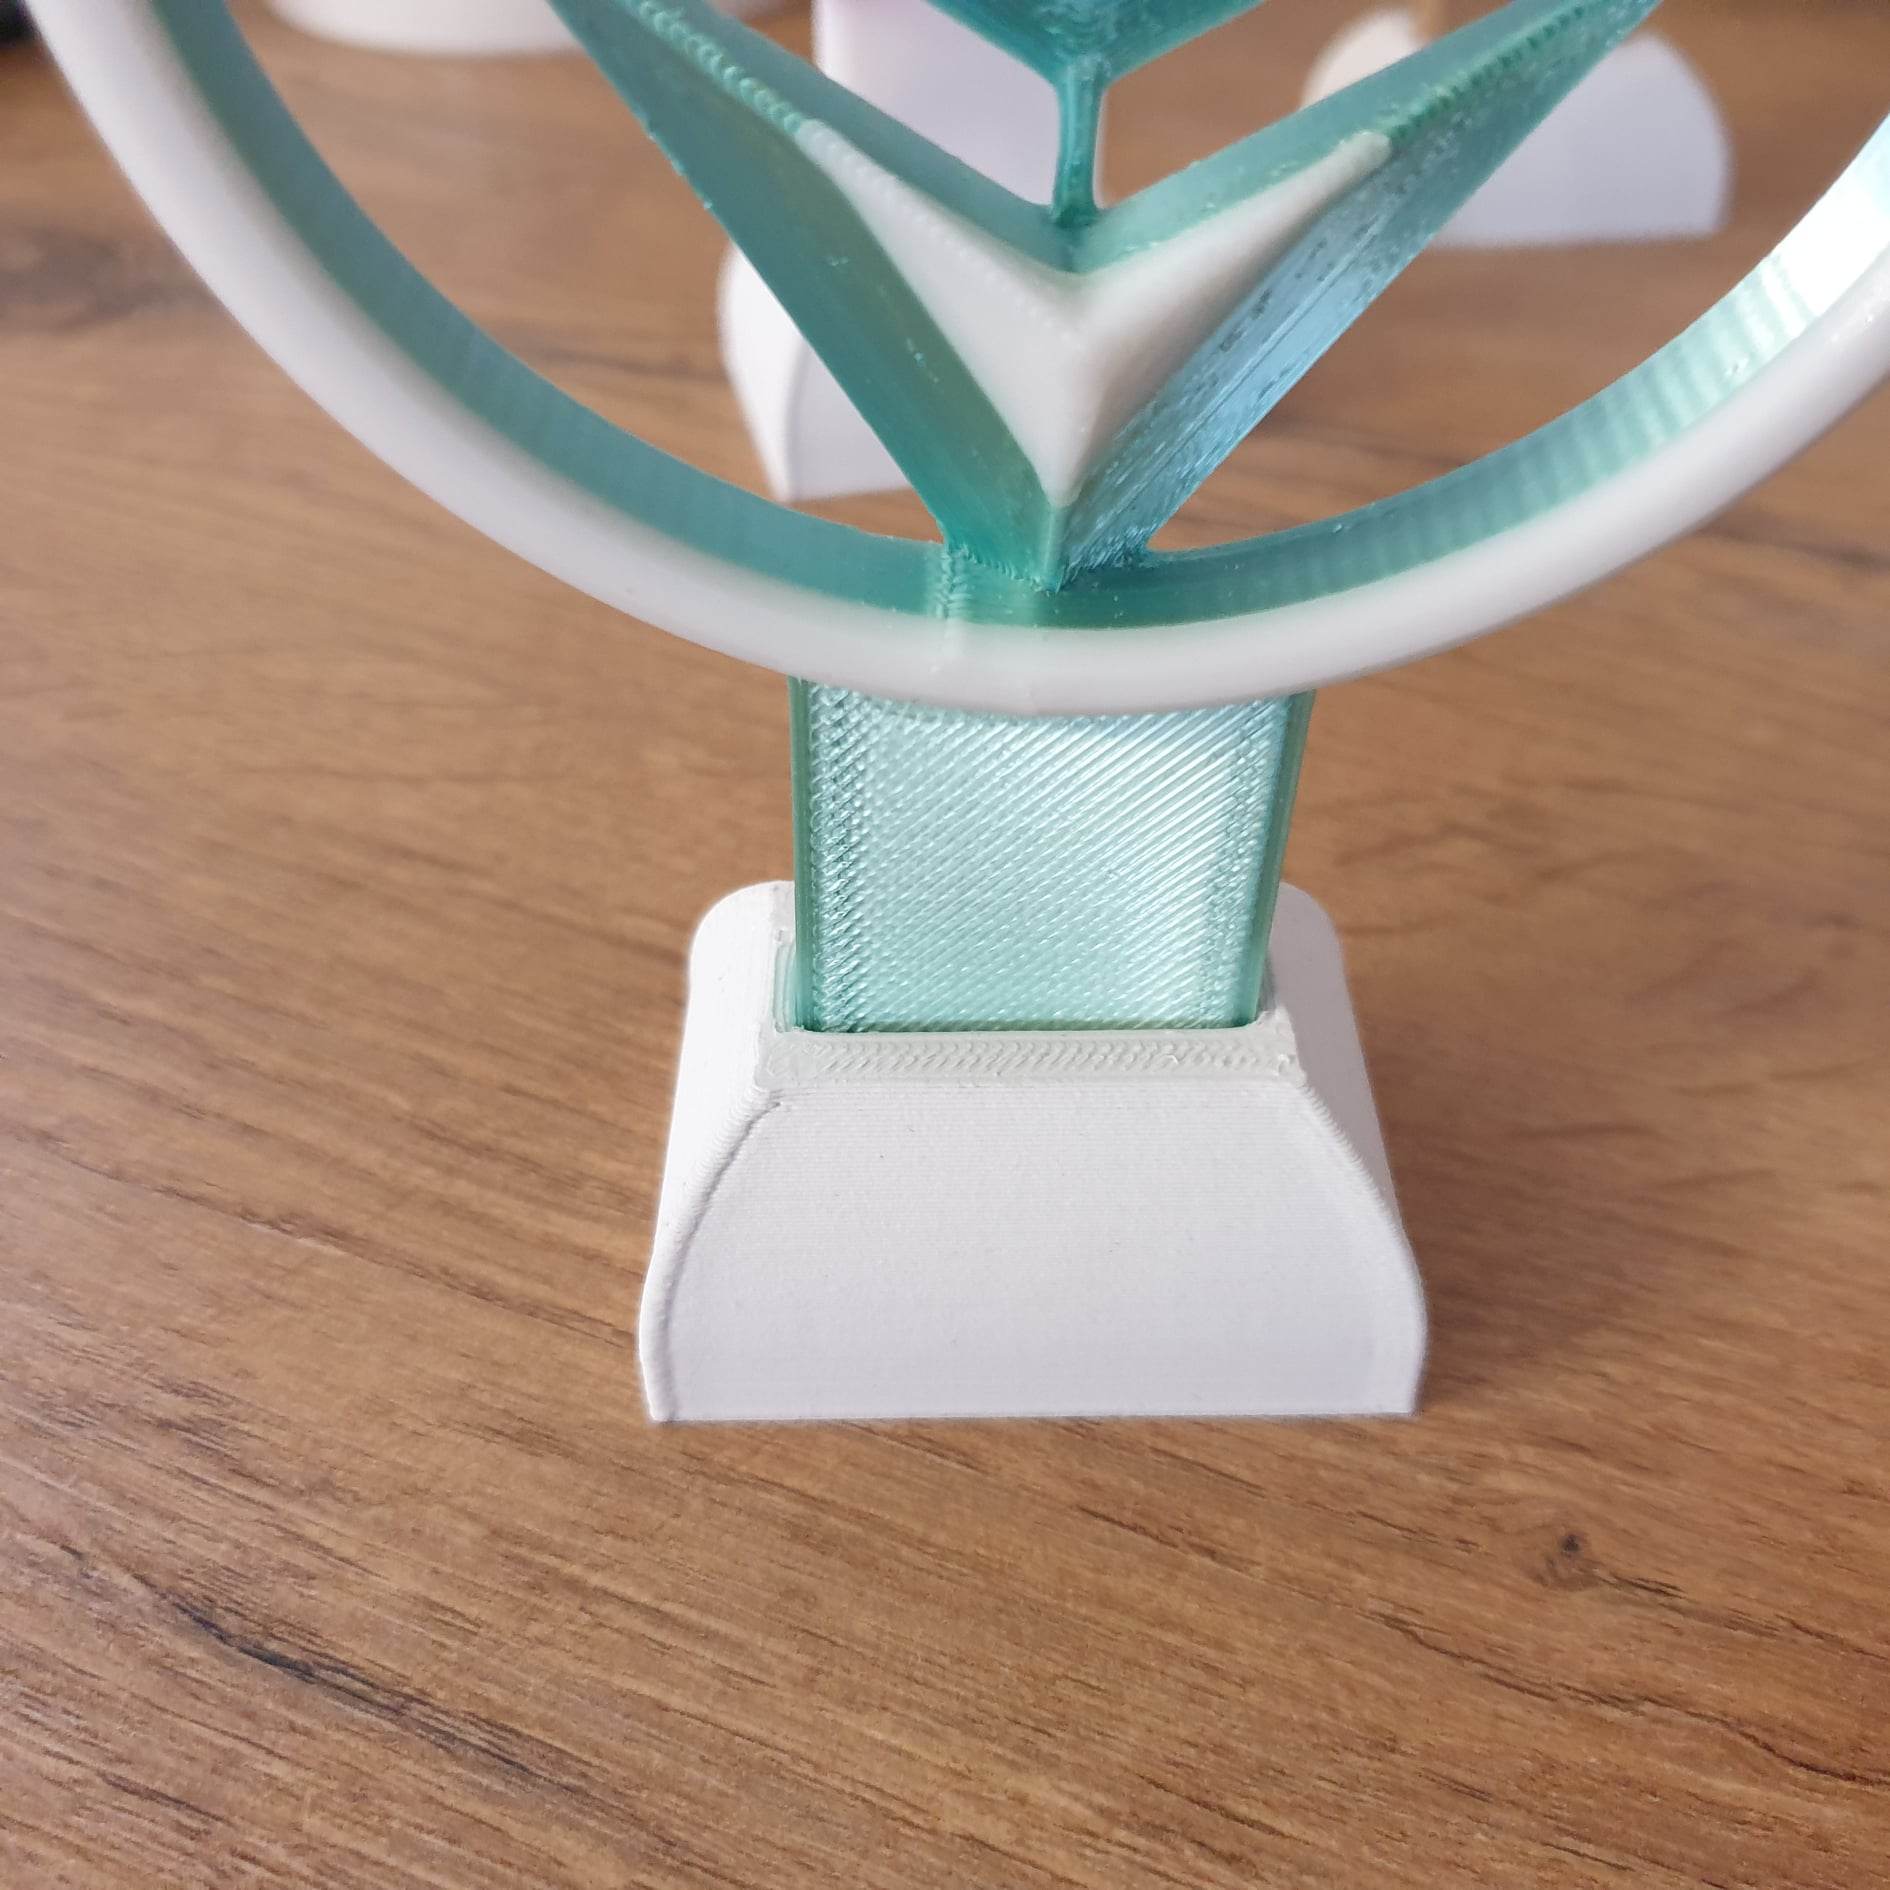
For the coins figurines i have printed them flat laying on the back, although the place where the rfid sits is overhanging, i did manage to print them without support and the bridging was good enough to place the rfid tag, these will be a cap anyway on top. For simple operation i included the cap so that in case you need to access the rfid tag you can, but you can even include it inside the model while printing by making an empty infill region to have place for it.
The multicolor of the parts is made by pausing at a height and changing the filament color. I am using PrusaSlicer wich uses M600 command for pause wich i have enabled in marlin but Cura also allow extra features for pausing at height.
The D for dogecoing is made by setting top perimeters to 0 and exposing star infill patter.
Same for BNB coin but using modifier stl to set top perimeters to 0 only for the area i want.
The coin's body is about 100mm diameter without the rectangle, the base is
45mm tall and 83mm x 66mm base dimensions.
The lid for the reader case is attached with 4 screws with a diameter of 1.5-2.5 mm and a length of max 8mm. The hole in the case model are 2.5mm but when printing they will get distorted.
For the electronics, the RC522 module has a slot where it is placed at a good distance to be able to read the tag. It's quartz crystal, the thing in metal casing will have to carefully be soldered on the other side to have room for sliding in the plastic slot and have the module's pins on the esp8266 side for attaching some wires.
For the oled display and the pushbutton i just used a hotglue gun since if i were to use screws i couldn't fit a screwdriver in and i would have had to make some hole in the other side of the case or partition it even more and i ended up just using hot glue wich is easy and fast to do, it's only drawback would be if you want to take the components out, you can heat it to get it loose but you might damage the PLA components or even the electronics so be careful and use just the right amount.
To glue the oled in place, at first you must have some relatively long wires to the esp8266 or you won't have enough room inside to keep it pushed agains the pla case until the glue dries. After that you can use a long stick (or something rigid, long, flat..) to attach the oled with double sided tape to it's end so it reaches all the way to it's location inside the case and you will be able to easily position it and apply pressure. Then just add some glue lines and position it, make sure the glue isn't to hot hot damage the module. While doing the positioning of the screen, it would be great to have a text printed on it so that you can see if it is parallel with the slot in the case but be careful since you will have power through the installation to not damage or short anything.
Pretty much the same for the pushbutton, if you managed the screen i bet the button won't be a problem.
https://www.amazon.co.uk/Glue-Guns/b?ie=UTF8&node=1939345031
Return policy:
Digital items aren't eligible for returns or exchanges. We will refund you
in case you buy an item twice.
Buyer can contact seller about any issues with an order.
Permissions for use:
Listing for personal use or for selling a physical product made according to this design.
The file cannot be shared, resold, or redistributed in any form!
No credit required, but positive reviews are welcome!
If you have any questions please contact me!
Thank you for stopping by!