Skip to content

Ender 3 V3 - Creality Light Bar (Retrofit)

Advertising
Advertising
?
Creation quality: 5.0/5 (1 vote)
Evaluation of members on the printability, utility, level of detail, etc.

  • 3.4k views
  • 5 likes
  • 89 downloads
  • 1 comment

License
3D design format
Folder details Close
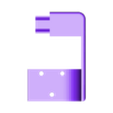
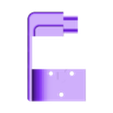
  • Left_Bracket_Retrofit.stl
  • Right_Bracket_Retrofit.stl

Learn more about the formats

Publication date 2023-09-20 at 23:07
?
Published to Thingiverse on: 2023-09-20 at 19:58
Design number 1463843

3D printer file info

3D model description

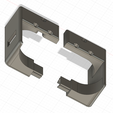
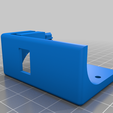
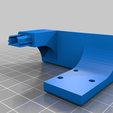
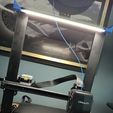
This set of brackets allows mounting the official Creality Light Bar kit to your Ender 3 V3 printer (tested here on my SE version). Find this item on Amazon for as cheap as $20.

The frame of this printer is much lighter than the V2 and contains no v-slots for hiding cables.

But there's a hidden trick!!

The vertical frame channels are hollow inside. As luck would have it, the left-hand channel also has a hole pre-cut underneath the printer base for pulling wires through. The only catch: there isn't a hole in the top of the frame.

Before you continue: note that you WILL be drilling a hole in your brand new printer for this installation.

If you're still here and want to continue, then do so at your own risk. These steps are really simple though. I took snapshots of each step, so refer to those as you proceed

Bracket Assembly

  1. Print out both brackets. No need for supports on either one, but print them on end (the side that will be facing outward
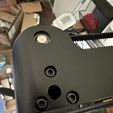
  2. Remove the 3 screws from the top of the frame, starting on the right side
  3. Place the bracket in place and use the original screws to mount the bracket in place. The screws should counter-sink into the bracket, just don't over-tighten
  4. Remove the screws from the left-side bracket and set them aside for now
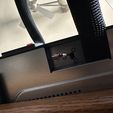
  5. Drill a small hole in the top frame bar, very near the front, and in between the 2 screws.I used a 1/4 inch bit
  6. Push the cable from the light bar kit down into this hole in the top frame bracket
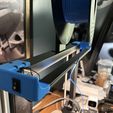
  7. Remove the switch from the original light bar bracket. Use a small screwdriver to pop it right out. Push the switch into the new bracket you just printed and install the push connectors
  8. After connecting to the light bar, push the bar onto the brackets and re-mount the left side bracket with the original screws

Wiring Connections

  1. Remove the power cord from the printer to avoid shock
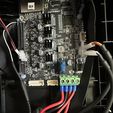
  2. Flip the printer on its side and remove the screws from the bottom panel. Pull the panel down carefully as the wiring cable is slid into the panel
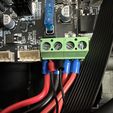
  3. Find the positive/negative power connections on the main control board. These should be standard red/black. The bed power cables are labeled as such. Do not use these 2 terminals.
  4. Loosen the screws and push the ferrules from the light bar wires into the positive/negative terminals (or crimp/splice/solder together if you prefer)
  5. Screw the bottom panel back on, making sure not to pinch the wiring cables

And you're done!

Advertising


Issue with this design? Report a problem.

Would you like to support Cults?

You like Cults and you want to help us continue the adventure independently? Please note that we are a small team of 3 people, therefore it is very simple to support us to maintain the activity and create future developments. Here are 4 solutions accessible to all:

  • ADVERTISING: Disable your banner blocker (AdBlock, …) and click on our banner ads.

  • AFFILIATION: Make your purchases online by clicking on our affiliate links here Amazon.

  • DONATE: If you want, you can make a donation via Ko-Fi πŸ’œ.

  • WORD OF MOUTH: Invite your friends to come, discover the platform and the magnificent 3D files shared by the community!


Sharing and downloading on Cults3D guarantees that designs remain in makers community hands! And not in the hands of the 3D printing or software giants who own the competing platforms and exploit the designs for their own commercial interests.

Cults3D is an independent, self-financed site that is not accountable to any investor or brand. Almost all of the site's revenues are paid back to the platform's makers. The content published on the site serves only the interests of its authors and not those of 3D printer brands who also wish to control the 3D modeling market.

100% secure payment by credit card, PayPal, Apple Pay, Google Pay, etc.
View all payment options.