Skip to content

Anycubic Kossel Calibration Coaxial Sensor Holder

Advertising
Advertising
?
Creation quality: 0.0/5 (0 votes)
Evaluation of members on the printability, utility, level of detail, etc.

  • 421 views

License
3D design format
GCODE and STL Folder details Close
  • ENDSTOP_CORRECTION.gcode
  • ESCHER_CORRECTION.gcode
  • colinear_sensor_holder.STL

Learn more about the formats

Last update 2021-03-15 at 12:43
Publication date 2021-03-01 at 12:08
?
Published to Thingiverse on: 2017-03-25 at 16:27
Design number 317668

3D printer file info

3D model description

This is a calibration guide for the Kossel, if you need permament sensor holder, check this thing:
https://cults3d.com/en/3d-model/tool/anycubic-kossel-permament-sensor-holder

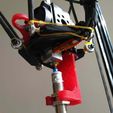
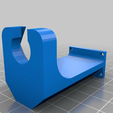
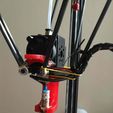
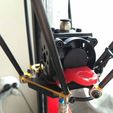
This is M12 inductive sensor holder which is designed to be mounted in place of blower nozzle with original M2 screws. The sensor position is perfectly under the nozzle so the measurement is not affected by non-linear delta kinematics. Use it to calibrate your DELTA printer with help of escher calculator (http://www.escher3d.com/pages/wizards/wizarddelta.php).
With repetier firmware you can set your sensor 3mm above the bed and then probe with G30 P0 command. Returned Z values copy to corresponding cells in ESCHER calculator.

I recommend this order of calibration which gave me perfect results:

  1. Find the center of the printer with repetier method in this clip: https://www.youtube.com/watch?v=L9URtv2LqKc end at 1:45 min DO NOT USE G32 S2 AT THIS MOMENT, now you have some initial settings which can be used as an input to DELTA calculator. You can use my G-CODE to automate this process a little bit, you should have working sensor already mounted to use G-CODE.
  2. Use ESCHER calculator at least twice. In files you can find my G-CODE which automates z-probing. Adjust the point coordinates to your own if you need.
  3. NOW USE G32 S2 with the probe mounted below the nozzle (remember to set measuring points and nozzle offset which should be X0, Y0, Z0)
  4. Dismount the sensor holder and correct the Z MAX HEIGHT setting to be relative to your hotend nozzle. (use sheet of paper method or place your sensor in my another holder http://www.thingiverse.com/thing:2203930)

In my case distortion correction messed up my calibration so I had to do everything again so I don't use it.

Later on I will possibly make more "step by step" guide

3D printing settings

-

Advertising


Issue with this design? Report a problem.

Would you like to support Cults?

You like Cults and you want to help us continue the adventure independently? Please note that we are a small team of 3 people, therefore it is very simple to support us to maintain the activity and create future developments. Here are 4 solutions accessible to all:

  • ADVERTISING: Disable your banner blocker (AdBlock, …) and click on our banner ads.

  • AFFILIATION: Make your purchases online by clicking on our affiliate links here Amazon.

  • DONATE: If you want, you can make a donation via Ko-Fi πŸ’œ.

  • WORD OF MOUTH: Invite your friends to come, discover the platform and the magnificent 3D files shared by the community!


Sharing and downloading on Cults3D guarantees that designs remain in makers community hands! And not in the hands of the 3D printing or software giants who own the competing platforms and exploit the designs for their own commercial interests.

Cults3D is an independent, self-financed site that is not accountable to any investor or brand. Almost all of the site's revenues are paid back to the platform's makers. The content published on the site serves only the interests of its authors and not those of 3D printer brands who also wish to control the 3D modeling market.

100% secure payment by credit card, PayPal, Apple Pay, Google Pay, etc.
View all payment options.