Skip to content

USB Volume Knob Device

Advertising
Advertising
?
Creation quality: 5.0/5 (1 vote)
Evaluation of members on the printability, utility, level of detail, etc.

  • 2.1k views
  • 2 likes
  • 28 downloads

License
3D design format
SKP and STL Folder details Close
  • VolumeKnob.skp
  • VolumeKnob_EncoderBracket.stl
  • VolumeKnob_HouseCover.stl
  • VolumeKnob_Housing.stl
  • VolumeKnob_Knob.stl
  • VolumeKnob_KnobCover.stl
  • VolumeKnob_foot.stl

Learn more about the formats

Publication date 2020-02-06 at 11:45
?
Published to Thingiverse on: 2018-01-07 at 09:44
Design number 105815

3D printer file info

3D model description

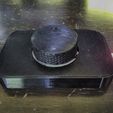
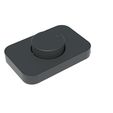
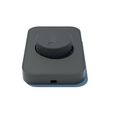
If you are tired of fiddling with your keyboard to adjust the volume on your computer while sitting back and watching movies, and if your speakers and the volume knob are located out of the way, try this dedicated USB volume knob.

This is a USB volume knob device made to house a rotary encoder and an Arduino-compatible Adafruit Trinket.

The setup is described in detail on Adafruit's excellent website: https://learn.adafruit.com/trinket-usb-volume-knob/overview

Common Issues With Trinket

If you've never worked with Adafruit's Trinket board, read the setup instructions carefully: https://learn.adafruit.com/introducing-trinket/setting-up-with-arduino-ide

We had to install this driver first: https://learn.adafruit.com/introducing-trinket/windows-setup

You also need to hit the reset button on the Trinket before hitting the upload button on the Arduino IDE to upload the sketch. Experiment with the timing. For ours, we had to hit reset and immediately hit upload after we heard the USB disconnect chime on our desktop.

We permanently soldered the wires from the encoder to the Trinket. BE CAREFUL when wiring your project. Switched wires can burn out your Trinket!!!

Concrete Infill

You can make this as is, or you can mix 3 parts sand, 1 part cement and add a concrete infill as pictured to give it a nice weighted feel. The knob comes with a cover, so you can add concrete in the knob as well, then friction weld or glue the cover in place.

Leave the concrete to dry overnight. Test fit the knob cover to make sure you didn't place too much concrete in. If there is excess concrete, the day after you can still scratch out the excess material and fit the cover.

Other popular methods of providing infills include hot wax and metal pellets. We didn't do this because 3D printing uses thermoplastic and heat could warp the parts. Experiment at your own risk.

Securing the Knob

To secure the knob onto the rotary encoder, use some hot glue. We used an earlier knob version with a semi-circle interface that did not fit our encoder. We drilled it out, but the knob now is slightly lopsided. The knob included in the STL files is a full circle so glue will be required to secure it to the rotary encoder. Double check alignment to avoid leaving it lopsided.

Securing the Rotary Encoder

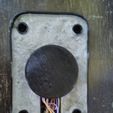
Since we don't know what encoder you have, we made the encoder bracket a separate part that can be redesigned in SketchUp to fit whichever one you have on hand. It is essential that the encoder sits in the channel centered. We friction welded the bracket in place and can slide the encoder in and out of the channel. We used a dab of hot glue to secure it in place after prototyping was done.

Advertising


Issue with this design? Report a problem.

Would you like to support Cults?

You like Cults and you want to help us continue the adventure independently? Please note that we are a small team of 3 people, therefore it is very simple to support us to maintain the activity and create future developments. Here are 4 solutions accessible to all:

  • ADVERTISING: Disable your banner blocker (AdBlock, …) and click on our banner ads.

  • AFFILIATION: Make your purchases online by clicking on our affiliate links here Amazon.

  • DONATE: If you want, you can make a donation via Ko-Fi πŸ’œ.

  • WORD OF MOUTH: Invite your friends to come, discover the platform and the magnificent 3D files shared by the community!


Sharing and downloading on Cults3D guarantees that designs remain in makers community hands! And not in the hands of the 3D printing or software giants who own the competing platforms and exploit the designs for their own commercial interests.

Cults3D is an independent, self-financed site that is not accountable to any investor or brand. Almost all of the site's revenues are paid back to the platform's makers. The content published on the site serves only the interests of its authors and not those of 3D printer brands who also wish to control the 3D modeling market.

100% secure payment by credit card, PayPal, Apple Pay, Google Pay, etc.
View all payment options.