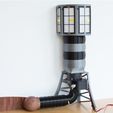
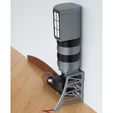
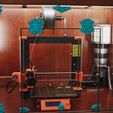
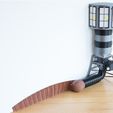
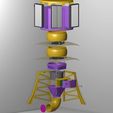
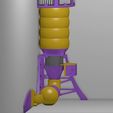
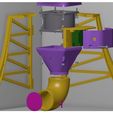
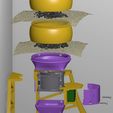
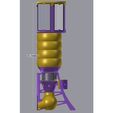
This is an air treatment system for the interior of a 3D printer enclosure. This design is intended to
capture particulates (HEPA filter),
absorb moisture (desiccant granules),
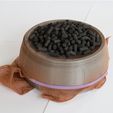
adsorb volatile organic compounds (activated charcoal) that are byproducts of printing with filament such as ABS.
Inspired by the work of RJ_Make and jmillerfo, I have remixed their designs to make this vertical stack filter tower. My goal in this remix is to improve filtration and minimize the footprint of the air filter within my enclosure. I have modified two of jmillerfo's models, and provided new models for all other parts of this Thing. However, I am completely reusing the purchased parts recommendations (except for the screws) from jmillerfo. I notice that jmillerfo continues to update his parts list, so check his thing before making any purchases.
Increase the air throughput of the HEPA filter section by expanding the filter open surface area to three filters.
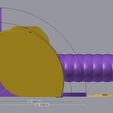
Increase the performance of the activated charcoal by increasing the surface area and increasing air flow by sectioning the charcoal into a series of eddy chambers. This series of chambers prevents the charcoal from compressing together into a dense heap and provides a means for the air to flow from chamber to chamber with minimal resistance. A fine nylon mesh suspends each layer of charcoal and offers low air resistance. The number of charcoal chambers is extensible. The chambers screw together.
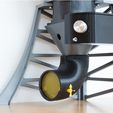
A Backflow Preventer Valve is on the air exit path within the Exhaust Tube. The valve opens when the fan is running, and closes when the fan stops. When the fan is off, the valve is intended to prevent damp room atmosphere from entering the enclosure and degrading filament or desiccant in the enclosure. The valve has a position indicator to show whether it is open or closed. This valve is also provided as a stand-alone thing: https://www.thingiverse.com/thing:2769856
The tower is intended to be free-standing and to ideally sit in any corner of the enclosure.
Unfiltered air enters at the top, and filtered air exits at the bottom.
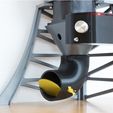
Reused the source design's nozzle's split-stream function, which provides for filtered air to be both recirculated within the enclosure, and exhausted out of the enclosure. The concept is to maintain a negative pressure (relative to the room) in the enclosure to make sure that unfiltered air does not escape.
Modified the source models Exhaust_Tube and Nozzle: I added rotating lock tabs on mating surfaces, improved clearances for the M3 screw holes, prints with fewer supports, and holds the exhaust Backflow Preventer Valve.
The models for the enclosure exit covers are particular to my enclosure which has a wide cable access slot on the rear base of my enclosure.
The exhaust path models' diameters are backward compatible with the sources; allowing the source's enclosure exit models to be used with my design.
The fan speed controller mounts near the fan. Use a slicer to mirror the model for the controller PCB enclosure (along the X or Y axis) to switch the mounting orientation.
There are cable tie holes on the legs of the stand to neatly route the 12V supply cable.
Reused source recommendations for: fan, fan controller, Roomba filters, and activated charcoal.
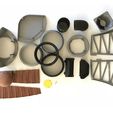
Bill of Materials
Print
(1) HEPA Chamber Top
(1) HEPA Chamber Bottom
(1, 2, 3…) Charcoal Chamber
(1) Charcoal Chamber -to- Fan Adapter
(1) Left Stand
(1) Right Stand
(1) Controller Top
(1) Controller Bottom
(1) Nozzle w/ lock tabs
(1) Exhaust Tube w/ lock tabs
(1) Flapper (Backflow Preventer Valve)
(1) Rotation Indicator (Backflow Preventer Valve)
(1) Straight exhaust
(1) Right vent panel cover
(1) Left vent panel cover
(1) Cable guide https://www.thingiverse.com/thing:100924
Purchase
Fan (see https://www.thingiverse.com/thing:2394452)
Fan controller http://a.co/a6OsQkt uniquegoods 1803BKW 1.8v 3v 5v 6v 7.2v 12v 2A 30W DC Motor Speed Controller (PWM) Adjustable Driver Switch.
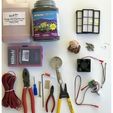
HEPA Filter (3) http://a.co/akWGDkz 3-Pack - Roomba 800 & 900 Series AeroForce Compatible Filters - iRobot Roomba Compatible Filters.
Activated charcoal pellets http://a.co/gEZqc6I Acurel Extreme Activated Filter Carbon Pellets for Aquariums and Ponds.
Desiccant granules http://a.co/0q3aavS 1 Quart Orange Premium Desiccant Indicating Silica Gel Beads - 2 LBS Reusable.
Fine nylon mesh (one per charcoal chamber, about 4 inch square). Sheer nylon “tights” material is best. I used discarded “footies” provided by shoe stores when you try on a pair of shoes in your bare feet.
M3 x 16 socket head cap screws (10) https://www.albanycountyfasteners.com/Socket-Head-Cap-Screw-3MM-A2-Stainless-Steel-p/5040000.htm
M3 lock nuts (10) https://www.albanycountyfasteners.com/Metric-Nylon-Insert-Lock-Nuts-A2-Stainless-Steel-p/5570000.htm
Connectors for 12V supply http://a.co/dmtspt9 Hilitchi 300Pcs (50set) 2.54mm JST SYP 2-Pin Female & Male Red Plug Housing Crimp Terminal Connector Kit.
Cable zip ties
Double-faced tape to hold the air exit panels in place
Two straight pins and a scrap M3 screw per these instructions for the Backflow Preventer Valve: https://www.thingiverse.com/thing:2769856.
Assembly
To attach the Left Stand to the Right Stand, slide a section of filament into the mating sections at the corner.
Using 4 M3 screws/nuts, sandwich the upstream side of the Fan between the Charcoal-to-Fan adapter and the Stand. The Stand will make contact with 3 of the 4 screws.
Using 4 M3 screws/nuts, sandwich the downstream side of the Fan between the Controller Top and the Nozzle. The Controller Top will make contact with 2 of the 4 screws. Choose the orientation of the nozzle to make sure that the recirculating exhaust opening is not aimed at your print bed. Choose the orientation of the Controller Top so that the control knob is pointed away from the Stand. Note that I flipped the screws head-to-tail, and put the screw heads inside the nut wells. I needed to do this so that I could more easily tighten the screws.
Place the controller PCB into position in the provided slots in the Controller Top. Attach the fan wiring to the PCB terminal, and attach a sufficiently long 12V supply cable to the PCB terminal. Insert the controller knob through the knob opening in the controller bottom. These wiring details are pretty limited here, so you should check out the wiring warnings and diagrams provided here: https://www.thingiverse.com/thing:2394452
Using 2 M3 screws/nuts, put the Controller Bottom on the Controller Top. Route the wires through the Controller Bottom opening.
Use zip ties to route the 12V supply cable along the edge of the stand.
Calibrate the Flapper and mate it with the Exhaust Tube. Use these instructions: https://www.thingiverse.com/thing:2769856. The Exhaust Tube functions as the Collar for the Flapper.
Insert the Exhaust Tube into the Nozzle and then turn the Exhaust tube to lock it in-place.
Place a piece of nylon sheer mesh on the top opening of the charcoal chamber -to- fan adapter. Stretch the mesh over the threads while screwing a Charcoal Chamber onto the Charcoal Chamber -to- Fan Adapter. Place activated charcoal pellets on the suspended mesh surface, up to a depth that half fills the Charcoal Chamber. Using a razor blade, trim off the excess nylon mesh along the circumference of Charcoal Chamber.
Repeat the above step for each successive layer of Charcoal Chamber.
Stretch a piece of nylon over the top of the top-most Charcoal Chamber, and then screw the HEPA Chamber Bottom onto the top-most Charcoal Chamber.
Cover the top-most nylon mesh with a layer of desiccant granules. These desiccant granules will absorb water vapor.
Insert 3 HEPA filters into the openings on the HEPA Chamber Bottom.
Place the HEPA Chamber Top onto the HEPA Chamber Bottom.
Put the completed assembly into place within the enclosure.
Attach the straight section of the exhaust to the Exhaust Tube.
Slide the right side cover panel over the end of the straight section of the exhaust.
Use double faced tape to attach the cover panels to the enclosure wall.
Attach the 12V supply cable extending from the base of the stand to a 12V source.
https://www.youtube.com/watch?v=FSXe7_GZbmo

/https://fbi.cults3d.com/uploaders/13539655/illustration-file/be47c949-d080-4ebe-a69c-799c3ff4fd7d/b0ff7e145d0ce83ab68ae62593701dcf_preview_featured.jpg)


