Skip to content

Marblevator "Mini", Counterclockwise Hand Cranked Base

Advertising
Advertising
?
Creation quality: 5.0/5 (1 vote)
Evaluation of members on the printability, utility, level of detail, etc.

  • 1.6k views
  • 35 downloads

License
3D design format
STL and ZIP Folder details Close
  • Assembly.skp.zip
  • Axle.stl
  • Base.stl
  • Block.stl
  • Crank.stl
  • Gear.stl
  • Gear_Crown.stl
  • Knob.stl

Learn more about the formats

Publication date 2018-06-14 at 15:35
Design number 26966

3D printer file info

3D model description

If you wanted to build the Marblevator "Mini" series but hesitated because you didn't want to buy motors, connectors, power supplies, batteries, etc., and then have to solder the whole mess together, then this thing may be for you.

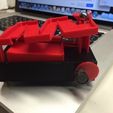
This is a counter clockwise hand cranked base designed to work with the three Marblevator "Mini" tracks; Bowl, Seesaw and Zigzag (for a clockwise cranked version, see this thing: http://www.thingiverse.com/thing:313944). The photo is shown with the Marblevator "Mini", Zigzag track, but the video that follows shows all three tracks. Caveats: it does require finesse in building and a very steady hand in operating, but if I can do it, so can you as shown in this video https://www.youtube.com/watch?v=ZIS4EiZXx2s.

Printed in PLA on a Makerbot Replicator 2 using Makerware 2.3.3.42 "Standard" settings.

3D printing settings

Study "Assembly.skp".

Print all parts. After printing "Base.stl" break off the four hold down disks at the corners and trim, file and/or sand smooth (the hold down disks help minimize warping during printing).

Press "Knob Crank.stl" into the square hole in "Crank.stl". A small dot of thick cyanoacrylate is a good idea to keep the knob assembly attached to the crank.

Lubricate the holes that guide the crank shaft with white lithium grease.

Slide the crank assembly part way into "Base.stl", then slip "Collar.stl" onto "Crank.stl".

Lubricate "Gear Crank.stl" with white lithium grease then place it into position, the press "Crank.stl" into "Gear Crank.stl". At this point, make sure the hand crank operates smoothly. If it is tight, slightly enlarge the two holes that the crank shaft passes through by filing, sanding, trimming, or using a 15/64" drill bit, then re-lubricate.

Lubricate "Gear Crown.stl" with white lithium grease then place it into position.

Slide "Collar.stl" towards the hand crank to hold the hand crank in position. This may require a number of adjustments until the hand crank and crown gear operate smoothly. When you are sure of the final position of the collar, apply a small dot of thick cyanoacrylate to the outside edge to hold it in position.

Install the track and press in the worm gear. Break in the assembly be rotating the crank counter clockwise as viewed from the knob.

Manual Marblevators Unite and Marblevate!

Advertising


Issue with this design? Report a problem.

Would you like to support Cults?

You like Cults and you want to help us continue the adventure independently? Please note that we are a small team of 3 people, therefore it is very simple to support us to maintain the activity and create future developments. Here are 4 solutions accessible to all:

  • ADVERTISING: Disable your banner blocker (AdBlock, …) and click on our banner ads.

  • AFFILIATION: Make your purchases online by clicking on our affiliate links here Amazon.

  • DONATE: If you want, you can make a donation via Ko-Fi 💜.

  • WORD OF MOUTH: Invite your friends to come, discover the platform and the magnificent 3D files shared by the community!


Sharing and downloading on Cults3D guarantees that designs remain in makers community hands! And not in the hands of the 3D printing or software giants who own the competing platforms and exploit the designs for their own commercial interests.

Cults3D is an independent, self-financed site that is not accountable to any investor or brand. Almost all of the site's revenues are paid back to the platform's makers. The content published on the site serves only the interests of its authors and not those of 3D printer brands who also wish to control the 3D modeling market.

100% secure payment by credit card, PayPal, Apple Pay, Google Pay, etc.
View all payment options.