In short
Offset adjustment platform for Raspberry Pi auto guiding system.
Overview
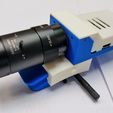
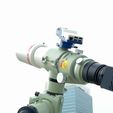
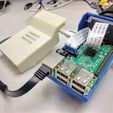
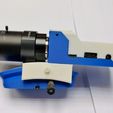
This is an integrated solution where the RPi board and the guide scope are being mounted onto the telescope. The goal is to allow fine offset adjustment of the guide scope, and to allow wireless, computer-less auto guiding.
Offset Adjustment
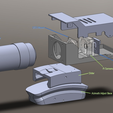
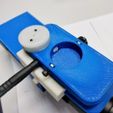
The platform includes a azimuth adjustment mechanism through a worm gear - spur gear set, and a altitude adjustment (tilt adjustment) through a curved sliding rail. This solution is more explicit and easy to control compare with the 2-pivot guide scope holder system.
Auto Guide
This system utilizes Raspberry Pi 3 and Raspberry Pi Camera (support both v1.3 and v2.1) as the auto guiding infrastructure. You can install your favorite OS (Ubuntu Mate, Raspbian, etc.), your favorite guiding software (OpenPHD, lin_guider, etc.) and any guide scope with a C/CS mount upon your focal length needs.
My own solution tested on Ubuntu Mate with OpenPHD 2.6 installed. Using INDI to control my Takahashi EM-11 via bluetooth-serial adapter (or SkyFi) and remote control the RPi using the WLAN built-in on the RPi 3 board, I can implement a complete wireless guiding solution. (A battery hang on the case can be used as the power supply!)
Depends on what guiding software and guide scope you are using, the result may be vary. In my experience, using a f=75mm f/2.8 CCTV lens with OpenPHD is not possible to spot any star on the night sky. This could be due to lack of exposure control of RPi-V4L2. Either switching to other guiding software (python based) or using a better scope can perform better. Though both the v1.3 or v2.1 RPi camera should have high enough resolution in cooperate with f=100-200mm guide scope. I can get some good result using a f=100mm f/2 scope to guide my Tak. FSQ-85.
Instruction
This stuff includes six 3D print parts, one RPi 3 board and RPi camera, a metal C/CS mount, many little screws and a set of gear. You can also find a printed version of C mount here https://www.thingiverse.com/thing:2728134.
Bill of material
3D Printed parts
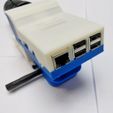
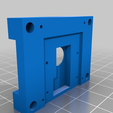
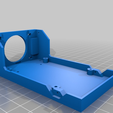
+ Pi Box Base (to hold the RPi board and fix on the slider)
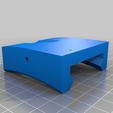
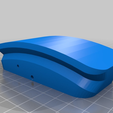
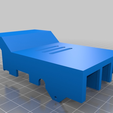
+ Pi Box Cover
+ Pi Camera Holder (with a metal C/CS mount fixed on it)
+ Altitude Adjust Slider
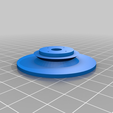
+ Azimuth Adjust Rotator
+ Azimuth Adjust Base
Other parts
+ Raspberry Pi 3, with SD card loaded
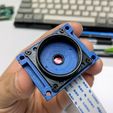
+ Raspberry Pi Camera v1.3 or v2.1, with stock lens removed, cable attached
+ Metal C/CS mount (I removed it from a cheap IP Cam, mounting hole spacing is 28mm. You may need to remix the holder to suit your case)
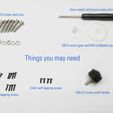
+ 1.7x8mm self-tapping screw for plastic x 16 (for joining the Pi Box cover, Pi Box base and slider, and holding the RPi Cam and C/CS mount on the holder)
+ 2x6mm self-tapping screw for plastic x 4 (for fixing the RPi board)
+ M3x15 screw and nuts x 7 (for fixing the RPi Cam holder on the Pi Box, and as the locking screw of both altitude and azimuth axis)
+ M4x12 screw with handle (for locking screw of the altitude slider)
+ [optional] M0.5x8 worm gear and M0.5x29 teeth spur gear (for azimuth fine tune)
+ [optional] a 2mm metal rod with handle to turn the worm gear (I use a micro screw driver for this)
+ [optional] 1.4x5mm self-tapping screw for plastic (for fixing the spur gear onto the base)
Tools
+ Screw drivers for small screws
+ 3.2mm drill (to bore holes for M3 screw)
+ [optional] M3 tap
+ [optional] M4 tap
+ [optional] 1/4" tap
Some parts may be missed in the material list above, please refer to my photos and the instruction below.
Assembling
Instruction to assemble the system is quite straight forward. Please refer to my photos for hints.
- Fix the C/CS mount onto the RPi Camera holder using 4 1.7mm screw
- Fix the RPi Camera onto the RPi Camera holder using 4 1.7mm screw
- Fix the RPi Box Base onto the Slider using 4 1.7mm screw
- Fix the RPi Camera assembly onto the RPi Box Base using 4 M3x15 screw and nut
- Fix the RPi 3 board onto the RPi Box Base using 4 2mm screw
- Cover the RPi Box Cover to the Base using 4 1.7mm screw
- Load the slider with M4 handle screw and M3 locking screw
- Insert 2 nuts on the bottom of the Azimuth Rotator
- Load 2 M3 locking screw on the bottom of the Azimuth Rotator
- Fix the spur gear onto the Azimuth Base using 1.4mm screw (you may need to drill some holes on the spur gear)
- Drop the worm gear into the slot on the bottom of the Azimuth Rotator
- Puncture the 2mm metal rod through the worm gear and the Azimuth Rotator
- Tap the center hole of the Azimuth Base with your favorite size (1/4" will suit most case)
- Place the Azimuth Base into the Rotator
- Finish

/https://fbi.cults3d.com/uploaders/13913867/illustration-file/85443915-10db-410b-9d98-53a46d8a0db8/IMG_20160907_110034-01.jpeg)
