This is a heating booster for Vogel & Noot Type 21 two-layer compact radiators in widths 132cm and 62cm at 80mm depth.
The system works with standard 8cm PC fans (3 pin) which connect the printed segments together. In addition, the segments are connected to each other with small filament pieces that are inserted into three holes on the sides. Squeeze the filament a little with pliers before inserting it for more friction. The segments adhere to the radiator with pressed-in round 10x3mm neodymium magnets. There are recesses in the segments for the cable feed-through, so that four fans each can be connected in parallel via a Molex distributor.
For reasons of efficiency, as little air as possible should escape at the bottom and sides, so the system is closed at the bottom with plates between the fans and via attachable side plates. The side elements for holding the control board differ in length and number for the 132 and 62cm wide radiators and are named accordingly. All other segments are identical and differ only in terms of number.
Power is supplied via an 8mm hole in the controller segment, through which a cable can be fed or a connection socket installed. For fan control I used a 12V relay control board with temperature sensor, which is mounted with M3 screws on the holes provided. To adjust the fan speed, an adjustable DC-DC step-down converter is recommended. With this converter, the fan voltage can be reduced from 12V to approx. 7-8V, so that the fans run quietly but sufficiently strong.
To connect the fans to the voltage converter, I constructed a Molex adapter into which 4 standard straight 2.54mm pin headers are inserted. The 3pin fan connectors are plugged into them. Alternatively, you can just solder everything together.
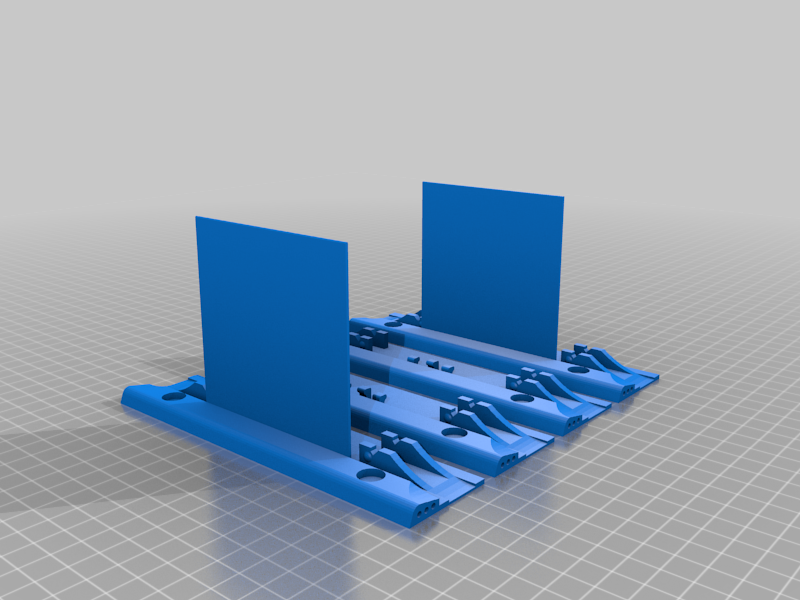
Print the segments in STL orientation in 0.3 layer height with 20% infill and the Molex adapter in 0.2 layer height. Make sure that the raised plates (sealing between the fans) are aligned in the direction of the Hotend fan, otherwise they will be easily bent away by the airflow during printing.
--- Parts list 132cm radiator ---
1x ModulsRight_132cm_Radiator Controller.stl
4x Moduls_2x.stl
1x Moduls_1x.stl
1x ModuleLeft.stl
2x Molex4xAdapter Male 3Pin.stl
8x 8cm PC fan (3pin Molex)
34x 10x3 round neodymium magnets
1x Temperature controller W1209 Manual
1x Adjustable DC-DC Step-Down Converter D-SUN with MP-1584 chip
1x 8mm connection socket
1x power supply 12V, 2A, DC voltage
4x M3 screws and nuts
6x 2-3mm cable ties
--- Parts list 62cm radiator ---
1x ModulsRight_62cm_Radiator Controller.stl
1x Moduls_2x.stl
1x ModulsLeft.stl
1x Molex4xAdapter Male 3Pin.stl
4x 8cm PC fan (3pin Molex)
20x 10x3 round neodymium magnets
1x Temperature controller W1209 Manual
1x Adjustable DC-DC Step-Down Converter D-SUN with MP-1584 chip
1x 8mm connection socket
1x power supply 12V, 2A, DC voltage
4x M3 screws and nuts
5x 2-3mm cable ties
------------ I would be very happy if you have as much fun with the things as I do. ------------
If you like :-) Thank you very much!
--- German description ---
This is a heating booster for Vogel & Noot Type 21 two-layer compact radiators in widths 132cm and 62cm at 80mm depth.
The system uses standard 8cm PC fans (3 pin) that connect the printed segments together. In addition, the segments are connected to each other with small pieces of filament, which are inserted into three holes on the side. Squeeze the filament a bit with pliers before inserting for more friction. The segments adhere to the radiator with pressed-in round 10x3mm neodymium magnets. There are recesses in the segments for the cable feed-through, so that four fans each can be connected in parallel via a Molex distributor.
For efficiency reasons, as little air as possible should escape at the bottom and sides, so the system is closed at the bottom with panels between the fans and via clip-on side panels. The side elements for holding the control board differ in length/number for the 132 and 62cm wide radiators and are named accordingly. All other segments are identical and differ only in terms of number.
Power is supplied via an 8mm hole in the controller segment, through which a cable can be fed or a connector jack installed. For fan control, I used a 12V relay control board with temperature sensor, which is mounted with M3 screws on the holes provided. To adjust the fan speed, an adjustable DC-DC step-down converter is recommended, which can be used to reduce the fan voltage from 12V to about 7-8V so that the fans run quietly but with sufficient power.
To connect the fans to the voltage converter, I constructed a Molex adapter, into each of which 4 standard straight 2.54mm pin headers are inserted. The 3pin fan connectors are plugged onto them. Alternatively, you can just solder everything together.
Print the segments in STL orientation at 0.3 layer height with 20% infill and the Molex adapter at 0.2 layer height. Make sure that the raised plates (sealing between the fans) are aligned in the direction of the hotend fan, otherwise they will be easily bent away by the air draft during printing.
--- Parts list 132cm radiator ---
1x ModulsRight_132cm_Radiator Controller.stl
4x Moduls_2x.stl
1x Module_1x.stl
1x ModulLeft.stl
2x Molex4xAdapter Male 3Pin.stl
8x 8cm PC Fan (3pin Molex)
34x 10x3 round neodymium magnets
1x W1209 temperature controller manual
1x Adjustable DC-DC Step-Down Converter D-SUN with MP-1584 chip
1x 8mm connector socket
1x power supply 12V, 2A, DC voltage
4x M3 screws and nuts
6x 2-3mm cable ties
--- Parts list 62cm radiator ---
1x ModulsRight_62cm_Radiator Controller.stl
1x Moduls_2x.stl
1x ModulLeft.stl
1x Molex4xAdapter Male 3Pin.stl
4x 8cm PC Fan (3pin Molex)
20x 10x3 round neodymium magnets
1x W1209 temperature controller manual
1x Adjustable DC-DC Step-Down Converter D-SUN with MP-1584 chip
1x 8mm connector socket
1x power supply 12V, 2A, DC voltage
4x M3 screws and nuts
5x 2-3mm cable ties
:format(webp)/https://fbi.cults3d.com/uploaders/27397533/illustration-file/3577a289-08e4-4f94-a9d8-8a4264eda7ce/5cf65bc5-697e-48b6-83ec-df85f09176ff.png)


/https://preview3d-images.cults3d.com/4fcdy3rwqgm7kefwmww2qs3vcsld)
/https://preview3d-images.cults3d.com/s982w2qgoczgohjtl2fpn6by22rk)
/https://preview3d-images.cults3d.com/obe8o9hpokv052nwxt3i17rfbm3f)
/https://preview3d-images.cults3d.com/0sk4hldrvfqrrujqgno200nd5ki1)
/https://preview3d-images.cults3d.com/qf4smk5yo3htafyj1l6401xg5aml)
/https://preview3d-images.cults3d.com/a484ltb15cg99e5bb6ncyh3u3rqv)


