Skip to content

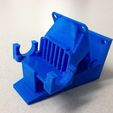
Rear-Mount Print Cooler for Ecksbot

Advertising
Advertising
?
Creation quality: 0.0/5 (0 votes)
Evaluation of members on the printability, utility, level of detail, etc.

  • 226 views
  • 2 downloads

License
3D design format
Folder details Close
  • eck_rear_print_blow.scad
  • eck_rear_print_blow.stl

Learn more about the formats

Publication date 2022-11-01 at 18:08
?
Published to Thingiverse on: 2013-05-19 at 03:47
Design number 907890

3D printer file info

3D model description

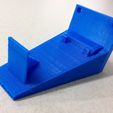
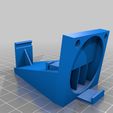
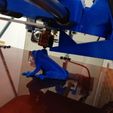
This is a print cooler I designed for my Ecksbot. I had been using http://www.thingiverse.com/thing:58306 for quite some time which actually worked well. My biggest problem with the front-mounted print cooler is that it was constantly in my way when trying to clean the nozzle, or just when observing my printer in action. I wrote this part using OpenSCAD and I've included the .scad file as well in case you find that your particular application needs adjustments.

This cooler is designed to simply clip onto the extruder cooling shroud on the Ecksbot, however I found that it can shift and rattle during really fast/aggressive infils, so I added a loop for a cable tie to keep it secured. The same 40mm fan used on the extruder cooler is also used for this as well. Eckertech sells them for $5 apiece (I'm in their area often for local pickup), or you might find one elsewhere if you're lucky (I wasn't).

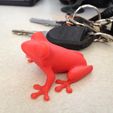
This print cooler will allow you to decrease your minimum layer time to at least 10 seconds per layer if not less than that. I included a picture of a red tree frog (http://www.thingiverse.com/thing:18479) I printed it at 0.05mm layer height, 500 layers, in about 2 hours (Skeinforge default would take over 8 hours at minimum 60 seconds per layer).

3D printing settings

Hopefully you will only need to print the .stl I uploaded, but if you need/want to tweak the design a little, feel free to play with the .scad. Nothing special to print this, I used 0.3mm layer height at 30% infill. The print will likely NOT want to come off your bed and it is quite fragile/thin, so you'll need to be careful. I've printed at least a dozen trials of these during development and I've found that the best method for removal is to use a clean, flexible paint scraper and to work it off gently starting at the fan clip. Install the 40mm fan using a pair of M4 x 40mm bolts and nuts. Wire your existing extruder cooler to be fed from constant 12V power and then wire the print cooler to the D09 output instead to allow PWM control.

In general, I print most objects with the print cooler off for the first 3 layers to ensure good adhesion, then I turn it on 50% or so for the remaining. If the layer time is fast (<15 seconds) I might go higher to 70-80%. Skeinforge doesn't seem to have support to do this automatically, but I believe Slic3r does have something for this.

Advertising


Issue with this design? Report a problem.

Would you like to support Cults?

You like Cults and you want to help us continue the adventure independently? Please note that we are a small team of 3 people, therefore it is very simple to support us to maintain the activity and create future developments. Here are 4 solutions accessible to all:

  • ADVERTISING: Disable your banner blocker (AdBlock, …) and click on our banner ads.

  • AFFILIATION: Make your purchases online by clicking on our affiliate links here Amazon.

  • DONATE: If you want, you can make a donation via Ko-Fi πŸ’œ.

  • WORD OF MOUTH: Invite your friends to come, discover the platform and the magnificent 3D files shared by the community!


Sharing and downloading on Cults3D guarantees that designs remain in makers community hands! And not in the hands of the 3D printing or software giants who own the competing platforms and exploit the designs for their own commercial interests.

Cults3D is an independent, self-financed site that is not accountable to any investor or brand. Almost all of the site's revenues are paid back to the platform's makers. The content published on the site serves only the interests of its authors and not those of 3D printer brands who also wish to control the 3D modeling market.

100% secure payment by credit card, PayPal, Apple Pay, Google Pay, etc.
View all payment options.